Monthly Archives: May 2012

MFT Preview 2 – Give it a Whirl w/coloring tutorial

We’re moving on with Day 2 of previews of My Favorite Things June 5 release! Today we’re sharing samples using Inspired by Travel and Fred Bear and The Pinwheel.

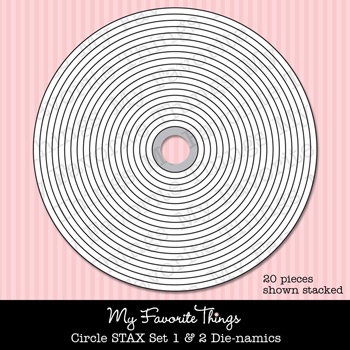
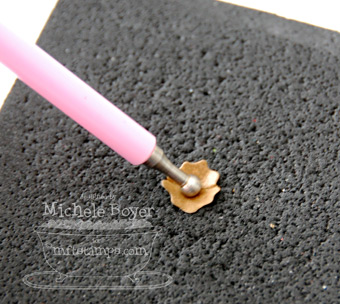
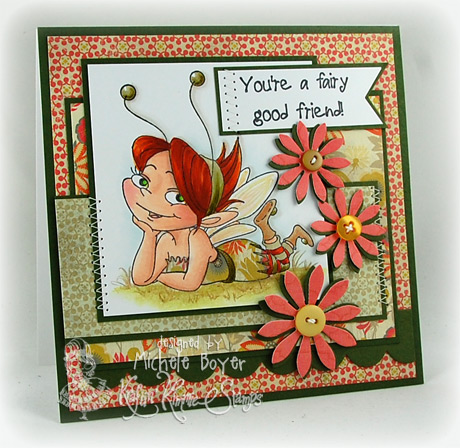
Obviously, I went with the bear.  🙂  On the actual stamp, Fred is holding a pinwheel.  But I chose instead to make my own.  I used a small square from Square STAX, cut from each corner toward the center (but not all the way into the center), bent in every other piece and added a brad.

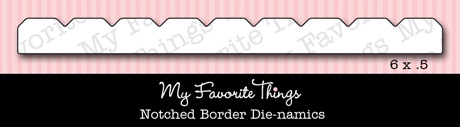
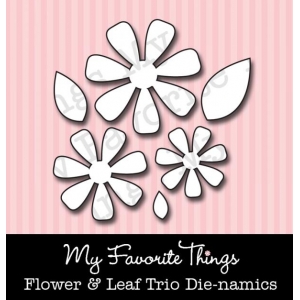
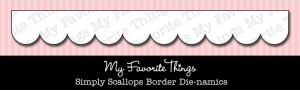
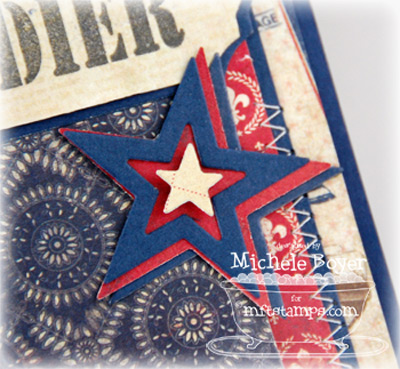
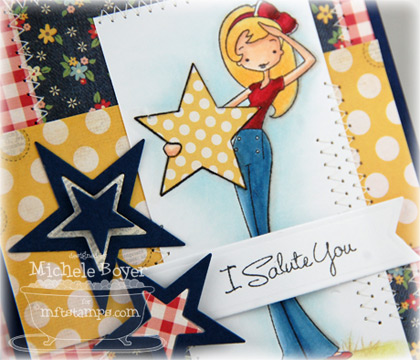
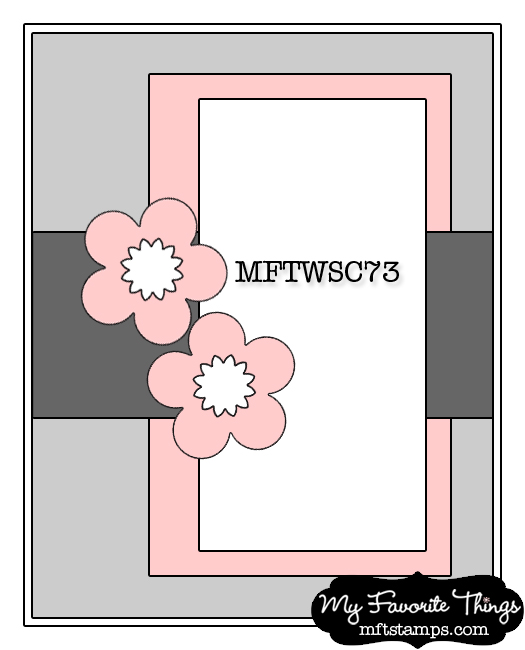
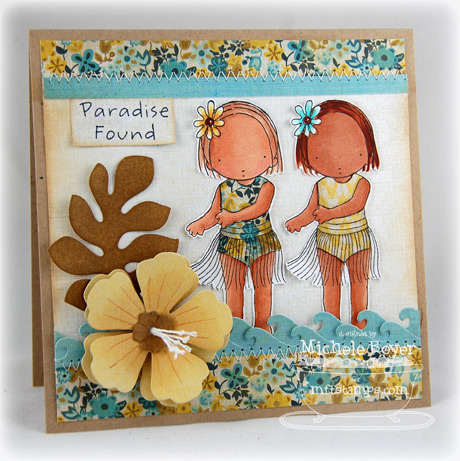
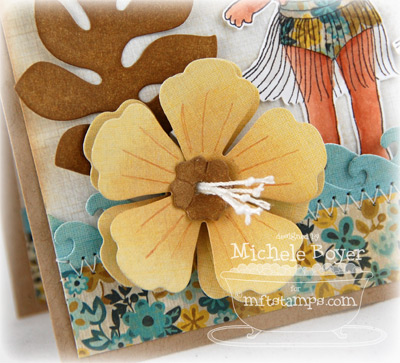
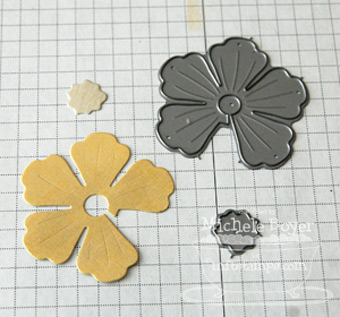
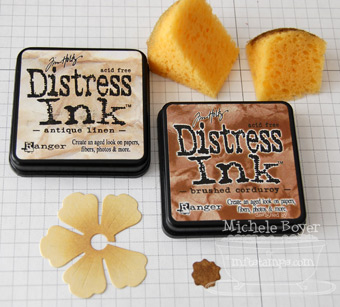
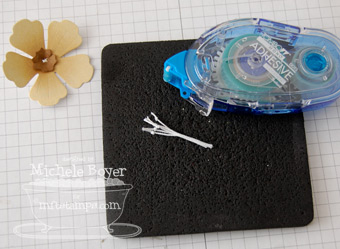
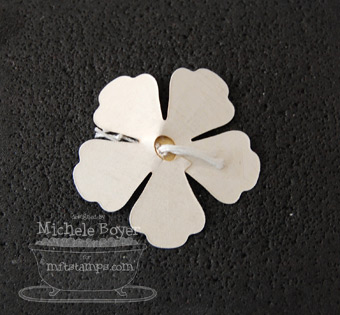
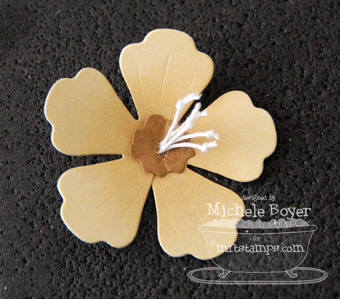
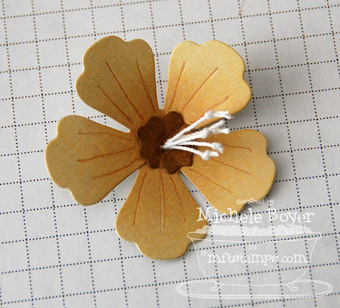
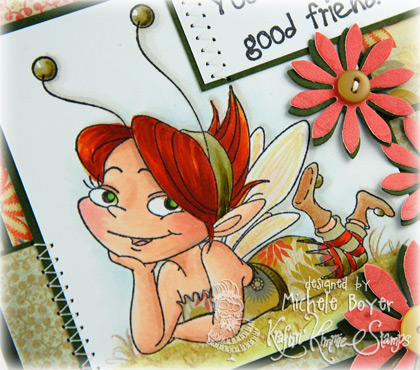
I used Square STAX for the focal square as well as the matting.  Having both sets (1 & 2) provides the perfect amount of layering!  Along the bottom of the dark teal panel, I placed a strip of our new Notched Border.  And I used layers of Flower Trio to create the flowers.

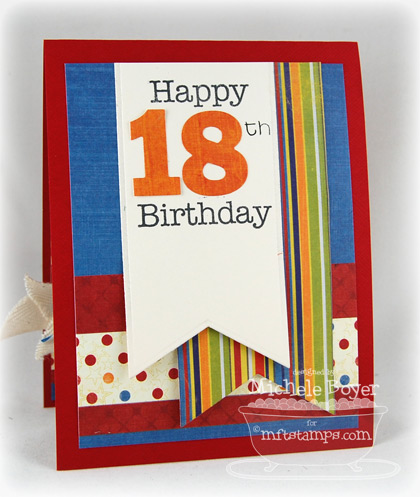
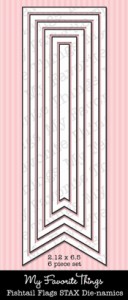
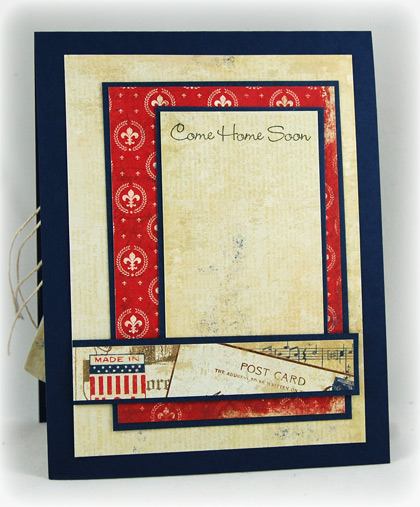
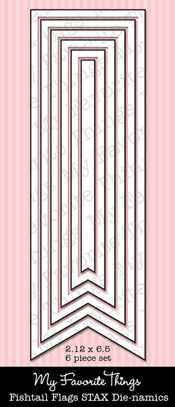
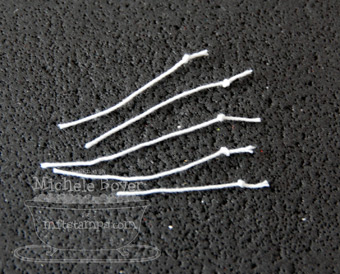
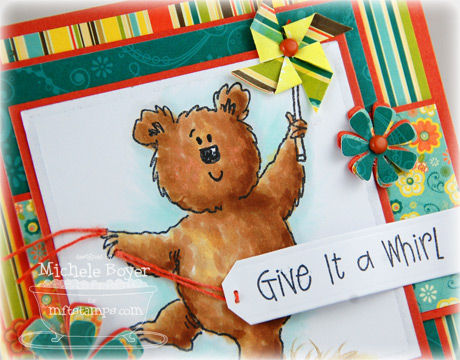
After stamping the sentiment onto a Fishtail Flag, I trimmed the left edge to a tag shape and inserted the string, tucking both ends through holes punched above and below Fred’s hand.

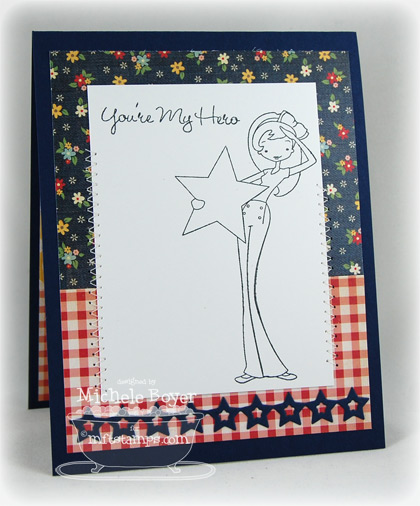
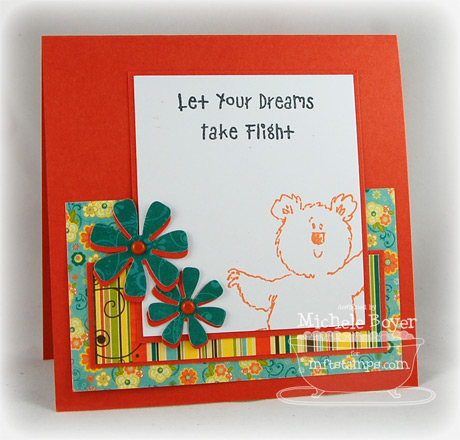
On the inside, I used a sentiment from Fred Bear in Flight.

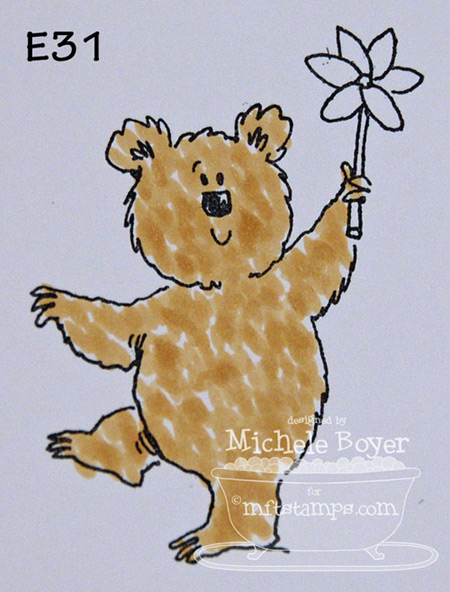
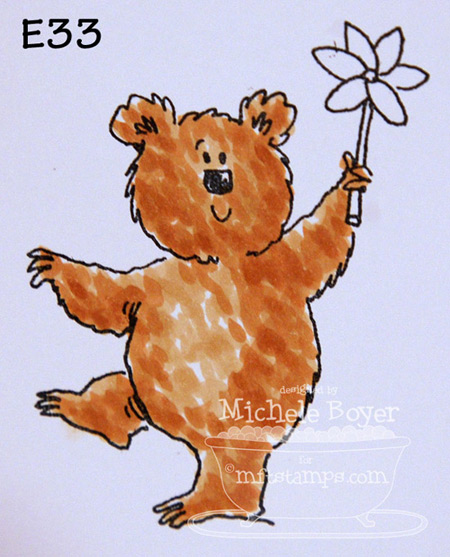
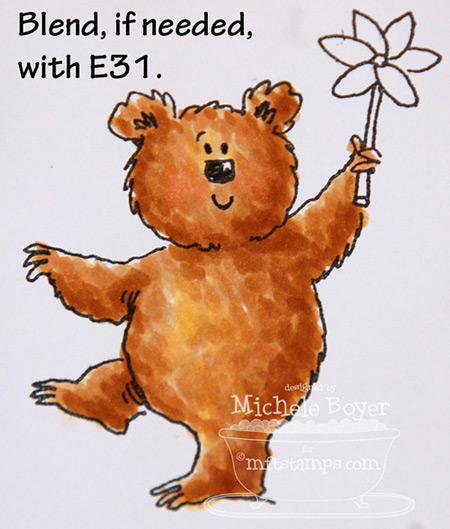
Since I’ve had quite a few questions on how I color Fred, I thought I’d take this chance to show you.  You can click on the photos to see a larger pic.

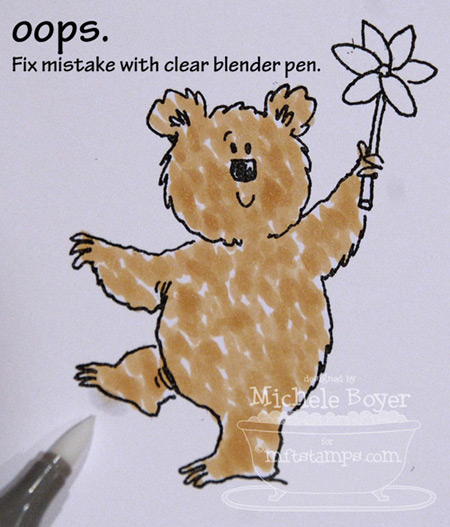
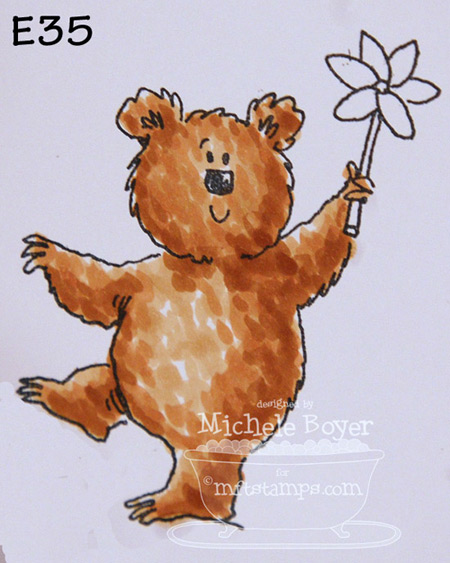
When I color fur, I “dob” on the color using the side of my marker. Looking at the photos, you’ll see the rectangular “dots.”   I don’t use the tip of my marker nor do I color in a sweeping or circular motion (on any part of the image).  Using the side of the marker creates texture, and the color goes on fairly quickly.

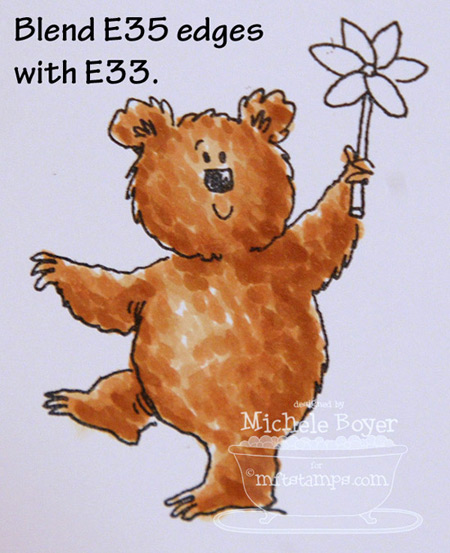
Note:  In the fifth photo, when I say “Blend E35 edges with E33” I mean to add more dots of E33 along the edges of the E35 dots.

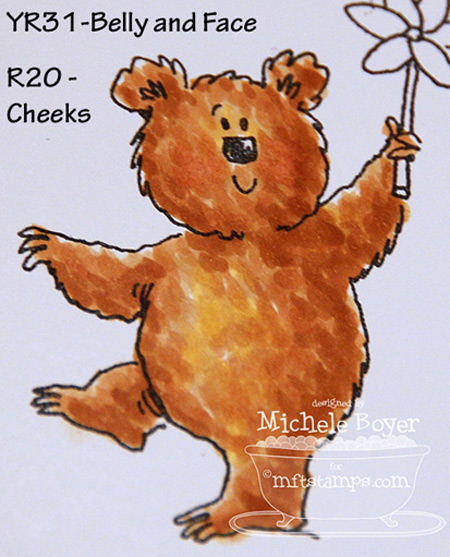
Left to right, next row, left to right… (in case it isn’t clear)  😉


I hope that helps.  🙂


Here are the details about the upcoming release:

  • You can attend the New Release Party on June 5th from 8-10 PM EST here in the MFT forum where you can enjoy fun, games and PRIZES!
  • The MFT release, including all new stamp sets and Die-namics, will take place June 5th at 10 p.m. EST. You’ll find all the newest products here at release time.
  • The guest designer contest is ON!  Check out the forum for details on how YOU can win over $200 in stamp sets and Die-namics and play along with the MFT Design Team for a month.
  • Teaser prizes continue so be sure to leave comments as you look! You can find direct links to all participating DT HERE.  Each day, two prize vouchers are held by two members of our design team.  You’ll have all week to comment on each of the posts and all winners will be posted on Kim’s blog on Tuesday, June 5th around 7:30pm.

I’ll be back tomorrow with Day 3 of previews!   Thanks for stopping by!

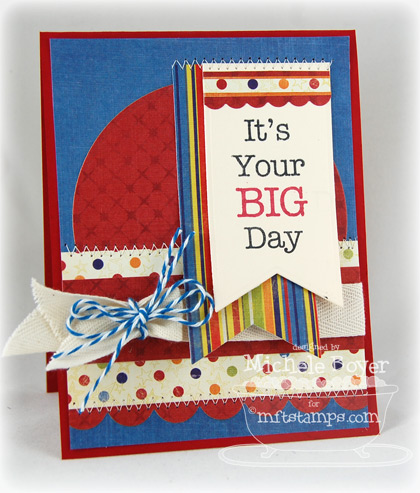
Stamps:  MFT “Fred Bear and the Pinwheel” and “Fred Bear in Flight”  Ink: Memento Tuxedo Black and Tangelo  Paper:  MFT Tangy Orange ReplenishmentsX Press It Blending Card, Bo Bunny “Hello Sunshine” (6×6)   Accessories:  Copic markers (E31, E33, E35, R20, YR31, C00, C1, BG10, YR09-string), MFT Square STAX, Fishtail Flags STAX, Flower Trio and Notched Border Die-namics,  string, brads, foam tape.  Finished size 5″ x 5″.

It’s Your Big Day

Time for another sketch with My Favorite Things!  🙂

Boy/teen cards (of any type) can be so difficult.  What to do?  What to do?  🙂  I pulled out my Big Greetings and Fishtail Flags along with some fun patterned paper and I actually had something together in record time (which was a good thing because I waited until the very last minute to come up with something for my nephew).

I broke up the sentiment, placing each word on a separate line to fit the Fishtail Flag.  After stitching across the top, I left the bottoms of the flags loose to add some dimension to the card.

The twill was tucked under the right side with the middle adhered to the card.  I trimmed the left edge at an angle, then added a folded scrap of twill on top.  I doubled-up a length of Denim Twine and tied the scrap to the longer strip.

I used Circle STAX to cut the circle, Simply Scallops Small for the scallops along the bottom and Small Scallop Border for the small strip across the top of the sentiment flag.

I used the “Happy Birthday” from Big Greetings, fitting in “18” die-cut from By the Numbers Die-namics and the “th” from Banner Day Alpha.  (I would have used the “th” from the coordinating By The Numbers stamp set, but I couldn’t find it.)

<– Here’s the sketch if you’d like to play along.  Remember, if you upload your card to the SCS gallery using the keyword MFTWSC74, you will have the chance to win up to $20 in MFT money!  One winner is chosen at random each week. More info can be found in the MFT Forum in SCS.

Thanks for visiting!  Have a great day!  🙂

.

Stamps:  MFT “Big Greetings” and “Banner Day Alpha”  Ink: Memento Tuxedo Black and Rhubarb Stalk  Paper:  MFT Wild Cherry and Whip Cream Replenishments, X Press It Blending Card, Fancy Pants “To the Moon” (6×6)   Accessories:  MFT Fishtail Flags STAX, Circle STAX, Simply Scallops Small, Mini Scallop Border and By the Numbers Die-namics,  Denim Twine, twill.  Finished size 4 1/4″ x 5 1/2″.

MFT Preview 1 – I ♥ My Soldier

It’s time to begin previews of My Favorite Things‘ June release!

Teaser PRIZES begin today so be sure to leave comments as you look.  You can find direct links to all participating DT HERE.  Each day, two prize vouchers are held by two members of our design team.  You’ll have all week to comment on each of the posts and all winners will be posted on Kim’s blog on Tuesday, June 5th around 7:30pm.

Today we’re sharing samples using Godspeed Who’s That Girl and Guy.   For the first time ever, I’ve used a WTG set without the girl (or guy).  🙂

I chose instead to use the “I ♥ My Soldier” sentiment stamped onto a layered Clearly Sentimental Label.  Beneath the sentiment, I used a Fishtail Flag.  The layout was ‘borrowed’ from Joanne.

I don’t have a soldier to ♥ or miss, but I do understand as much as possible without living the life, what it’s like to miss someone so terribly.  Or to have such concern for safety.  My heart goes out to those who serve, as well as their families who are serving also, but in a different way.  They all give so much.  And I’m so proud of ALL of them.  Seriously.  (This set makes me kind of teary…)

I die-cut a Dog Tag from ‘patterned paper’ in Authentique’s “Glory” collection (FABULOUS patriotic papers!), then hung the tag from a small chain and button.  I adhered the button with two pieces of foam tape to provide the proper space for the chain (and to keep the chain around the button).

The lower two layers of stars as well as the small star in the middle were die-cut using new Star STAX.  The upper blue star was cut using Stacking Stars.  For a little added dimension, the center star was adhered using a small piece of foam tape.

On the inside, I used a third sentiment from the set.

Here are the details about the upcoming release:

  • You can attend the New Release Party on June 5th from 8-10 PM EST here in the MFT forum where you can enjoy fun, games and PRIZES!
  • The MFT release, including all new stamp sets and Die-namics, will take place June 5th at 10 p.m. EST. You’ll find all the newest products here at release time.
  • The guest designer contest is ON!  Check out the forum for details on how YOU can win over $200 in stamp sets and Die-namics and play along with the MFT Design Team for a month.

I’ll be back tomorrow with Day 2 of previews!   Thanks for stopping by!

Stamps:  MFT Godspeed Who’s That Girl and Guy  Ink: Memento Tuxedo Black and Rhubarb Stalk  Paper:  Stampin Up Night of Navy, Authentique “Glory”  (6×6)   Accessories:  MFT Clearly Sentimental Label, Star STAX, Fishtail Flags STAX, Stacking Stars, Dog Tag STAX Die-namics; button; jute string; Copic 1/4″ foam tape.  Finished size 4 1/4″ x 5 1/2″.

Here’s a sign… (and a sentiment)

Are all of my American friends ready for the lonnnnggg weekend?  I certainly am!  It’s going to be a hot one over here!  That’s ok though.  I’m ready for it.  🙂

This week with Kraftin Kimmie, Sharon is challenging us to get sentimental. Actually, you don’t have to be all mushy, or even kind of mushy.  We just need to use a sentiment.  Easy enough.

This week I’ve chosen pretty Tara…who is named after my pretty (and very sweet) krafty friend, Tara.   She works for  The Canadian Hearing Society as an American Sign Language/English interpreter, thus the sign language.

When I was in elementary school (about 100 years ag0), there was a school for the deaf nearby.  Some of their students would come to our school to teach sign language.  Then we, in turn, would go to their school to participate in stage performances.  I truly enjoyed it (the sign language…not the stage) and wish I’d kept up with it.  Now, I barely remember the alphabet.


I used Copics to color, pencils to add in the ground.

To see more sentimental samples, check out the Krafty Blog HERE.  If you’d like to play along, be sure to post a link to your creation there on the Krafty Blog for your chance to win a free stamp from Kraftin Kimmie.   If you’d like to do some KKS bargain shopping, you can find Frugal Friday deals HERE.

Thanks for visiting!  Have a great day!

Stamps:  Kraftin Kimmie Stamps “Tara” (Moonlight Whispers)   Ink: Memento Tuxedo Black    Paper:  Papertrey Ink Smokey Shadow, X-Press It Blending Card, My Mind’s Eye Indie Chic “Ginger” (6×6)   Accessories: Copic markers (E11, E13, R20, Y21, YR31, YR14, E35, YR00, YR02, YR04, YR07, B00, W00, W1, YR0000), Melissa Frances crocheted trim, My Favorite Things Perfect Petal Trio, buttons, jute.  Finished size 4 1/4″ x 5 1/2″.

I Salute You

There’s another great sketch this week with My Favorite Things‘ Wednesday Stamp Club!

This week I’ve chosen to use Blue Without You à la modes,  along with Simple Stories’ new Summer Fresh.

Along the side, I used scraps of patterned paper and cardstock to die-cut a couple of Stacking Stars.  (There’s a bit of foam tape beneath the center of the larger star for added dimension.)   A Fishtail Flag STAX die was used for the sentiment strip.

Along the bottom on the inside, I used a strip of Star Border Die-namics.

You can find direct links to DT samples HERE on the MFT blog.  The info is also posted in the MFT Forum in SCS.  And remember, if you upload your card to the SCS gallery using the keyword shown on the sketch, you will have the chance to win up to $20 in MFT money!  One winner is chosen at random each week.

Thanks for visiting!  Have a great day!  🙂

.

Stamps:  MFT “Blue Without You” (à la modes)  Ink: Memento Tuxedo Black  Paper:  Stampin Up Night of Navy, X Press It Blending Card, Simple Stories “Summer Fresh” (6×6)   Accessories:  Copic markers (E00, E11, Y21, YR21, R37, R39, R89, B93, B95, W00, W1, BG70), Prismacolor pencils, MFT Stacking Stars, Star Border and Fishtail Flags STAX Die-namics,  Copic 1/4″ foam tape.  Finished size 4 1/4″ x 5 1/2″.

MFT VIP New Product Tour – Paradise Found

It’s time for My Favorite Things‘ VIP!  This month’s kit is titled Fun in the Sun. I certainly had fun creating my summery scene!   :)

For $34.90, you can purchase Pure Innocence Hula Girl and Sprinkler Girl stamp sets, Fun in the Sun Sentiments mini (VIP exclusive stamp set – will never be offered for sale or be available again $9 value, FREE), Hibiscus Die-namics and Notched Border Die-namics. You can find the new collection HERE (while supplies last).

I adore this little hula girl, so much that I had to make two!  I stepped out of my E00/E11 comfort zone for the skin tones and used E11/E13 for the girl on the left and E13/ E15 for the girl on the right.  (R20 for both on cheeks.)

They’re colored with Copics with little pieced suits.  I used two layers of Catch a Wave Die-namics along the bottom and the new Hibiscus Die-namics to create the flower.

I die-cut two flowers then layered them with bits of foam tape between the petals.

On the inside, I stamped another hula girl, a second sentiment from the set and added a single layer flower.

Before I started, I took a quick peek online to see just what a hibiscus looks like. When I saw the long stamen, I wanted to find a way to recreate it.  Here’s how I created the one layer flower on the inside of my card:

Die-cut flower pieces.

Use Antique Linen Distress ink to shade the center of the flower.  Sponge the inside piece using Brushed Corduroy.

Place the center piece onto a foam cushion then roll the ball end of a quilling tool (or something similar) in the middle to gently fold up the edges, creating a dip. Punch a hole in the center.  (I used a paper-piercer.) After forming the flower (by gluing small tab to adjacent petal), adhere rolled piece to flower center.

Cut five short lengths of white string.  Knot the end of each piece.

With strings rolled together, apply adhesive from approximately 1/4″ below knots to ends.  Roll strings together to form a tighter bond.

Insert strings through hole and tape ends to the back.

Flip flower over and separate strings.

As an afterthought, I used a a cream marker to define the embossed lines on the petals.

Be sure to check out the links on Kim’s blog for direct links to more samples using these cute new sets and dies!

Thanks for visiting!  Have a great day!

Stamps:  My Favorite Things “Hula Girl”  (Pure Innocence)   Ink: Memento Tuxedo Black; Ranger Antique Linen and Brushed Corduroy Distress   Paper:  MFT Kraft Replenishments , X-Press It Blending Card, My Mind’s Eye Indie Chic “Nutmeg” (6×6)   Accessories: Copic markers (E11, E13, E15, E18, R20, Y21, YR23, BG10, BG13, W00), MFT Hibiscus and Catch a Wave Die-namics, string, sponge, Copic 1/4″ foam tape.   Finished size 5″ x 5″.

Happy Birthday

I ♥ the little robots from Taylored Expressions‘ new Far Out set.  They’re just adorable and so fun to use. 🙂

** REMOVED FOR PUBLICATION – To return soon**


As soon as I saw the new Sunny Side collection from My Mind’s Eye, I  knew I would love it so I actually bought two pads.  I never do that.  If you could see my paper supply, you’d know why.  I adore the floral print but in flipping through, I decided some of the other patterns would be perfect for a little boy’s birthday card!

Isn’t he cute?  Eek!  🙂   I stamped him onto X-Press It Blending Card, colored with Copics and then added little white dots to his cheeks using Copic Opaque White.

I die-cut three gears using the Sprockets Border Taylored Die, adhering each with a brad.

Thanks for visiting today!   Happy Sunday!   🙂

Stamps:  Taylored Expressions “Far Out” (Embracing Grace)   Ink:  Memento Tuxedo Black   Paper:  Bazzill Red Rock, X-Press It Blending Card, My Mind’s Eye Sunny Side (6×6)   Accessories:  Copic markers (BG11, BG13, R02, R05, R08, R39, YR31, YR21, YR23, YR27, C00, C1, C3), 0.25 black Copic Multi-liner (floor line), TE Sprockets  Taylored Die, Copic Opaque White, Michaels brads.  Finished size 5 1/2″ x 4 1/4″.

This Won’t Hurt A Bit! – KKS Release

Welcome to Kraftin Kimmie Stamps‘ May release!   We’ve had such fun with the new images!  Now you can too!  🙂

This month Lulu is On the Move!  Such a cute set by Cheryl Alger!  🙂   We have two fabulously Flirty Fairies sets by Emilie Goulet and  six amazing new Everyday Girls by Annie Rodrigue.  Also, this month KKS introduces brand new Everyday Trinkets designed by Krafty Girl Nicole Aspinall.

You’ll see most of the new images throughout the hop.  If you’ve come from our incredibly talented Krafty Guest Susan, you’re right on track.  But if you just popped in to my blog, you may want to start at the beginning. Otherwise,  you will have missed most of the hop.  Be sure to leave comments as you go because two lucky winners will each receive a package of assorted stamps from the release!

I *adore* Nurse Nightingale.  She looks just a wee bit mischievious. (But then that’s what a love about all of Annie’s images.)

After stamping the image, I had to put some thought into how I was going to color.  I wanted the dress and apron to be white but I didn’t want them to just blend together. To distinguish between the two, I decided to shade one with W1 and the other using E50.  I also added the little stripe at the bottom of her dress and colored it in red.

You can find all of this month’s new release images here.  Gimme Kimmies Kits are available here for a limited time (grouped together by artist and available at a discount).

Your next stop along the hop is with our fab illustrator EMILIE!  🙂

Thanks for stopping by!  Happy hopping…and shopping!

Stamps:  Kraftin Kimmie Stamps “Nurse Nightingale” (Moonlight Whispers)   Ink: Memento Tuxedo Black, Ranger Antique Linen Distress   Paper:  Bazzill, X-Press It Blending Card, Cosmo Cricket Baby Jane (6×6)  Accessories: Copic markers (E00, E11, R20, B00, E13, E15, E18, E50, R24, R89, W00, W1),Copic 0.25 black Multi-liner, My Favorite Things Pretty Posies and Simply Scallops Die-namics, button, string, sponge.  Finished size 4 1/4″ x 5 1/2″.

So Proud of You – KKS, Day 4

Hi everyone!  The Krafty Girls are back again today sharing samples of Kraftin Kimmie Stamps‘ new Moonlight Whispers images to be released on May 20th.  We have more Everyday Girls, and they are c-u-t-e…just sayin’.  🙂

Not only is today a preview day, but it’s also a challenge day, which means you have TWO ways to win.  You can check out Pam‘s sketch, as well as more samples, HERE.  Be sure to leave comments as you look because two lucky stampers will each win a package containing three of Annie’s new images!

Secondly, if you’d like to play along with this week’s challenge, be sure to post a link to your creation there on the Krafty Blog for a chance to win Tara!

Meet Tessa Tassel.  She comes along with the sentiment I’ve used here as well as “The tassel was worth the hassel!”

I decided to keep my card fairly simple, adding only a few flowers around the edge to allow Tessa to shine on her own…since she’s so pretty…and proud.  🙂

Don’t forget to pop on over to the Krafty Blog for direct links to more samples!  I’ll be back tomorrow (1 a.m. EST) for Kraftin Kimmie’s May Release Hop & Shop.  Thanks so much for visiting!  Have a great day!

Stamps:  Kraftin Kimmie Stamps “Tessa Tassel” (Moonlight Whispers)   Ink: Memento Tuxedo Black    Paper:  The Paper Cut Black Licorice, X-Press It Blending Card, Echo Park Yours Truly (6×6)   Accessories: Copic markers (E00, E11, R20, BV00, Y21, YR23, E35, R37, R59, C3, C5, C7, 100, BG70), Copic 0.25 black Multi-liner, My Favorite Things Oval STAX, Flower Trio and Simply Scallops Small Die-namics, brads.  Finished size 4 1/4″ x 5 1/2″.

Fairy Good Friend, KKS Day 3

Hi everyone! The Krafty Girls are back today with another sample for Kraftin Kimmie‘s May 20 release! Today we’re previewing Flirty Fairies 1 & 2 by Emilie Goulet.

The image and sentiment I’ve used today are both from Flirty Fairies 1.

Each set includes three adorable fairies along with four or five coordinating sentiments.

After coloring with Copics, I added sparkle to the fairy’s hair and wings using Orange and Buttermilk Spica glitter pens (which, of course, isn’t showing in the photo).  :/

Check out the Krafty Blog HERE for direct links to more samples using Flirty Flairies.  As always, be sure to leave comments as you look because two lucky stampers will each receive one of the new fairy sets!

Thanks for visiting!  Have a great day!

Stamps:  Kraftin Kimmie Stamps “Flirty Fairies 1” (Emilie’s Etchings)   Ink: Memento Tuxedo Black    Paper:  Prism Herbal Garden Dark, X-Press It Blending Card, My Mind’s Eye Indie Chic “Ginger” (6×6)   Accessories: Copic markers (E00, E11, R20, YR14, YR16, E09, YG91, YG93, YG95, W00, W1, BG70), Prismacolor pencils, Spica Buttermilk and Orange glitter pens, My Favorite Things Upsy Daisy Flower Builder and Simply Scallops Small Die-namics.  Finished size 5″ x 5″.