Monthly Archives: January 2015

You Compute Me – Basic Copic Coloring Tutorial

Hi everyone!  Just want to let you know I have a basic Copic coloring tutorial on the Craftsy blog today.  Find out how I colored the image below with just five markers and the Colorless Blender – HERE.

Finished-Robots

I used cute robots from Taylored ExpressionsFar Out stamp set with small hearts from Love Monsters.

Finished-Robots-CU

 Thanks for checking it out (here).  🙂


Additional supplies/info:  Silver mini brads, Copic markers (B93, C1, Y21, R81, R85, Colorless Blender, black Multi-liner).  Finished size 4 3/4″ x 4 3/4″.

MFT February Previews – Somebunny

Hi everyone!  Welcome back to a second day of February 3 release previews with My Favorite Things!  Today I’ve used a super cute new set by Birdie Brown, Somebunny, along with Blueprints 22.

Somebunny-Needs-a-Hug-500

The little bunnies in this set are so sweet.  Kind of old fashioned.  I ♥ them.  I used coordinating Somebunny Die-namics to die-cut the bunny from X-Press It Blending Card then colored with Copics.  All other pieces were die-cut using Blueprints 22.

Somebunny-Needs-a-Hug-CU

Inside, I stamped a partial sentiment and a second bunny sitting on the Blueprints 22 heart.

Somebunny-Needs-a-Hug-In

Be sure to check out the MFT Blog for direct links to more Countdown samples, info on prizes and all you need to know about our February 3 release!

And don’t forget, starting tomorrow:

Share the Love square

MFT will be giving away one stamp set and Die-namics combination every day from February 1 – 13, and then on the 14th, we’ll give $300 towards the March release to one Instagram follower and the friend she tags.  $300!  You can follow MFT HERE, and you can follow me HERE.  

Thanks so much for stopping by!  I’ll see you tomorrow!

Please note that links to new products will not be in effect until time of release, Tuesday, February 3, 10 p.m. EST.

Additional supplies/info: Copic markers (R30, RV00, RV32, E40, E42), Kool Tak Clear Foam Squares.  Finished size 4 1/4″ x 5 1/2″.

MFT February Previews – Spring Tulips

Hi everyone!  It’s time for February previews with My Favorite Things!

I have two samples to share today, both using Lisa Johnson’s new Spring Tulips

Wishing-You-a-HB-500
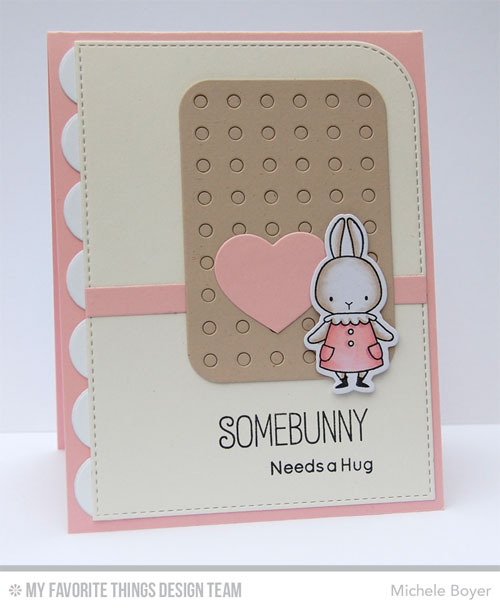
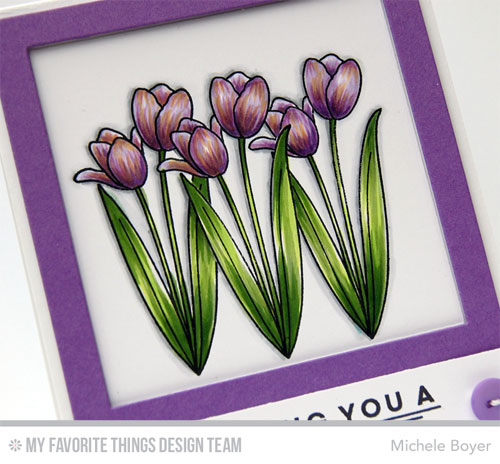
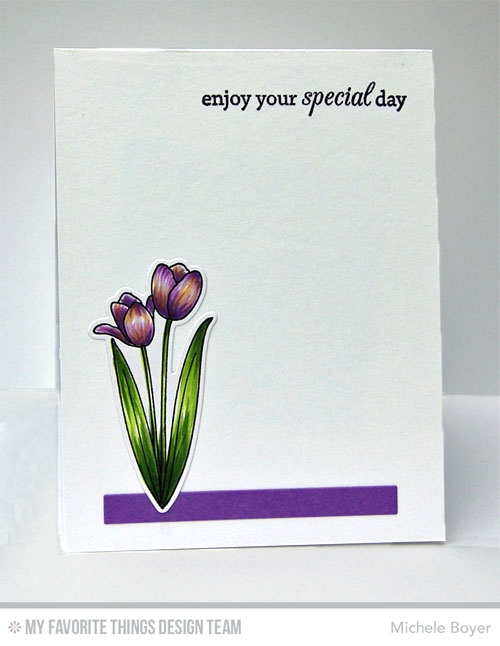
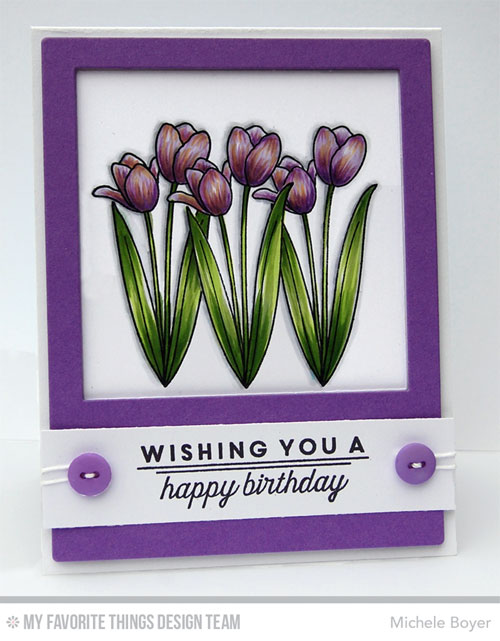
I used Polaroid Cover-Up Die-namics to die-cut the frame from Grape Jelly card stock, then stamped the flowers onto X-Press It Blending Card and colored with Copic markers.

Wishing-You-a-HB-CU

Inside, I stamped a sentiment from Birthday Greetings, added a strip die-cut from new Blueprints 22 and added a die-cut tulip.

Wishing-You-a-HB-In

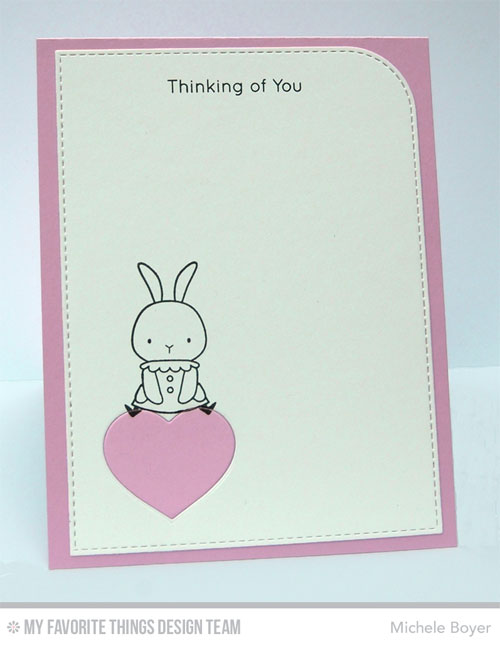
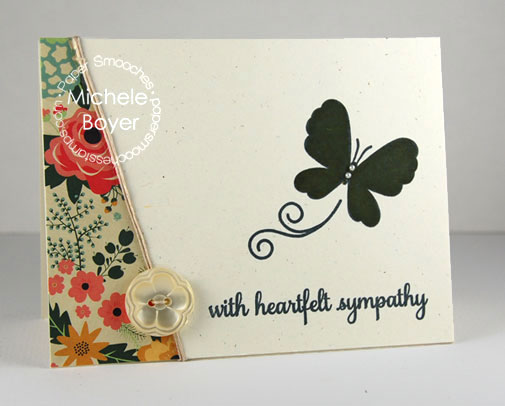
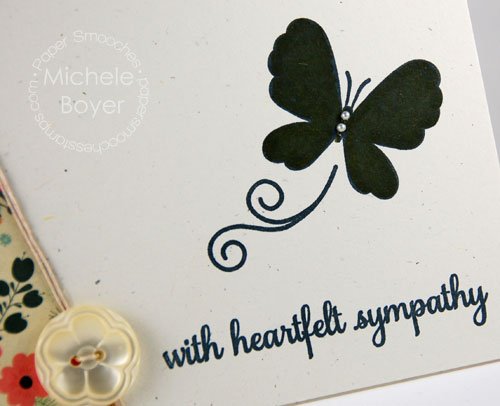
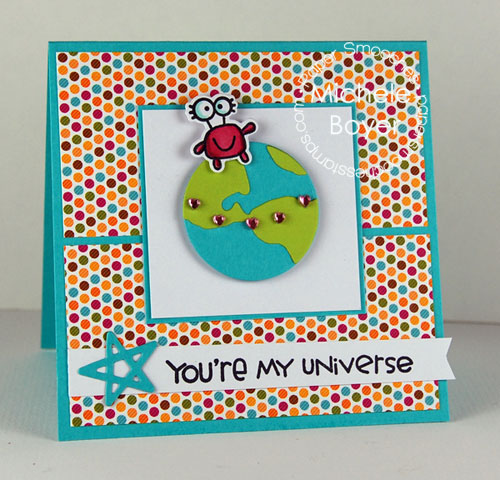
My second card uses Spring Tulips but with a softer color palette of white and Pink Lemonade.

Each-New-Day-500

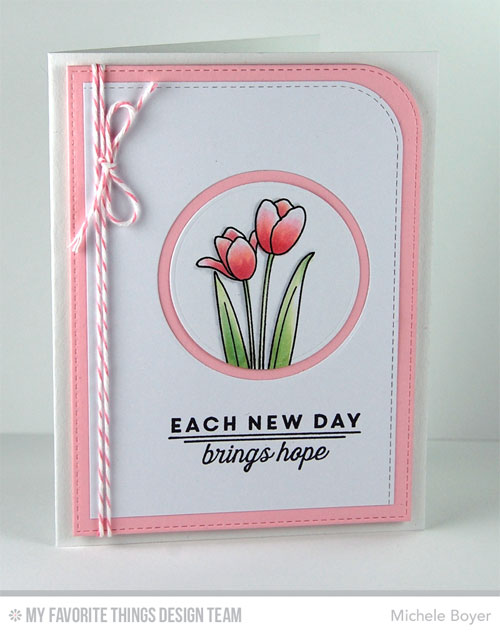
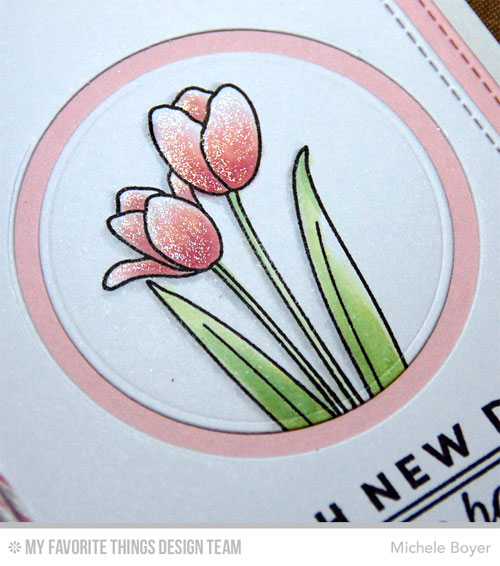
Panels were cut using Blueprints 22 plus a circle from Circle STAX 2.  After stamping and coloring the tulips, I added some sparkle using a clear Wink of Stella glitter pen.

Each-New-Day-CU

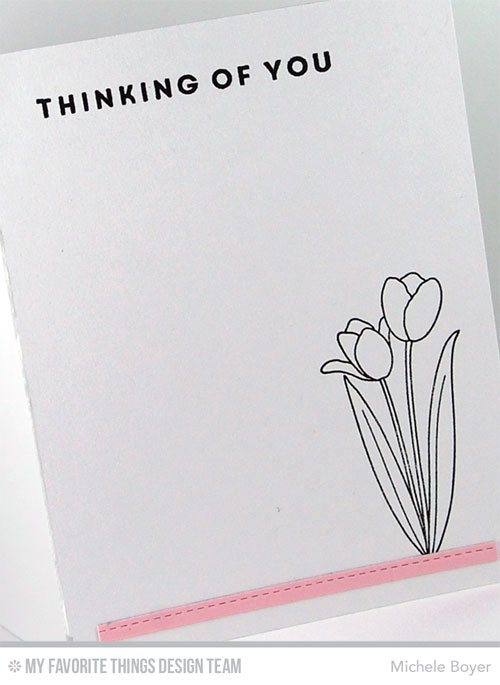
I stamped a silhouette and partial sentiment from Spring Tulips inside and added an extra stitch embossed strip from Blueprints 22.

Each-New-Day-In

Be sure to check out the MFT Blog for direct links to more Countdown samples, info on prizes and all you need to know about our February 3rd release!

Just in case you haven’t seen the latest announcement, and you won’t want to miss this one…

Share the Love square

MFT will be giving away one stamp set and Die-namics combination every day from February 1 – 13, and then on the 14th, we’ll give $300 towards the March release to one Instagram follower and the friend she tags.  $300!  You can follow MFT HERE, and you can follow me HERE.  Starts February 1st!  Good luck!  🙂

Thanks for stopping by!  I’ll be back tomorrow!

Please note that links to new products will not be in effect until time of release, Tuesday, February 3, 10 p.m. EST.

Wishing You a Happy Birthday card

Additional supplies/info: Copic markers (BV00, V15, V17, Y23, YG63, YG67, C00, C1, C3).  Finished size 4 1/4″ x 5 1/2″.
.
Each New Day Brings Hope card

Additional supplies/info: Copic markers (RV00,R30, RV32, G20, G21, C00, C1), baker’s twine, clear Wink of Stella.  Finished size 4 1/4″ x 5 1/2″.

Paper Smooches February Release Hop

It’s Pep Rally week and we are here today to share a sampling of the NEW Paper Smooches February release!  FOUR new stamps and EIGHT new dies will be available to purchase on January 31st at 8:00pm Pacific Time. Once our release goes live, you will find our new products HERE.  

To add extra fun to our blog hop, we are offering a $25.00 gift code to choose what you like at the PS online store.

Here are the details:

  • FOUR winners will be chosen at RANDOM from any of the design team blogs and the PS Blog to win the $25.00 prize.
  • Just leave a comment on any of the design team blogs listed below or the PS blog for your chance to win!  (You do not need to comment on all blogs to qualify but it increases your chances.)
  • Deadline: You have until midnight PT on Sunday, February 1st to leave a comment.
  • Please check the Paper Smooches blog on Monday, February 2nd to see if you are one of the FOUR lucky winners.

To increase your chances of winning:

  • Tell us that you Facebooked about our blog hop
  • Tell us that you Tweeted about our hop
  • Tell us that you posted on your blog about our blog hop

This means that you have up to three extra chances to win on each blog!

Today I’ve used new Graceful Beauties.

With-Heartfelt-Sympathy-505R

After stamping, I added a couple tiny pearls to the butterfly body.

With-Heartfelt-Sympathy-CU

Here’s your hop list. Be sure to comment as you look for your chance to win! Good luck!  🙂


far out

Hi everyone!  I’m squeezing in one more Space Cadet card before Paper Smooches‘ February release.  This one also uses Space Cadet Icons Dies as well as Sassy Script, which you can get for FREE with any $60 retail purchase through January 31.  (Only a few days left!)

Michele-Sassy-Script


The alien was colored with Copic markers, the sentiment and stars were white embossed, and for a little extra bling, I adhered a few silver sequins.  The space ship trail is from Bee Mine.  (Love that set. ♥)

Michele-Sassy-Script-CU

Thanks for stopping by today!  I’ll be back soon.  🙂

Additional supplies/info: Copic markers (C00, C1, C3, C5, C7, G14), white embossing powder, silver sequins.  Finished size 4 1/4″ x 5 1/2″.

i ♥ you

Hi everyone!  It’s time for MFT‘s monthly Creative Challenge!  With Valentine’s Day just around the corner, the MFT team has been challenged to create using lots (and LOTS) of hearts.

I used Centerpieces Wild Flowers Die-namics to create a garden of love. (lol)  And here’s your Eye Spy Challenge of the Day.  See if you can find the rebel heart that decided to turn, just before the glue dried. (#theresalwaysone)

Michele Boyer - My Favorite ThingsAfter die-cutting the wildflower panel, I nipped off most of the flowers, taking care to leave the tiny leaves in place.

Michele Boyer - My Favorite Things

I adhered a Whip Cream panel behind the opening, then die-cut LOTS of hearts using the heart strips from Love Centerpieces.  I used one of my favorite new card stock colors, Ripe Raspberry, along with Pink Lemonade and Cotton Candy. A QuickStik Pickup Tool was a tremendous help in placing the tiny hearts. It’s one of my favorite tools.

There are two puffy (cream) Clouds in the sky.

Michele Boyer - My Favorite ThingsBoth the inside and outside sentiments are from Miss Tiina’s I Love You More stamp set, stamped in Ripe Raspberry dye ink.

Michele Boyer - My Favorite Things

After creating the candle wrap, I die-cut a tiny Traditional Tag, then a heart-shaped window using the small heart from Blueprints 8.

Michele Boyer - My Favorite Things

Be sure to check out the MFT blog for direct links to other participating DT.  It’s a heart-filled day!

Thanks for stopping by!

Additional supplies:  Ribbon, kraft marker, candle (IKEA).  Finished card size: 4 3/4″ x 4 3/4″.

go boldly

Hi everyone!  I hope you’re enjoying your weekend so far.  I’ve been busy working on next month’s Paper Smooches release (blog hop this Thursday!) but in the meantime, I have a card to share using one of last month’s releases, Space Cadet Icons and Space Dies, both of which coordinate with Space Cadet stamp set.

Go-Boldly-500

After die-cutting the little astronaut, he was stamped and colored with Copic markers. The blue panel is popped up, adding a bit of dimension to the die-cut stars.

Go-Boldly-CU

The little dots were created with Glossy Accents and the sentiment was white embossed.

Thanks for stopping by today!

Additional supplies/info: Copic markers (E00, E11, E40, E42, E43, R01, R02, R29, B37), white embossing powder.  Finished size 4 1/4″ x 5 1/2″.

An Organized Crafty Stash, Day 5 of 5 – Inks and Refills

5Days_BlogHeader

Hi everyone! Welcome to the last installment of Five Days to an Organized Crafty Stash with My Favorite Things!  Today we’re sharing our ideas for managing ink pads and refills.  Prior to this week, my ink pads were pretty much a hot mess. Some were labeled, some weren’t.  My dye ink refills were with the dye ink pads but all of my hybrid refills were in a bag.  It was somewhat of a nightmare. I feel so much better now, labeled, stacked, categorized.  Ahhh…   🙂

On a shelf behind my stamp table, I have all of my MFT inks and some refills.  All ink pads are labelled and grouped by color. (You can find MFT labels HERE.)

All-inks-1-500

My dye inks and refills are stored on a little shelf organizer my husband made for me a while back.

Dye-ink-w-refills-500To the left of the dye inks are my hybrid inks and a handful of pigment inks.

Hybrid-Pigment-Inks-500Since there is no room for the hybrid refills, I store them in bins with a 1/4″ circle cut from the coordinating card stock glued to each top.  The refill with no card stock on top is black. Once I begin accumulating pigment ink refills, I’ll store them similarly but in a different color bin.

Hybrid-Refills-500

I’d love to take credit for the punched circles but I can’t.  Jody mentioned it to me long ago and I thought it was brilliant.

Hybrid-Color-Tops-500

Head on over to the MFT blog for a list of direct links to more ink organization! And be sure to leave a comment there on the MFT blog for your chance to win our GRAND PRIZE Package!  (It’s INCREDIBLE!)

5Ways_Prize5a


I hope you enjoyed our Five Days to An Organized Crafty Stash!   Thanks for stopping by!   🙂

An Organized Crafty Stash, Day 4 of 5 – Card Stock

5Days_BlogHeader

Hi everyone! Welcome to another installment of Five Days to an Organized Crafty Stash with My Favorite Things!  Today we’re sharing our ideas for managing card stock.  I have a lot so it’s stored in a few different locations.

Several years ago, I was doing all my stamping from my dining room table.  As you can imagine, I quickly outgrew that (plus it was an eyesore). During that time, I was offered a really big job, I worked hard, saved my money and bought a very nice project table with storage on each side.  I ♥♥♥♥♥ it. On this side, I keep a rainbow of card stock from which I pull on a daily basis.

Card-Stock-FrontI “file” my card stock packages with the label out so I can be certain of what I’m grabbing while flipping through.

CS-2-labelsI also open my packages from the bottom (near the label) so I can easily access the extra cut pieces I store in the package.  I’ve started writing the coordinating Copic color on the label as well.

CS-5-Lable-Opening

Since I use whites and black most frequently, I keep them on a shelf behind where I stand to stamp so they are very accessible.  (Yes, I stand.)  🙂

CS-3-Basic-ColorsOn the other side of my table, I use the bottom shelf to store all of my “extra inventory.” (I didn’t take a photo of the entire side because it’s not as pretty.)  😉

CS-4-Extra-StockHead on over to the MFT blog for a list of direct links to more card stock organization! And be sure to leave a comment there on the MFT blog for your chance to win one of two Prize Packages:

5Ways_Prize4a


Thanks for stopping by!


You’re My Universe

Hi everyone! It’s hump day! I’m dragging a bit as we were up late last night for a hockey game.  It went into overtime, then a shootout, and then sadly a loss.   Upon returning to our car, we found a small gift on our windshield from one Officer P. Matthews, so that was awesome too. :-/  Anyway…  🙂

I’m popping in with a greeting from a cute little pink martian from Paper Smooches.

Youre-My-Universe-500

I used Space Cadet with coordinating dies and new Space dies.  The martian, colored with Copic markers, is popped up on foam tape, as is the die-cut world.

Youre-My-Universe-CU

Thanks for stopping by today!  And be sure to read those parking signs!  (If you’re in DC, be sure you read the signs AND read between the lines. *insert incoherent mumbling*)

Additional supplies/info: Copic markers (R85, R89, BG11), Amuse heart rhinestones. Finished size 4 1/2 x 4 1/2.