Monthly Archives: August 2015

New from Paper Smooches

Hi everyone! I have a couple of cards to share today using new Paper Smooches stamps and dies. (After 8 pm pacific time today, you’ll be able to find the September release HERE.)

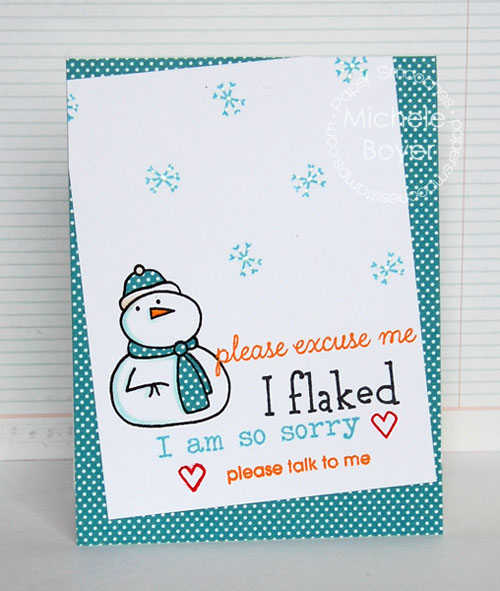
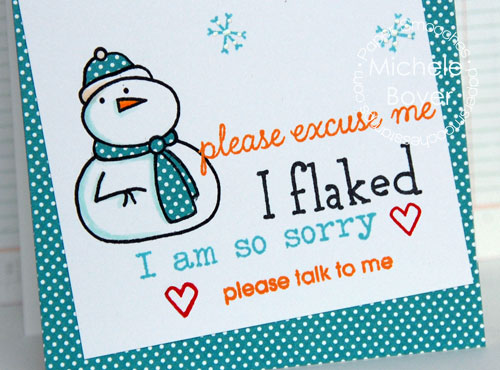
First up is a new sentiment set called Apologies which  I’ve paired with Swanky Snowdudes. I think this guy looks like he’s sorry. 🙂

Michele Boyer - Paper Smooches

After stamping the snowman and flakes, I paper-pieced the hat and scarf and added Kirarina Wink White Pearl dots on the snowflakes. A BG10 Copic adds just a hint of shadow on the snowman.

Please-Excuse-Me-CU

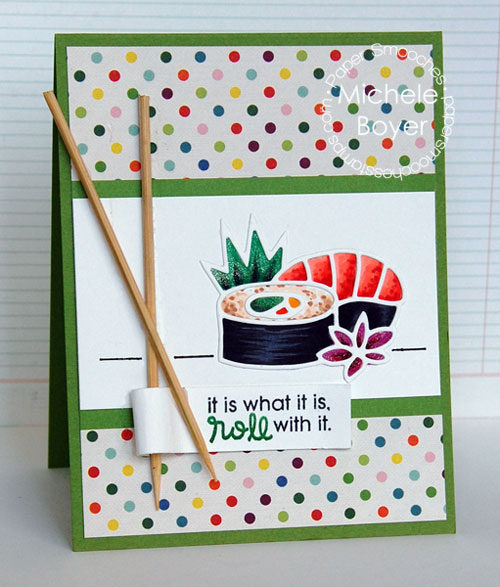
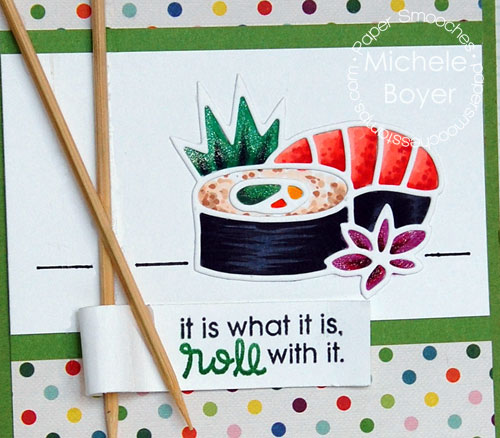
Next, I used new Sushi Die with a sentiment from Calorie Free.

It-Is-What-It-Is-500

I die-cut two sushi pieces, using one to hold in place while I colored the open spaces (with Copics). Once finished, I added some subtle glittery shine with a clear Wink of Stella brush then attached the second sushi die-cut.

The chopsticks are short bamboo skewers. Where the two cross, I used a Basic Grey sanding file to create a groove in one stick enabling the two to lie flat(ter) on the paper.

It-Is-What-It-Is-CU

Quick reminder – All September release product will be available for purchase after 8 pm pacific time tonight!  Thanks for visiting!

1amichele siggy 

Sorry, I Flaked card

Additional supplies/info: Copic markers (BG10, YR15, E50). Finished size 4 1/4″ x 5 1/2″

It Is What It Is card  

Additional supplies/info: Bamboo skewers, Copic markers (C7, G03, G09, G29, E33, E35, E50, N9, R02, R05, R24, R29, R89, RV66, YR07, 110). Finished size 4 1/4″ x 5 1/2″.

Product Focus – X-Press It Mask It and Adhesive Sheets

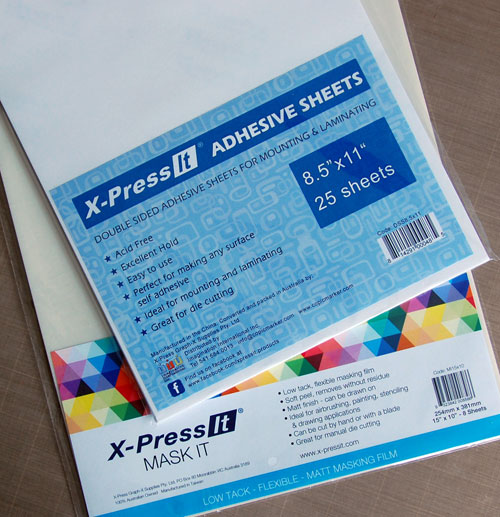
Hi everyone! Today I’ve created a couple projects using X-Press It Mask It film with a bit of Double-sided Adhesive Sheets, both by Imagination International, Inc, the U.S. distributor of Copic markers.
1-Photo

Mask It is totally different from what you may typically think of as a “mask” for stamping. It’s actually a low-tack adhesive film, perfect for layering color.  It’s easily die-cut or scissor cut to any shape and wipes clean. (That’s my favorite part!)

X-Press It Double-sided Adhesive Sheets are high-tack and also easily cut by scissors or die-cutting machine. The adhesive is smooth and clear which is great for use in places where the back is visible, like the little clear paint can I’ve used below or clear acetate cards like this or this.  I have tried many double-sided adhesive sheets in my stamping life and this one is by far my favorite.
Michele Boyer - Paper Smooches

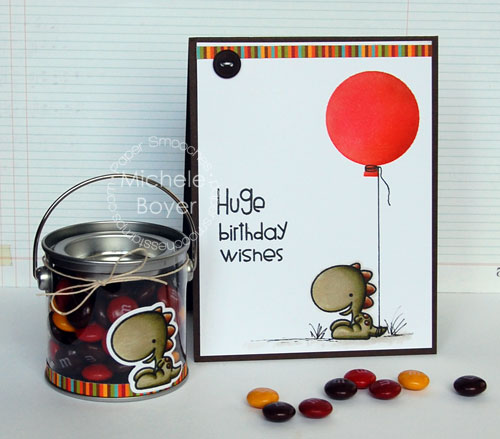
Party Posse and Big Balloons die by Paper Smooches

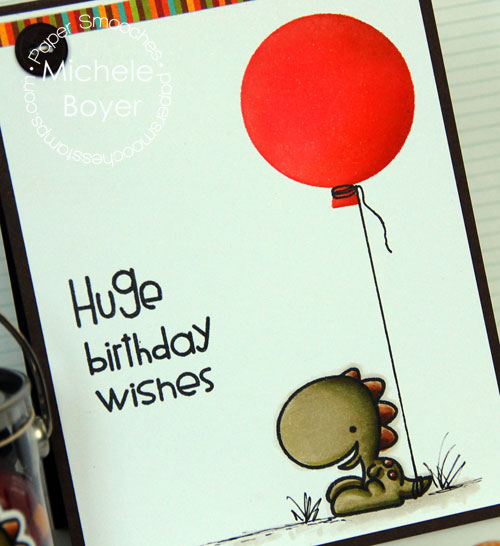
I used Mask It to blend color inside the balloon shape on the card above, and an Adhesive Sheet to adhere the dino and stripes to the clear paint can.

Creating a Mask for Inking
3-Steps-1-and-2

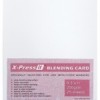
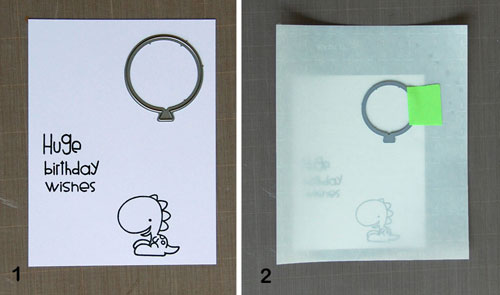
Step 1: First stamp your image and sentiment onto X-Press It Blending Card, keeping in mind where the balloon will appear.

Step 2: Cut a piece of Mask It larger than the Blending Card,  position balloon die and secure die in place with removable tape. By cutting the mask larger than the card stock, the adhesive backing holds the card stock securely in place while blending in color and there’s room on the mask to begin the blending into the open space.
3-Steps-3-and-4

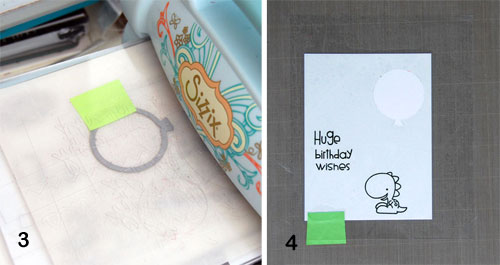
Step 3: Die-cut balloon from Mask It.

Step 4: Use a bit of tape to hold Blending Card in place. Remove backing from Mask It, position balloon opening and adhere over stamped panel.
3-Steps-5-and-6

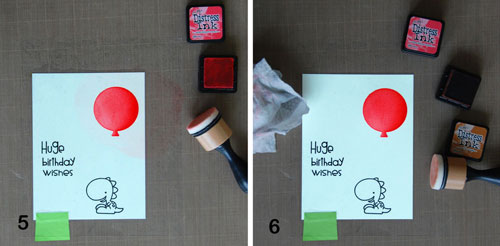
Step 5: Begin sponging ink (Ranger Abandoned Coral Distress ink) into balloon shape. Using a circular motion, begin blending on Mask It sheet, slowly moving into the balloon.

Step 6: Once the desired amount of ink is applied, use a baby wipe or damp cloth to remove excess ink from the mask. That is very cool!
3-Steps-7-and-8

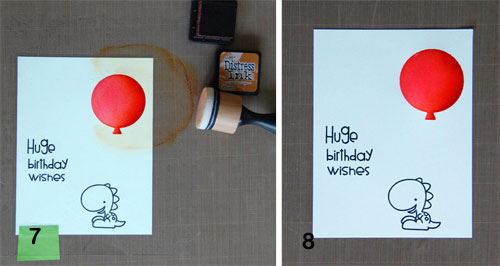
Step 7:  Blend in darker ink (Ranger Rusty Hinge Distress ink), beginning again on the mask and working in toward the balloon opening using circular motions. If you wanted to add another pattern over the sponged color, now is the time to do so (but wipe the mask clean before doing so).

Step 8: Wipe mask clean and carefully remove from Blending Card. The mask can be reapplied to the backing sheet and saved for future use if desired.

I used a 0.5 Black Multi-liner to add in the balloon string.
Michele Boyer - Paper Smooches

Super easy!  🙂

Now to create the little dino and stripes for the clear paint can.
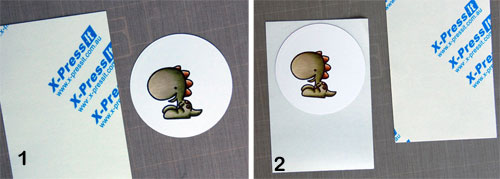
4-Steps-1-and-2

Step 1: Stamp and color image. (I just happened to have a spare die-cut circle on my desk so I used that.)

Step 2: Remove one side of the adhesive sheet backing and adhere colored image.  Use scissors to remove excess adhesive.
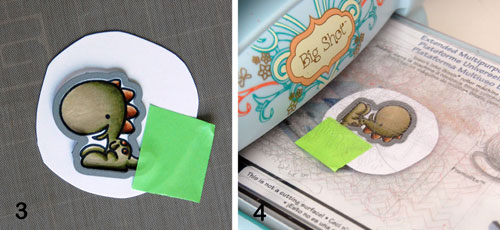
4-Steps-3-and-4

Step 3: Secure die in place with removable tape.

Step 4: Die-cut image.
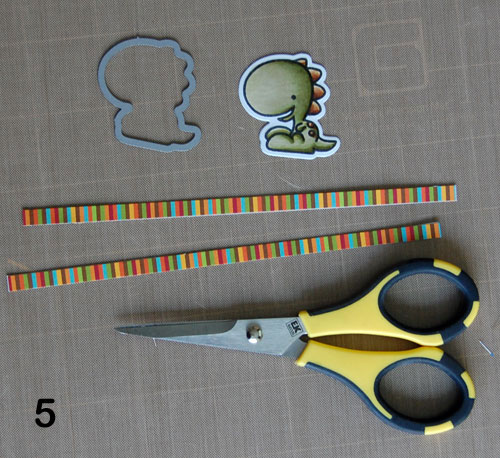
4-Step-7-Cut-strips-with-scissors

Step 5: Adhere two thin strips of patterned paper to adhesive sheet; trim with scissors. Remove backing paper from all and adhere to can.
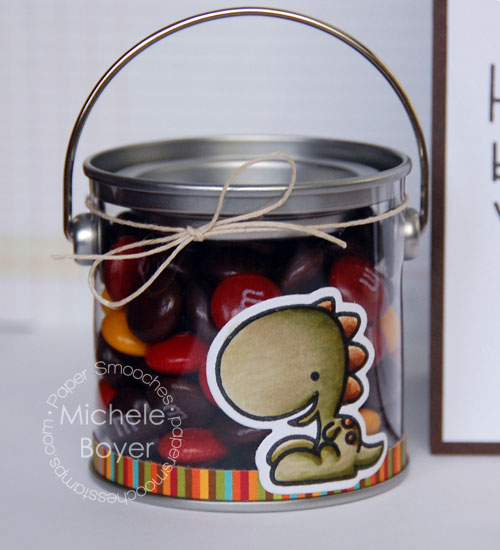
Michele Boyer - Paper Smooches

Copics used: E31, E33, E35, E37, YG91, YG93, YG95, YG97

Once applied to the can, the dino and stripes will not pull away from the surface. I love this adhesive paper. 🙂

Creating Masks for Stamps
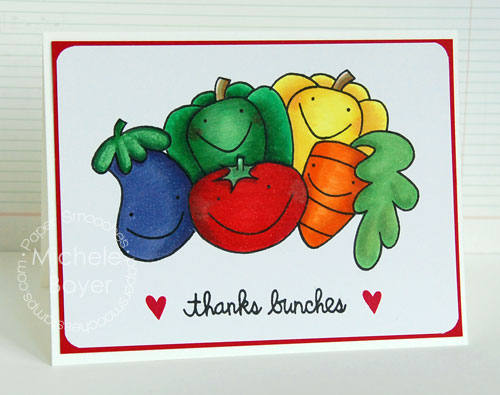
Michele Boyer - Paper Smooches

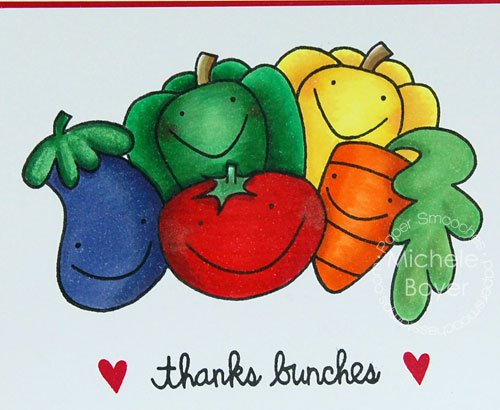
Vegtastic by Paper Smooches

Since ink does not absorb into Mask It film, the process of creating masks for stamps is a little different. Here’s how to do that:
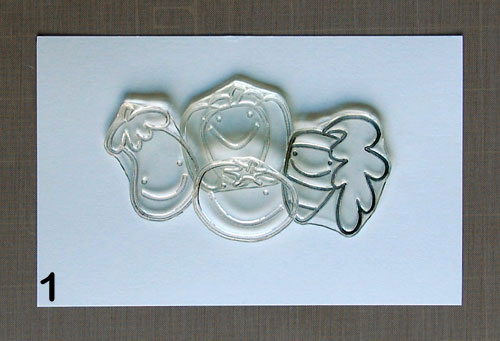
5-Step-1a-Lay-out-Stamps

Step 1: First decide how you’d like to layer your stamps. This will help to determine the order in which the images are stamped.
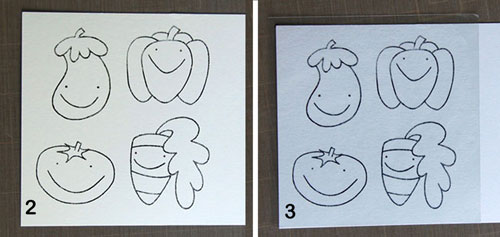
5-Step-2-and-3

Step 2: Stamp each image onto scrap paper.

Step 3: Remove backing from film and adhere over images (all at once).
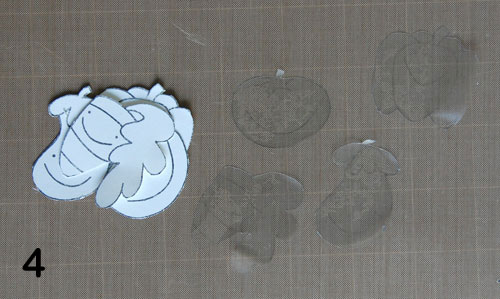
5-Step-4-Cut-out-and-carefully-remove-masks

Step 4: Cut out images and carefully remove each mask.
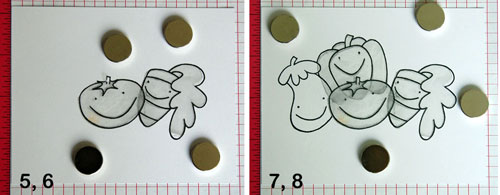
5-Step-5-6-and-7-8

Step 5: Stamp tomato and adhere mask.

Step 6: Stamp carrot. Before applying the carrot mask, I carefully lifted the right side of the tomato mask and wiped away the ink (from the edge of the carrot). Since the ink just sits on top of the mask, wiping away the ink helped me to avoid transferring the ink to my fingers and then onto anything else. Once the ink was wiped away, I added the carrot mask.

Step 7: Stamp eggplant, wipe away ink from edge of tomato and apply eggplant mask.

Step 8: Stamp green pepper, wipe away ink from top of tomato mask and apply pepper mask.

Since I had a bit of room left, I stamped an additional pepper above the carrot.
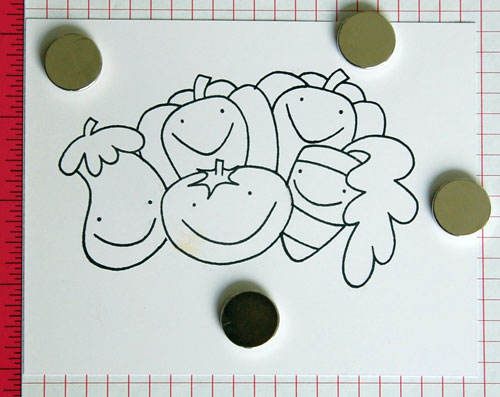
5-Step-8-Final-stamped-images

One big happy veggie family. 🙂

Michele Boyer - Paper Smooches

BV04, BV08, BV17, E31, E33, G03, G05, G07, G29, Y06, Y08, Y21, YR14, YR16, YR27

Thanks bunches for stopping by! ♥

1amichele siggy

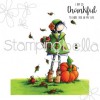
I am so thankful

Hi everyone! Happy Bellarific Friday! I was so excited to use another image from Stamping Bella‘s latest release! You can see ALL of the super duper cute new images right HERE.

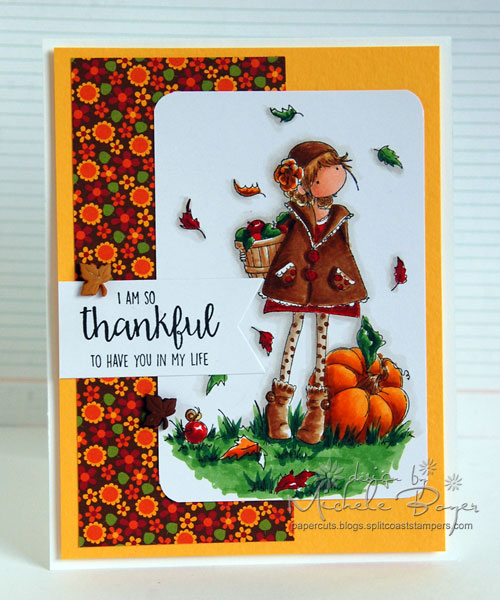
For last week’s challenge (a sketch), I used new Tiny Townie Fay Loves Fall. (My favorite season as well!)

I-am-So-Thankful-500

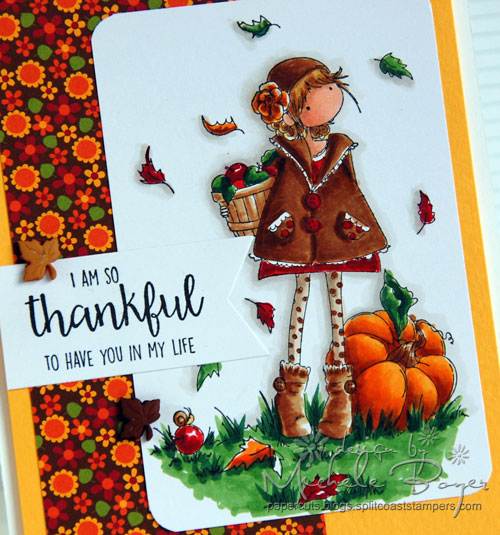
The image was stamped onto X-Press It Blending Card and colored with Copic markers. I then rounded each corner using my handy dandy Corner Chomper then added two small leaf buttons near the sentiment flag. The main panel is raised on foam tape to accommodate the button shanks (which are pretty small but are better hidden with a little room beneath).

I-am-So-Thankful-CU

I just love her.

Next week’s challenge is to create your own background. Create a card or project using any current Stamping Bella image, then email your card to Emily by next Thursday to be entered to win some Bella Bucks!  (All challenge details can be found HERE.)

Thanks for visiting!

1amichele siggy

Additional info/supplies: Copic markers (EOO, E11, E31, E33, E35, E37, E41, E43, R24, R29, R89, YG17, G29, Y38, YR04, YR07, W00, W1, W2. Finished size 4 1/4″ s 5 1/2″.

Paper Smooches September Release Hop

It’s Pep Rally week and we are here today to share a sampling of the NEW Paper Smooches SEPTEMBER release with you!  TWO new stamps and TEN new dies will be available to purchase on August 31st at 8:00 p.m. pacific time. Once our release goes live, you will find our new products HERE.

To add extra fun to our blog hop, we are offering a $25.00 gift code to choose what you like at the PS online store.

Here are the details:

  • FOUR winners will be chosen at RANDOM from any of the design team blogs and the PS Blog to win the $25 prize.
  • Just leave a comment on any of the design team blogs listed below or the PS blog for your chance to win!  (You do not need to comment on all blogs to qualify but it increases your chances.)
  • Deadline: You have until midnight PT on Sunday, August 30th to leave a comment.
  • Please check the Paper Smooches blog on Monday, August 31st to see if you are one of the FOUR lucky winners.

To increase your chances of winning:

  • Tell us that you Facebooked about our blog hop.
  • Tell us that you Tweeted about our hop.
  • Tell us that you posted on your blog about our blog hop.

(which means that you have up to three extra chances to win on each blog)

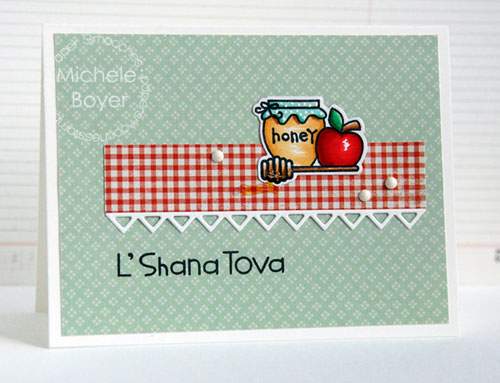
Today I’ve used new Kibitzing Two, Kibitzing Icons dies and Borders 3.

Michele Boyer - Paper Smooches

Apples and honey are served to wish a sweet new year.

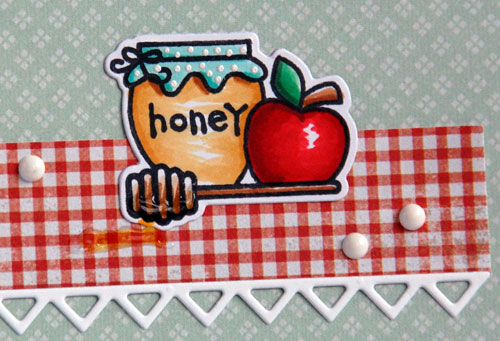
After stamping onto X-Press It Blending Card and coloring with Copic markers, the image was die-cut and adhered to the “table cloth.”  I added a bit of Glossy Accents “honey,” colored over with a golden yellow Copic.

The white dots on the jar cover were added using my favorite new white pen, Kirarina Wink White Pearl.

Michele Boyer - Paper Smooches

Be sure to hop along and comment with the rest of the DT to increase your chances to win:

Happy hopping!  Thanks so much for stopping by!

1amichele siggy

Copics: Y21, YR23, R24, R29, R89, G03, G09, BG11, BG13, E33, E35.

Give Thanks

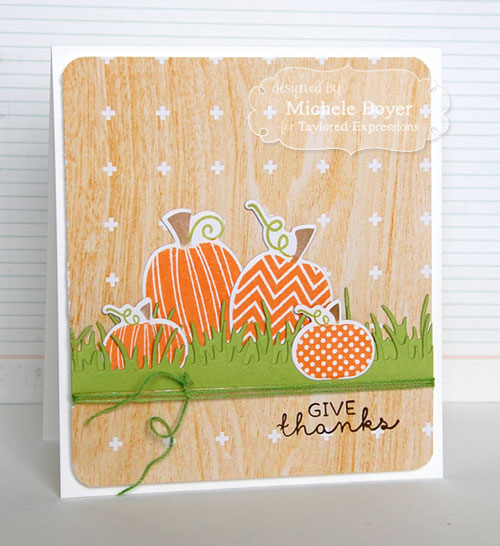
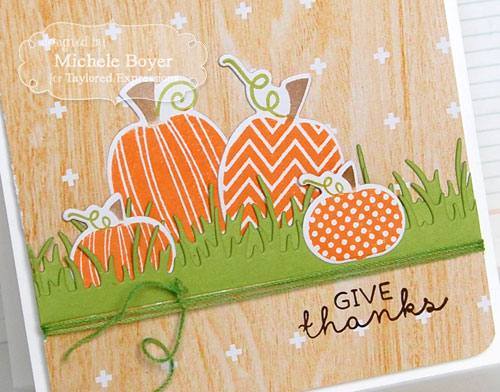
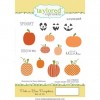
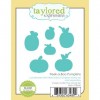
Hi everyone! My card today uses new Peek-a-Boo Pumpkins with coordinating dies from Taylored Expressions.

Michele Boyer - Taylored Expressions

The pumpkins were stamped onto X-Press It Blending Card then die-cut and placed within two strips of Wispy Grass Border. My MISTI made stamping the multi-colored pumpkins super easy.  I stamped one color, wiped the ink away and stamped the next without moving the stamp or paper. I love that tool.

Michele Boyer - Taylored ExpressionsI ran a green Copic over white string then curled the ends after tying off to the side.

Thanks so much for visiting today!

1amichele siggy

Additional supplies/info: MFT Orange Fizz, Sour Apple, Kraft, Chocolate Brown dye inks, Copic YG23 (string), Dear Lizzy Day Dreamer (6×6), X-Press It 1/2″ foam tape, Corner Chomper.  Finished size 4 1/4″ x 4 3/4″.

You Color My Dull World

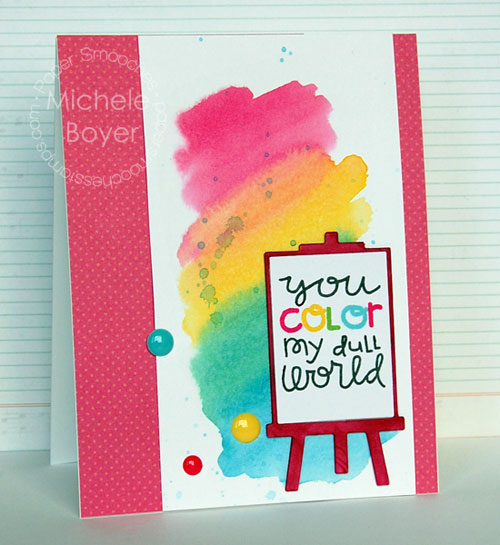
Hi everyone! I’m back today with a fun, colorful card using Paper Smooches stamps and dies.

I love the cute new Easel die, and the sentiments from Spreading Sunshine are a perfect fit.

Michele Boyer - Paper Smooches

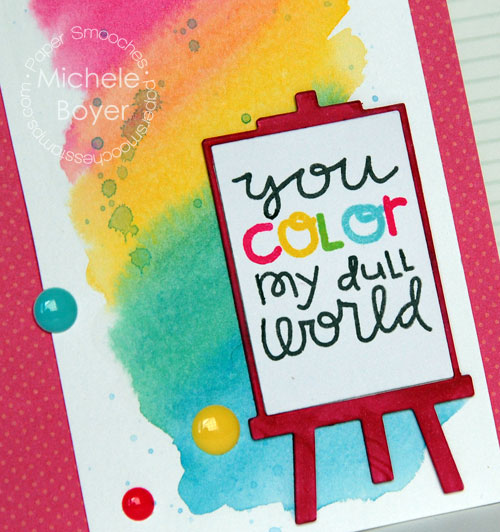
To create the multi-color sentiment, I carefully taped off each letter, stamping in colors to match those watercolored (and splattered) across the background.

Michele Boyer - Paper Smooches

A bright block of dotted pink patterned paper from Pebbles Fun in the Sun paper pad was adhered to the card providing a bright backdrop to the stamped panel.

Thanks so much for visiting today!

1amichele siggy 

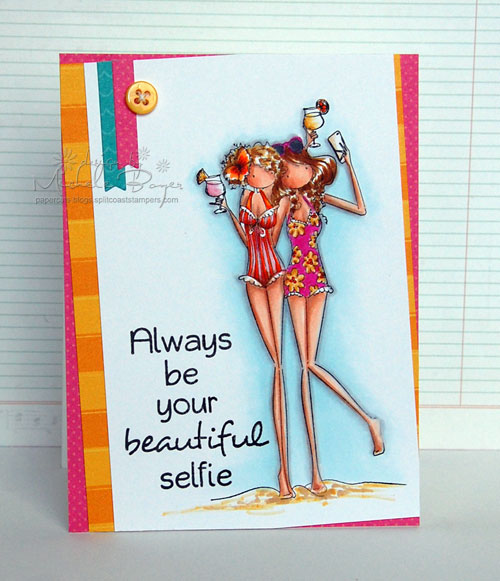
always be your beautiful selfie

Faces are getting a little long around here with the end of summer nearing. Only one week before school begins. Other than having little to no time for crafting, I enjoy my kids being home, relishing what (relatively) little time is left before they’re off on their own. (I don’t even want to think about that yet.)

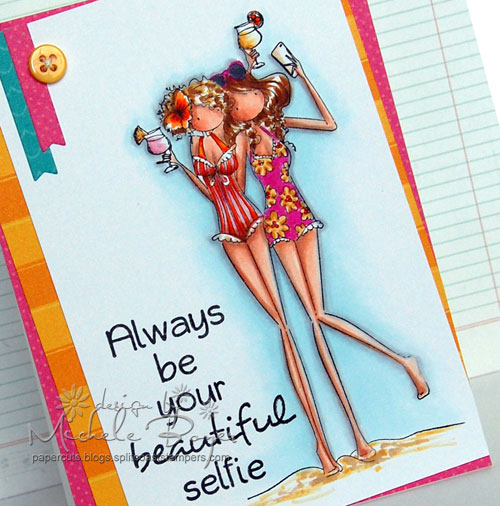
So, while hanging on to the last bits of summer (along with the heat and that blasted humidity which I hate), I’ve chosen Uptown Girls Samantha and Sierra Take a Selfie for my Bellarific Friday challenge with Stamping Bella.

Michele Boyer - Stamping Bella

The challenge was to use a specific color palette (seen at the end of last week’s post here). I stamped onto X-Press It Blending Card, colored with Copic markers and pulled in a few scraps of patterned paper from my stash.

Michele Boyer - Stamping Bella

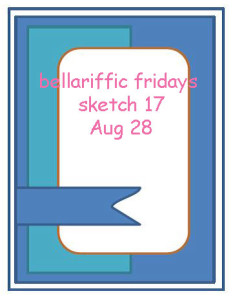
Next week’s challenge is a sketch:

sketch-17-aug-28 copy (3)

Create a card or project using the sketch and any current Stamping Bella image then email your card to Emily by next Thursday to be entered to win some Bella Bucks!  (All challenge details can be found HERE.)

Thanks for visiting!

1amichele siggy 

Additional info/supplies: Copic markers (E00, E11, BV000, R01, Y21, E31, E33, E35, E37, E41, YR23, YR04, YR07, RV55, RV06, R81, R83, B0000, C00, C1, C2, C7, Colorless Blender), button/string. Finished size 4 1/4″ x 5 1/2″.


You Make My Heart do Flip Flops

Hi everyone!

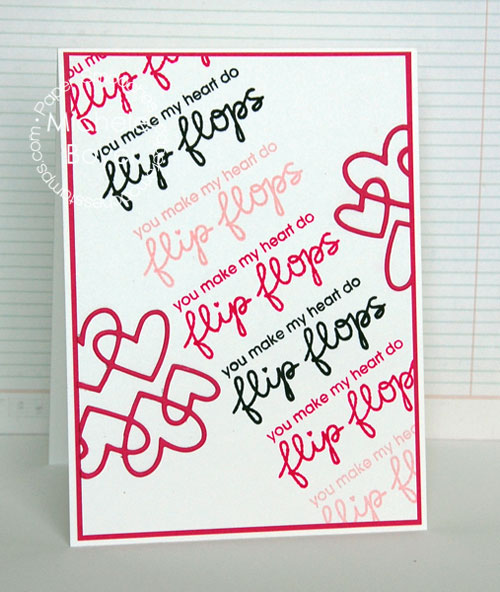
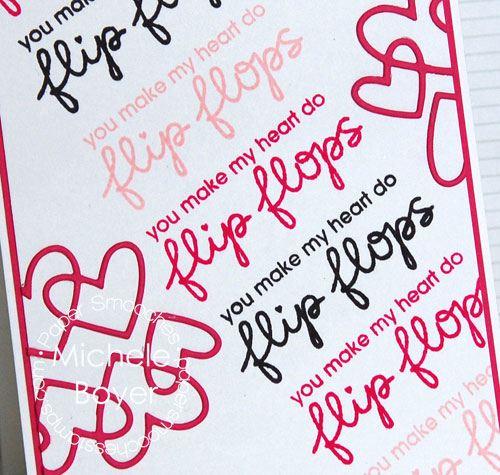
Today I’m sharing a card using two new Paper Smooches releases, Summer Lovin stamp set and Linked Hearts die.

Michele Boyer - Paper Smooches

I used a stamp press to align the sentiments, then die-cut two strips of hearts, flipping the bottom row. The points of the hearts above and below fit together quite nicely.  🙂

Michele Boyer - Paper Smooches

Thanks so much for stopping by today!

1amichele siggy 

Finished size 4 1/4″ x 5 1/2″.

Celebrate

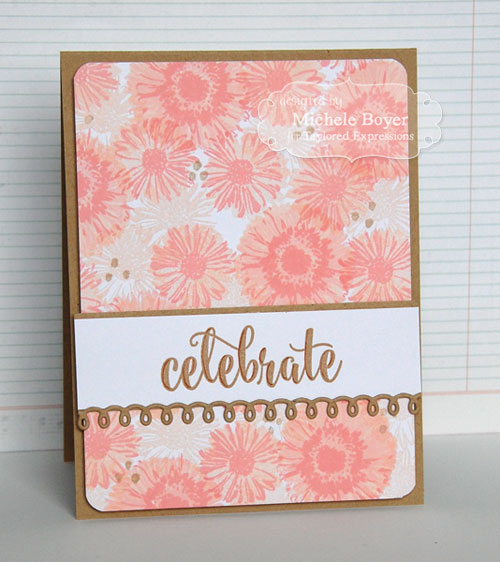
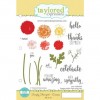
Hi everyone! Today I have a sample to share using another of Taylored Expressions‘ latest releases, Simply Stamped Daisies.

I used three shades of pink ink to stamp the daisies, creating a floral background. (The kraft dots were stamped with a pencil eraser.)

Michele Boyer - Taylored Expressions

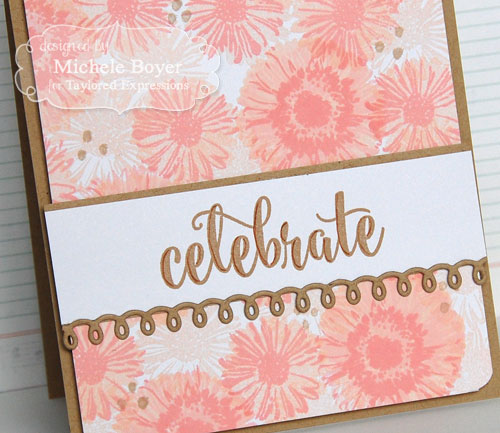
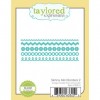
The sentiment, also from Simply Stamped Daisies, was stamped in Kraft with left edges outlined using a 0.5 Sepia Copic Multi-liner. The swirly border was cut from Toffee card stock using Skinny Mini Borders 2.

Michele Boyer - Taylored Expressions

Once the main panel was assembled, it was adhered to the card base using foam tape.

Thanks so much for visiting today!

1amichele siggy

Additional supplies/info: MFT Insulation Pink, Tickled Pink, Bubblegum, Natural, Kraft dye inks, X-Press It Blending Card, X-Press It 1/2″ foam tape, 0.5 Sepia Copic Multi-liner, Corner Chomper. Finished size 4 1/4″ x 5 1/2″.

You’re a Cool Cat

Hi everyone!

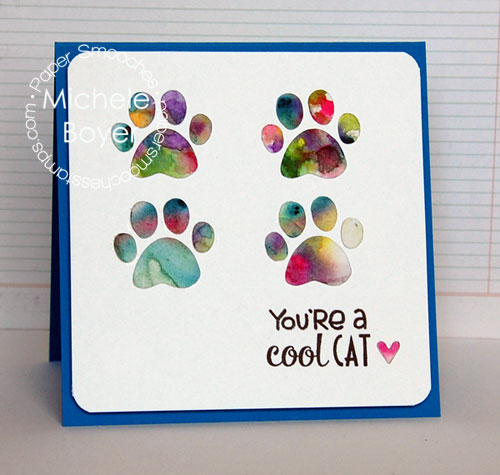
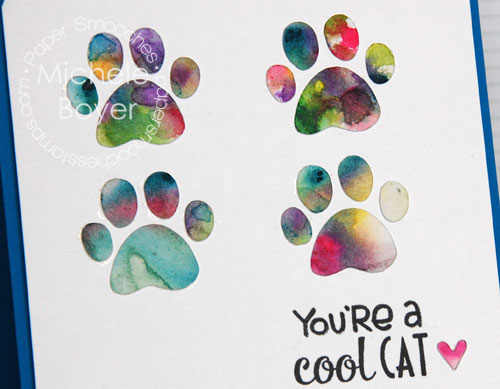
Today I have a card to share using new Charmed Cat Two and Paw Prints dies from Paper Smooches.

Michele Boyer - Paper Smooches

I first watercolored four bright patches onto watercolor paper, then die-cut the patches using Paw Prints dies.  I used “You’re a” from Ahoy Matey to complete the cool cat sentiment. The tiny heart, also watercolored, was die-cut using the tiny heart that comes along with the Paw Prints dies.

Michele Boyer - Paper Smooches

Thanks so much for stopping by today!

1amichele siggy 

Finished size 4 1/4″ x 4 1/4″.