
Hi everyone! Today I’ve created a couple projects using X-Press It Mask It film with a bit of Double-sided Adhesive Sheets, both by Imagination International, Inc, the U.S. distributor of Copic markers.
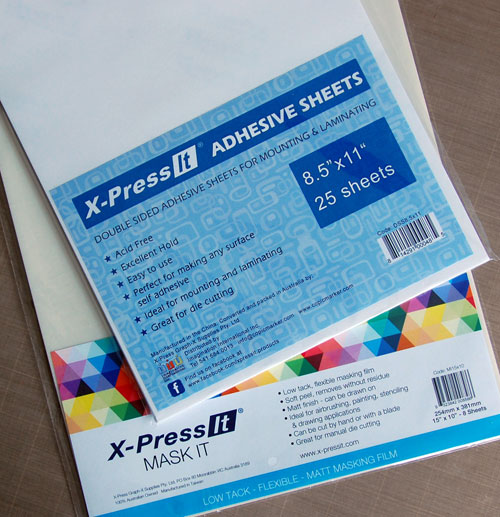
Mask It is totally different from what you may typically think of as a “mask” for stamping. It’s actually a low-tack adhesive film, perfect for layering color. It’s easily die-cut or scissor cut to any shape and wipes clean. (That’s my favorite part!)
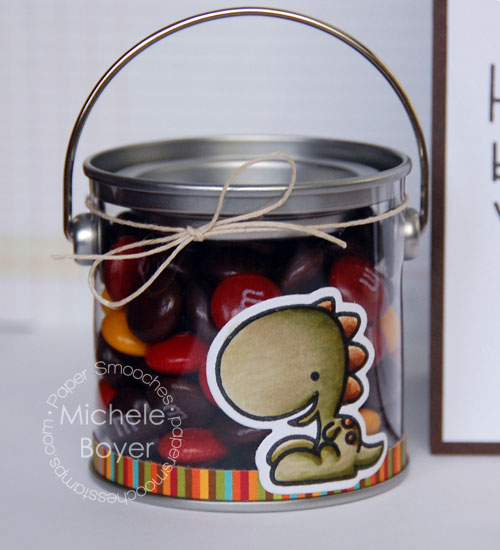
X-Press It Double-sided Adhesive Sheets are high-tack and also easily cut by scissors or die-cutting machine. The adhesive is smooth and clear which is great for use in places where the back is visible, like the little clear paint can I’ve used below or clear acetate cards like this or this. I have tried many double-sided adhesive sheets in my stamping life and this one is by far my favorite.
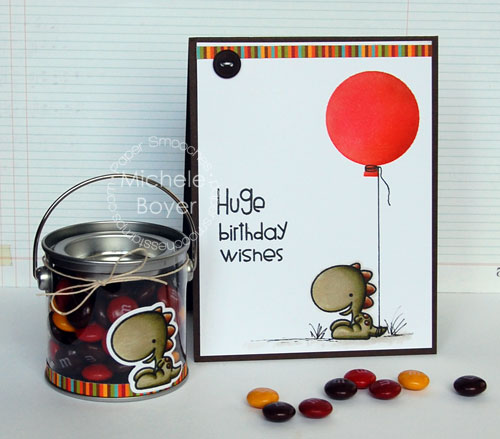
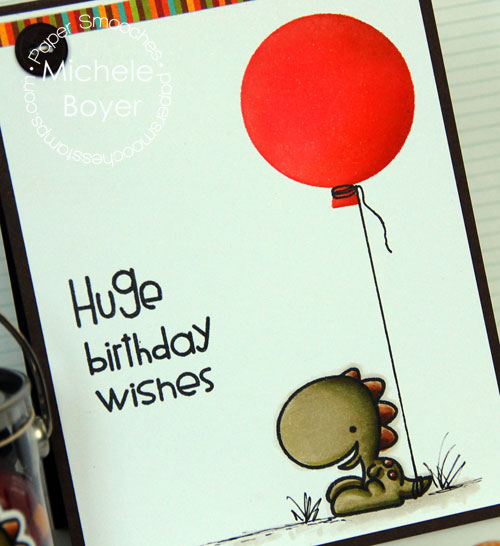
Party Posse and Big Balloons die by Paper Smooches
I used Mask It to blend color inside the balloon shape on the card above, and an Adhesive Sheet to adhere the dino and stripes to the clear paint can.
Creating a Mask for Inking
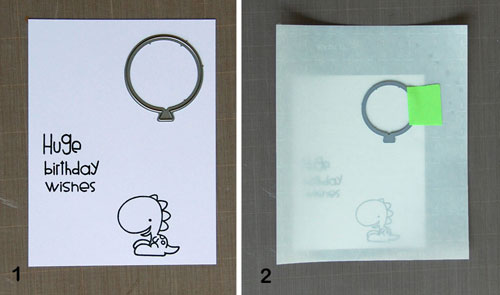
Step 1: First stamp your image and sentiment onto X-Press It Blending Card, keeping in mind where the balloon will appear.
Step 2: Cut a piece of Mask It larger than the Blending Card, position balloon die and secure die in place with removable tape. By cutting the mask larger than the card stock, the adhesive backing holds the card stock securely in place while blending in color and there’s room on the mask to begin the blending into the open space.
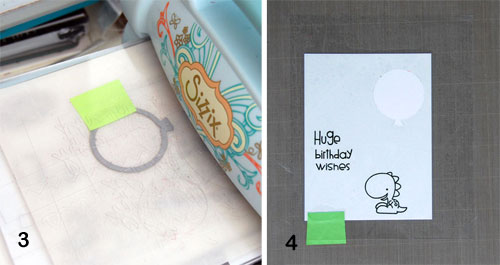
Step 3: Die-cut balloon from Mask It.
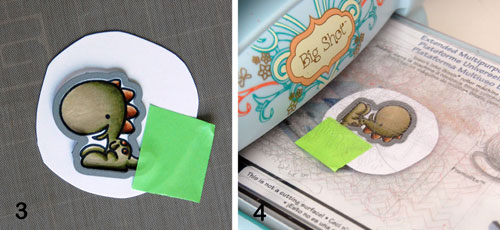
Step 4: Use a bit of tape to hold Blending Card in place. Remove backing from Mask It, position balloon opening and adhere over stamped panel.
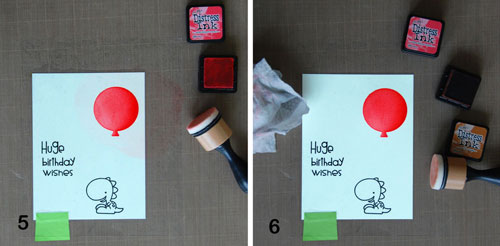
Step 5: Begin sponging ink (Ranger Abandoned Coral Distress ink) into balloon shape. Using a circular motion, begin blending on Mask It sheet, slowly moving into the balloon.
Step 6: Once the desired amount of ink is applied, use a baby wipe or damp cloth to remove excess ink from the mask. That is very cool!
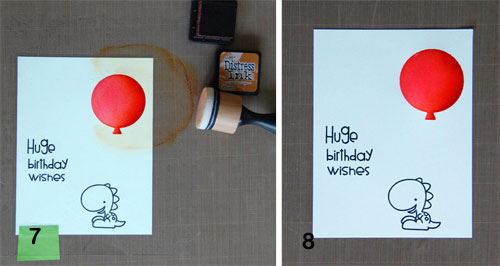
Step 7: Blend in darker ink (Ranger Rusty Hinge Distress ink), beginning again on the mask and working in toward the balloon opening using circular motions. If you wanted to add another pattern over the sponged color, now is the time to do so (but wipe the mask clean before doing so).
Step 8: Wipe mask clean and carefully remove from Blending Card. The mask can be reapplied to the backing sheet and saved for future use if desired.
I used a 0.5 Black Multi-liner to add in the balloon string.
Super easy! 🙂
Now to create the little dino and stripes for the clear paint can.
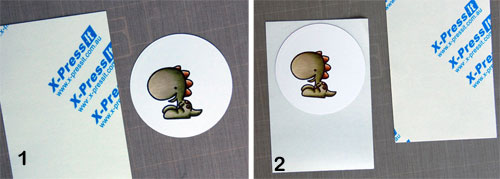
Step 1: Stamp and color image. (I just happened to have a spare die-cut circle on my desk so I used that.)
Step 2: Remove one side of the adhesive sheet backing and adhere colored image. Use scissors to remove excess adhesive.
Step 3: Secure die in place with removable tape.
Step 4: Die-cut image.
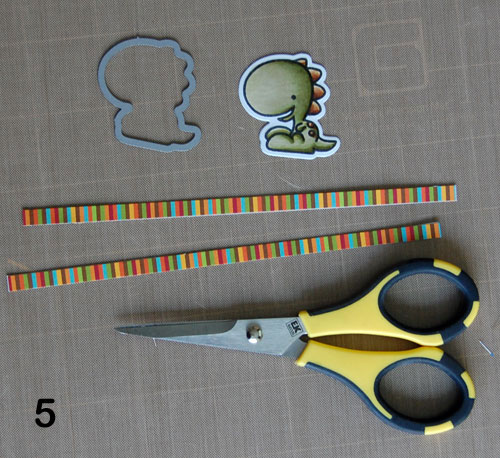
Step 5: Adhere two thin strips of patterned paper to adhesive sheet; trim with scissors. Remove backing paper from all and adhere to can.
Copics used: E31, E33, E35, E37, YG91, YG93, YG95, YG97
Once applied to the can, the dino and stripes will not pull away from the surface. I love this adhesive paper. 🙂
Creating Masks for Stamps
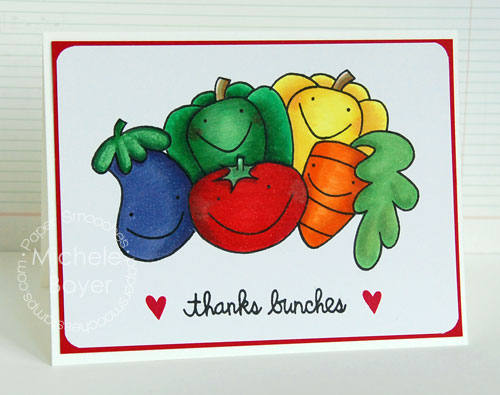
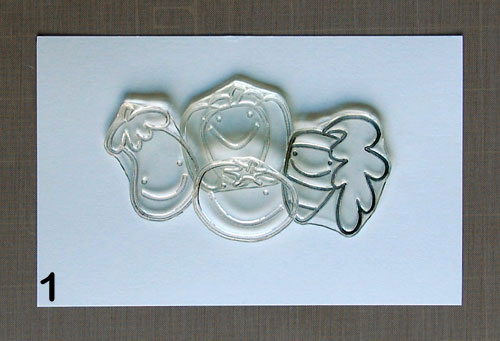
Vegtastic by Paper Smooches
Since ink does not absorb into Mask It film, the process of creating masks for stamps is a little different. Here’s how to do that:
Step 1: First decide how you’d like to layer your stamps. This will help to determine the order in which the images are stamped.
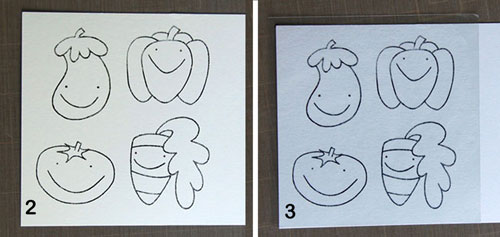
Step 2: Stamp each image onto scrap paper.
Step 3: Remove backing from film and adhere over images (all at once).
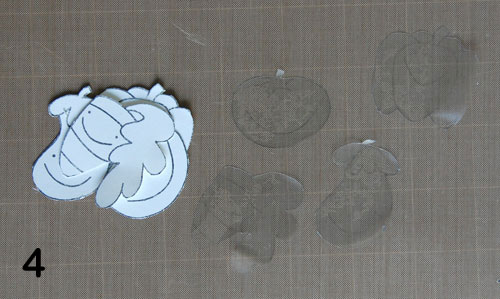
Step 4: Cut out images and carefully remove each mask.
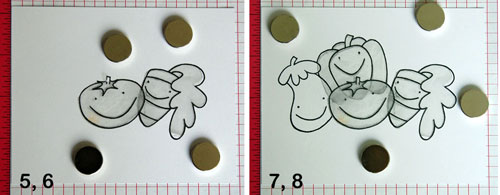
Step 5: Stamp tomato and adhere mask.
Step 6: Stamp carrot. Before applying the carrot mask, I carefully lifted the right side of the tomato mask and wiped away the ink (from the edge of the carrot). Since the ink just sits on top of the mask, wiping away the ink helped me to avoid transferring the ink to my fingers and then onto anything else. Once the ink was wiped away, I added the carrot mask.
Step 7: Stamp eggplant, wipe away ink from edge of tomato and apply eggplant mask.
Step 8: Stamp green pepper, wipe away ink from top of tomato mask and apply pepper mask.
Since I had a bit of room left, I stamped an additional pepper above the carrot.
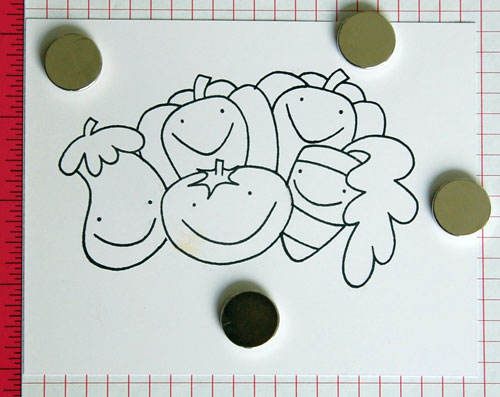
One big happy veggie family. 🙂
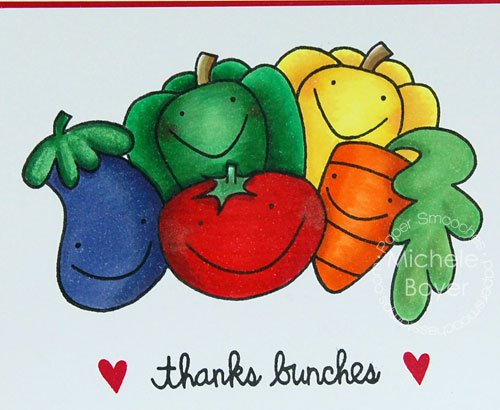
BV04, BV08, BV17, E31, E33, G03, G05, G07, G29, Y06, Y08, Y21, YR14, YR16, YR27
Thanks bunches for stopping by! ♥


3 responses to “Product Focus – X-Press It Mask It and Adhesive Sheets”