Monthly Archives: February 2016

Taylored Expressions March Preview – Congratulations on Your Wedding

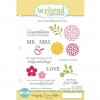
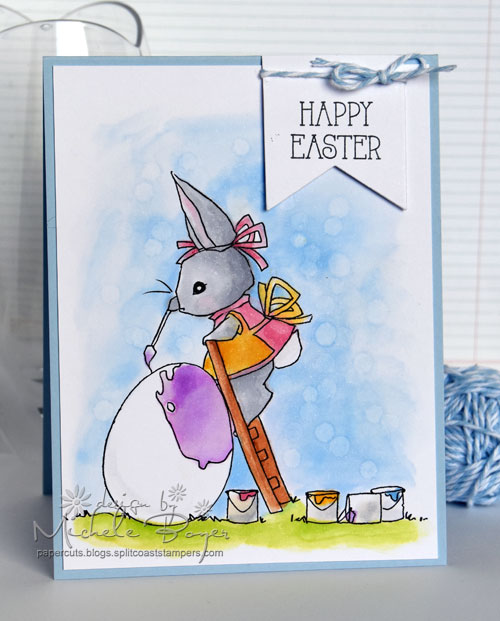
Hi everyone! Today I’m sharing a preview from Taylored Expressions‘ March 3rd release. Happily Ever After is a lovely wedding set, already available for purchase. This month TE releases coordinating dies. ♥

Michele Boyer - Taylored Expressions

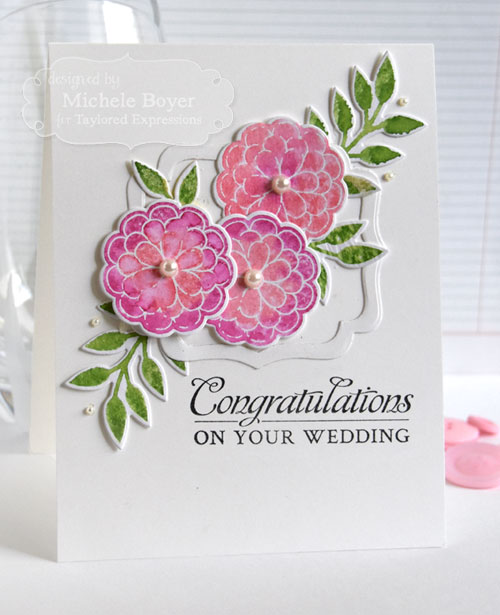
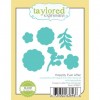
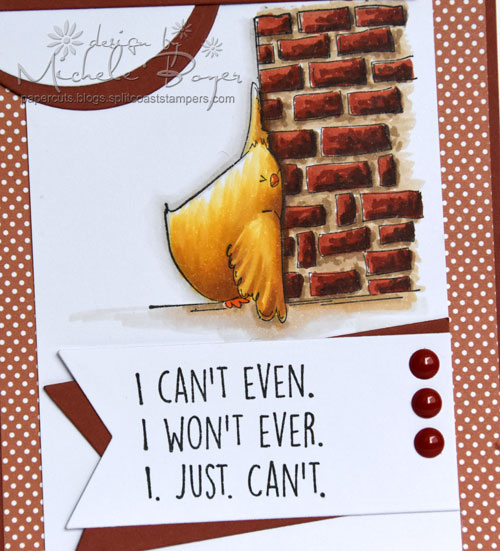
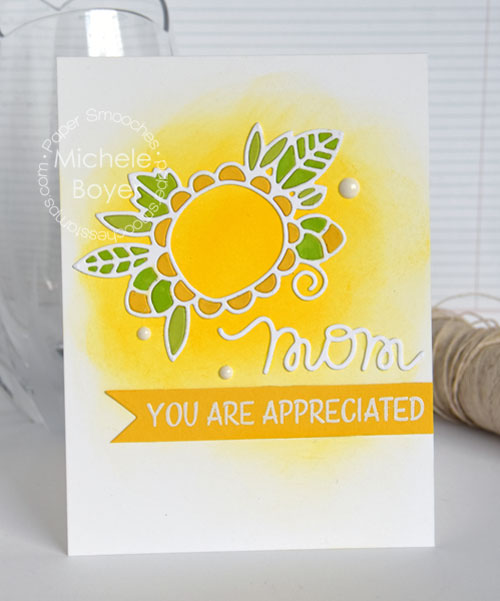
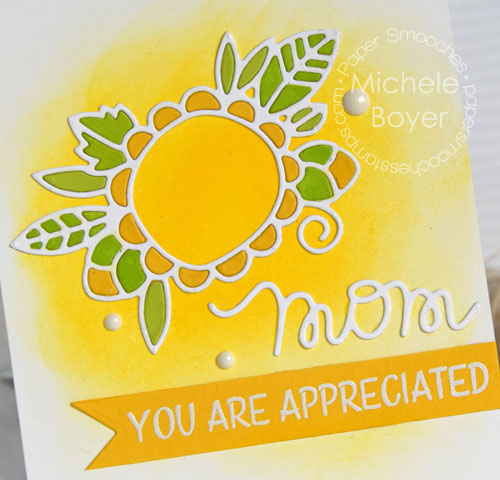
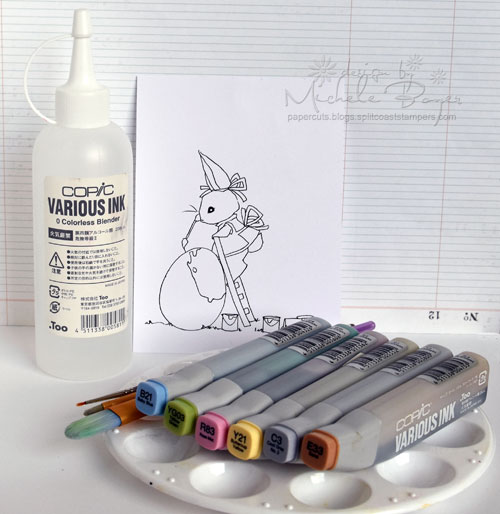
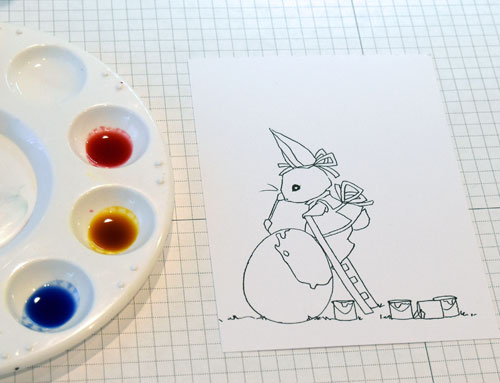
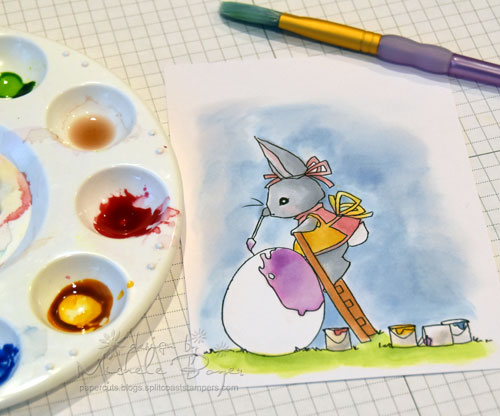
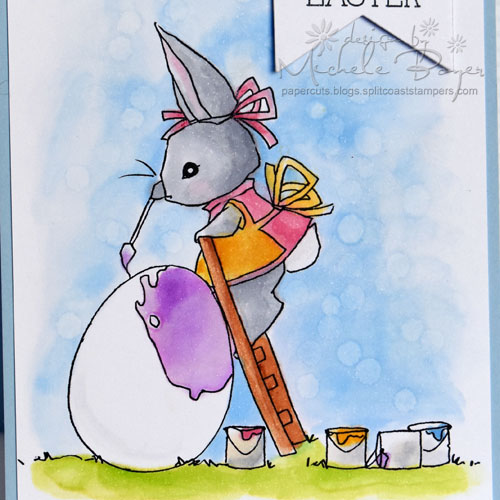
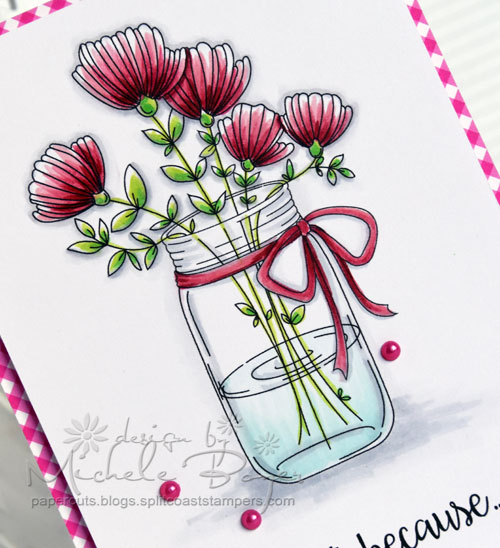
I used Distress Markers to color directly onto my stamps, spritzed with water then stamped onto Distress Watercolor paper.  The frame was created by aligning and taping in place two Label Stacklets 2 dies then die-cutting from Sugar Cube card stock.

Michele Boyer - Taylored Expressions

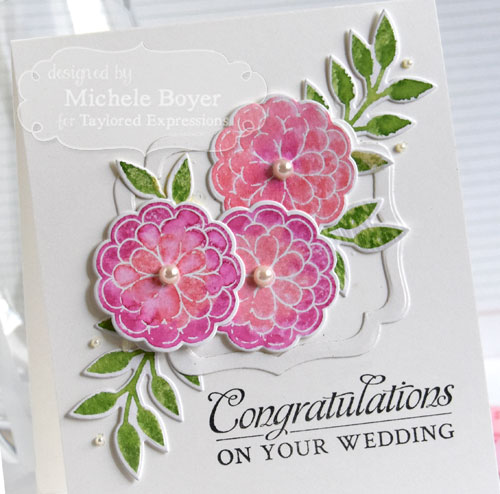
Distress markers – Mowed Lawn, Picked Raspberry, Worn Lipstick

Taylored Expressions is celebrating Release Week with some fabulous giveaways! Visit the TE Blog to answer Taylor’s Question of the Day for a chance to win a prize from the latest release!

question of the day

On the TE Blog you will also find a complete list of today’s participating designers, as well as new product information.

Thanks so much for visiting!  🙂

1amichele siggy

I. Just. Can’t.

Poor chick. I love her. I love her expression. I love her plastered to the wall. I love that the wall is brick. And that it is there to hold her upright. I think we can all relate. This image, by Stamping Bella, is from The Chicks Who “Couldn’t Even” stamp set.  **LOVE** And I’ve used last week’s {Mojo}Bella sketch (as seen here).

Michele Boyer - Stamping Bella

After stamping onto X-Press It Blending Card, I colored with Copic markers, dotting in all of the shading on the brick.

Michele Boyer - Stamping Bella

Copic markers – E08, E09, E31, E33, E40, E41, E42, E43, E74, Y21, YR07, YR23, W00, W1, W2

Next week’s challenge is super simple – add flowers to your card! Use any current Stamping Bella image then email your card to [email protected] by next Thursday to be featured on the SB blog and to be entered to win some Bella Bucks!  (All challenge details can be found HERE.)

As a reminder, there are only a few more days to purchase February’s Stamp of the Month, Uptown Girl Lucille Sends her Loveat 20% off. (On sale through February 29.)

Thanks for stopping by! Have a great day!

1amichele siggy

Paper Smooches March Release Hop

It’s Pep Rally week and we are here today to share a sampling of the NEW Paper Smooches MARCH 2016 release with you!  ONE new stamp set and FIVE new dies will be available to purchase at 8:00 p.m. PT on February 29th.  You will find our new products HERE once they go live.

To add extra fun to our hop, we are offering a $25 gift code to choose what you like from the PS online store.

Here are the details:

  • FOUR winners will be chosen at RANDOM from any of the design team blogs and the PS Blog to win the $25 prize.
  • Just leave a comment on any of the design team blogs listed below or the PS blog for your chance to win!  (You do not need to comment on all blogs to qualify but it increases your chances.)
  • Deadline: You have until midnight PT on Sunday,February 28th to leave a comment.
  • Please check the Paper Smooches blog on Monday, February 29th to see if you are one of the FOUR lucky winners.

To increase your chances of winning:

  • Tell us that you Facebooked about our blog hop.
  • Tell us that you Tweeted about our hop.
  • Tell us that you posted on your blog about our blog hop.

(That’s up to three extra chances to win on each blog!)

On my card I’ve used new Precious Mom sentiment, Mom Word die and Cute Cluster flower die.

Michele Boyer - Paper Smooches

To add just a bit of variation in the leaf colors, I used a YG01 Copic marker to color over some of the green card stock pieces.

Michele Boyer - Paper Smooches

Be sure to hop along and comment with the rest of the DT to increase your chances of winning one of the four $25 gift codes!

Thanks for visiting!  And happy hopping!  🙂

1amichele siggy

Copic Marker Storage: Art Case with DIY Inserts

Hi everyone! Today I’m sharing Copic‘s new Art Carrying Case and how my handy husband created removable inserts for the markers. This sturdy, lightweight case holds all 358 Sketch markers with extra room for accessories and comes in four colors. You can read a bit more about it here.

Black Case

Plastic marker cases, available here, fit inside, holding the markers upright, in place and nicely organized with room to spare.

Case filled with cases

I, however, don’t have any of those cases. After chatting with friends and doing a bit of Pinterest research, I found that many folks use fluorescent lighting ceiling panels as the markers, both Sketch and Caio, fit perfectly within the squares.

Case-open

From one panel (<$20), my husband used a Sawzall with a fine blade to cut two pieces, (each is 26 x 19 squares) to fit the inside of the case. He also cut two pieces of foam core board to 17 1/8″ x 3 1/2″.

Case-supplies

One grid is placed on the bottom, the core board is placed along each long side with the second grid placed on top. A marker inserted at each corner holds the core boards and grids perfectly in place. My husband is so clever. ♥

Case-corners2

With 26 x 19 squares, I can hold 494 markers (haha).  I don’t have all 358 markers, but if I did, I’d have plenty of room to spare. With the extra space, I find it helpful to leave a bit of room between the color groups.

Case-top-view

I like that the panels are easily removable so the case is great for other items as well. When not in use, I store the panels, strap and keys inside.

Case-inserts-storage

Thanks so much for visiting! Have a great day!

1amichele siggy

Happy Easter: Water Coloring with Copics

About a week or so ago I stumbled upon an adorable digi-image titled Easter Art by A Day for Daisies. This little bunny is the sweetest, high on the ladder painting her rather large egg. So cute.

Michele Boyer - A Day for Daisies

Instead of using traditional paints to watercolor, I used Various Ink (refills for Copic markers) and Colorless Blender Solution.

Supplies

Simply drop each ink, as well as Blending Solution, into the wells of a paint palette. Dip brush into Blending Solution then ink, then add to your image.

Note: The Colorless Blender will lighten the ink so choose shades a bit darker than the anticipated results.

Happy-Easter-Step-1

To add depth, additional ink may be applied once the initial application is dry.

Copic markers may be scribbled onto a palette or acrylic sheet then picked up with the dampened brush, but I find it much easier to use Various ink so that a larger amount of ink is ready at all times.  This is especially helpful in coloring large areas.

Happy-Easter-Step-2

To add a bit more interest to the background, I dipped the end of a q-tip into Blender Solution then dotted over the background. The Blender Solution lightens or “pushes” the color aside to create the lighter areas.

Michele Boyer - A Day for Daisies

Copic – B21, C3, E33, R83, V09, Y21

I just love her. ♥

Thanks so much for visiting today!

1amichele siggy

Stamping Bella – Dear Best Friend…

Hi everyone! Today I’m sharing one last sample before Stamping Bella‘s release tomorrow! You’ll be able to find all of the amazing new stamps and dies HERE. (I hope you have your list ready!)

Meet Tiny Townie Melissa Loves Movies. She is so cute with her little chick friends. I ♥ her.

Michele Boyer - Stamping Bella

I colored with Copics then paired her with a pretty Pebbles Fun in the Sun 6×6 patterned paper.

Michele Boyer - Stamping Bella

Copic markers – BG10, BG11, BG13, BG18, C00, C1, C2, C3, E31, E35, E40, E41, E70, E71, E74, R81, R83, R56, RV32, Y21, YR07, YR23

To see the new images featured today, check out the Stamping Bella blog HERE. While there, don’t forget to leave a comment for your chance to win one of the featured images as well as its coordinating die! If you missed any of the previous days’ sneak peeks, be sure to leave comments there too!

Thanks for visiting!

1amichele siggy

Stamping Bella – Keep Your Head up, Princess

Hi everyone! Today I have another preview of Stamping Bella‘s February 23rd release.  I’d say it’s my favorite, but like Em, I can’t choose just one.

This is Edna the Diva. Isn’t she lovely? And how about the sentiment?  I LOVE it.

Michele Boyer - Stamping Bella

After stamping her onto X-Press It Blending Card and coloring with Copic markers, I colored over her boa with a clear Wink of Stella glitter bush.

Once complete, the front panel was raised on 1/2″ X-Press It foam tape.

Michele Boyer - Stamping Bella

Copic markers – BG10, BG11, BG13, BG70, C00, C1, C2, E00, E01, E11, RV11

To see the new images featured today, check out the Stamping Bella blog HERE. While there, don’t forget to leave a comment for your chance to win one of the featured images as well as its coordinating die! If you missed any of the previous days’ sneak peeks, be sure to leave comments there too!

All images and dies will be available for purchase February 23rd HERE.

Thanks for visiting!

1amichele siggy

Stamping Bella Preview-Mason Jar of Flowers

Hi everyone.  I have another Stamping Bella preview to share! Today I’ve used Mason Jar of Flowers. So simple and so sweet.  🙂

Michele Boyer - Stamping Bella

The image was stamped onto X-Press It Blending Card and colored with Copic markers. Specific markers used are listed below the close-up (below).

Michele Boyer - Stamping Bella

Copic markers – BG0000, BG10, C00, C1, C2, R59, R89, RV32, YG03, YG09

To see the new images featured today, check out the Stamping Bella blog HERE. While there, don’t forget to leave a comment for your chance to win one of the featured images as well as its coordinating die! If you missed any of the previous days’ sneak peeks, be sure to leave comments there too!

All images and dies will be available for purchase February 23rd HERE.

Thanks for visiting!

1amichele siggy

Happy Birthday 1-2-3

Hello, everyone. Are you enjoying Stamping Bella‘s February release sneak peeks? I ♥♥♥♥♥ SB releases! Just in case you’ve missed them, be sure to hop on over to the Stamping Bella blog to see previews and hear fun stories of how the images came to be. (They really are entertaining.) 🙂  Leave a comment on each day’s post for your chance to win one of the featured images along with its coordinating die!

It seems we were just here, sharing a Friday challenge. I can’t believe how quickly this week has passed.

Michele Boyer - Stamping Bella

Last week’s challenge was to create a 1, 2, 3 card, meaning use one of something, two of something and three of something.  I used one patterned paper, two stamps and three sequins (along with 17 Copic markers, haha).

I used Uptown Girl Ava Loves to Celebrate. She was stamped onto X-Press It Blending Card then colored with Copics. The sentiment, broken into two lines, was stamped from Sanford the Birthday Boy Stuffie.

Michele Boyer - Stamping Bella

Copic markers – C00, C1, C2, E00, E11, E31, E35, E53, G29, R00, R01, R85, RV32, RV34, Y21, YG07, YG09

Next week’s challenge is a {Mojo}Bella sketch:

Feb 26

Use any current Stamping Bella image then email your card to [email protected] by next Thursday to be featured on the SB blog and to be entered to win some Bella Bucks!  (All challenge details can be found HERE.)

And one final reminder, Stamp of the Month Uptown Girl Lucille Sends her Love is 20% off through February 29.

Thanks for stopping by! Have a great day!

1amichele siggy

Stamping Bella Preview – Row of Bunny Wobbles

Hi everyone! Today I have another preview of Stamping Bella‘s February 23rd release. I adore these little bunnies, no matter which direction they may be facing.  🙂

I’ve used Row of Bunny Wobbles with a sentiment from another new release, Easter Bunny Chick.

Michele Boyer - Stamping Bella

I kept the layout very simple and used only a small handful of markers to color the image- grays for shading and light pink for ears and feet. Very quick and easy. And oh so cute!

Michele Boyer - Stamping Bella

Copic markers – BG10, R00, R01, C00, C1

To see the new images featured today, check out the Stamping Bella blog HERE. While there, don’t forget to leave a comment for your chance to win one of the featured images as well as its coordinating die!

Thanks for visiting!

1amichele siggy