Monthly Archives: July 2016

A little crosshatch here, a little crosshatch there

Hi everyone!  I stepped outside of my comfort zone today to give crosshatching a try. Instead of using a fine Copic Multiliner, I tried an IC dipping pen and ink.

Youre-Awesome-500

While Multiliners can certainly be used for crosshatching, the dipping pen and ink allow varied line thicknesses (from super fine to quite thick) as well as a very smooth application.  (Info on crosshatching can be found HERE.)

crosshatch_101

I stamped Paper SmoochesSpectrum images onto super smooth X-Press It Blending Card using Taylored Expressions Oreo hybrid ink, added the crosshatching then colored in just a bit with Copic markers. (The super shimmery heart sequins are from Simon Says Stamp.)

Youre-Awesome-CU

You can find a general introduction to dipping pens HERE, and a bit about handlettering, which has become very popular, HERE.

Thanks so much for visiting!

1amichele siggy

I Love You Like I Love My Morning Coffee (stamping bella)

Hi everyone! It’s time for another challenge with Stamping Bella! This week we are creating One Layer Wonders.

I decided to give “no line coloring” with Copics another try using new donttalktomebeforemycoffeeABELLA. (I love her.)

Michele Boyer - Staming Bella

I first stamped using a light natural ink then bravely started my coloring. To give the appearance of a one layer card, I cut my X-Press It Blending Card to fit the card front then added a strip of ribbon and tied a bit of white string.

Michele Boyer - Staming Bella

Copic markers – B91, B93, B97, B97, BV000, E00, E01, E11, E31, E33, E35, E37, E41, E42, E43, R20, R27, R39, R59, W00, W1, Y21

Next week we’re adding buttons, dots or sequins to our cards. Use any current Stamping Bella image then email your card to [email protected] by next Thursday to be featured on the SB blog and to be entered to win some Bella Bucks!  (All challenge details can be found HERE.)

Thanks for visiting!

1amichele siggy

Paper Smooches August Release Hop

It’s Pep Rally week and we are here today to share a sampling of the NEW Paper Smooches AUGUST 2016 release with you!  ONE new stamp sets and FIVE new dies will be available to purchase at 8:00 p.m. PT on July 31st.  You will find our new products HERE once they go live.

To add extra fun to our hop, we are offering a $25 gift code to choose what you like from the PS online store.

Here are the details:

  • FOUR winners will be chosen at RANDOM from any of the design team blogs and the PS Blog to win the $25 prize.
  • Just leave a comment on any of the design team blogs listed below or the PS blog for your chance to win!  (You do not need to comment on all blogs to qualify but it increases your chances.)
  • Deadline: You have until midnight PT on Sunday, July 31st to leave a comment.
  • Please check the Paper Smooches blog on Monday, August 1st to see if you are one of the FOUR lucky winners.

To increase your chances of winning:

  • Tell us that you Facebooked about our blog hop.
  • Tell us that you Tweeted about our hop.
  • Tell us that you posted on your blog about our blog hop.

(That’s up to three extra chances to win on each blog!)

Today I’ve used new Pencil dies and Noteworthy stamp set.  (Super cute pencil, yes?)

Michele Boyer - Paper Smooches

The clipboard clamp, boxes and checks were stamped using Clipboards 2. The “sheet of paper” is adhered directly to the card base at the top and with Kool Tak clear foam squares at the bottom to help create a more realistic appearance. I used a strip of 1/4″ X-Press It foam tape beneath the top edge of the clamp for a bit more lift in that area.

Michele Boyer - Paper Smooches

Be sure to hop along and comment with the rest of the DT to increase your chances of winning one of the four $25 gift codes! Good luck!

Thanks for visiting!  And happy hopping!  🙂

1amichele siggy

Wishing You a Sunny Day (paper smooches)

Hi everyone! Today I have a super summery card to share using the new Palm Tree die now available from Paper Smooches.

Michele Boyer - Paper Smooches

I die-cut the palm tree, as well as Power Rays, Borders 1 and Waves from watercolor paper. After painting with Tambi Gansai watercolors, I added sparkle to the waves using a clear Wink of Stella glitter brush. (The coconuts were colored with Copic markers.)

Michele Boyer - Paper Smooches

The sentiment is from new Summer Sampler, free through 7/31 with any $60 retail order.

Oh, how I wish I had that view right now…

Thanks so much for visiting today!

1amichele siggy

Obey the Poodle (taylored expressions)

Hi everyone! Today I’m sharing a card I created for a friend using Taylored Expressions‘ recently released Mimi stamp and die combo.

Michele Boyer - Taylored Expressions

I stamped the poodle onto X-Press It Blending Card using Oreo hybrid ink and colored with Copics, using “sloppy dots” to fill in the fluff. I chose that sentiment because I think it’s funny.  🙂

The patterned paper is Doodlebug’s Puppy Love (6×6), and the heart, layered over Banner Stacklets 1, was die-cut using Build a Tag 2.

Michele Boyer - Taylored Expressions

Copic markers – BG10, BG70, E23, E25, E27, E57, E59, R02, W00, W1, W2, YG01, YG03, YG23, YG25

Thanks so much for visiting! 🙂

1amichele siggy 

May All Your Wishes Come True (stamping bella)

Hi everyone! It’s time for another {Mojo}Bella sketch with Stamping Bella! (They’re my favorite type of challenge.) 🙂

This week I’ve used Balloonabella from the new Bella 2.0 line.

Michele Boyer - Stamping Bella

I followed the sketch found at the bottom of this post, colored with Copic markers and added dots of Stardust Stickles to the center of each flower on her dress.

Michele Boyer - Stamping Bella

Copic markers – C00, C1, E00, E01, E11, E31, E35, E40, E41, E42, R01, R22, R24, R56, R59, YR15, YR23

Next week’s challenge is to create a One Layer Wonder card. (Yes, one layer. You can do it!) 🙂

Use any current Stamping Bella image then email your card to [email protected] by next Thursday to be featured on the SB blog and to be entered to win some Bella Bucks!  (All challenge details can be found HERE.)

Thanks for visiting!

1amichele siggy 

Let’s Shell-abrate (paper smooches)

Hi everyone! Just popping in to share a card I created using a couple of Paper Smooches‘ latest releases – Shell dies and Summer Sampler. Summer Sampler is this month’s TAM (Thanks a Million) set, free with any $60 retail order through July 31st.

Michele Boyer - Paper Smooches

I die-cut the shells from watercolor paper then painted with super shimmery (and very inexpensive) Niji Pearlescent watercolor paints. (Link below.)

Michele Boyer - Paper Smooches

The fun sentiment was stamped in white pigment ink then white embossed.

Thanks so much for visiting today!

1amichele siggy

You’ve Aged Beautifully (Paper Smooches Clearance)

Hi everyone! Today I’m using one of my all-time favorite stamp sets from Paper SmoochesKnick Knacks, which is currently available for 50% off in the Clearance Section of the PS store. (Great deals! Be sure to check them out!)

Along with my favorite little ragdoll stamp, I’ve used two screen tones. As I mentioned in this post, screen tones (printed, transparent, repositionable stickers) are so easy to use. In paper crafting, they’re great for creating pattern on any color of card stock or Copic colored area, or for filling empty areas with pattern (i.e. “paper piecing,” backgrounds, etc.).

Youve-Aged-Beautifully-500

I used a gingham screen tone over red card stock to very quickly create a patterned background.

Youve-Aged-Beautifully-CU2

In the photo above, I slipped the card stock between the screen tone and the backing paper to see the final result. I decided I liked it so I removed the backing paper entirely, laid the screen tone over the card stock and applied pressure using the burnisher to permanently adhere. (Before burnishing, the screen tone is respositionable so it’s very easy to move from one spot to another, or from one paper to another.)


Youve-Aged-Beautifully-CU

I followed the same steps described in this post to adhere the floral screen tone around the rag doll. Once the unwanted area was cut away, I used an E43 Copic to dot the centers of the flowers. Once the dotted centers were dry, the Copic ink stayed in place.

Screen Tone Basics

You can read more about screen tones HERE in the IC, Inc. section of the Imagination International, Inc. website, and you can find all available screen tones (over 200!) HERE.

Thanks so much for visting today!

1amichele siggy 

Christmas Hugs (in July)

Hi everyone!  TGIF! This has been a week I am so very glad to bid adios.

Last week’s challenge with Stamping Bella was to create with a Christmas in July theme. I’ve used Maggie with Penguin from the Mo Manning Collection (with partial sentiment) and Edna Blows a Kiss Hanging Sign Base with coordinating die.

Michele Boyer - Stamping Bella

After stamping the girl and penguin onto X-Press It Blending Card, I colored with Copics, masked and then blended the brick over top using a stencil and three inks. A Signo white opaque pen added quick little dots of falling snow.

Michele Boyer - Stamping Bella

Copic markers – BG96, E00, E01, E11, E40, G46, R20, R27, R37, R56, R59, W4, W5, W7, Y21, YG99

I used a stamp positioner to place the partial sentiment within the sign then die-cut and popped up over the brick.

Next week’s challenge includes this {Mojo}Bella sketch:

July 22

Use any current Stamping Bella image then email your card to [email protected] by next Thursday to be featured on the SB blog and to be entered to win some Bella Bucks!  (All challenge details can be found HERE.)

Thanks for visiting!

1amichele siggy

Using Screen Tones to Create Quick and Easy Backgrounds

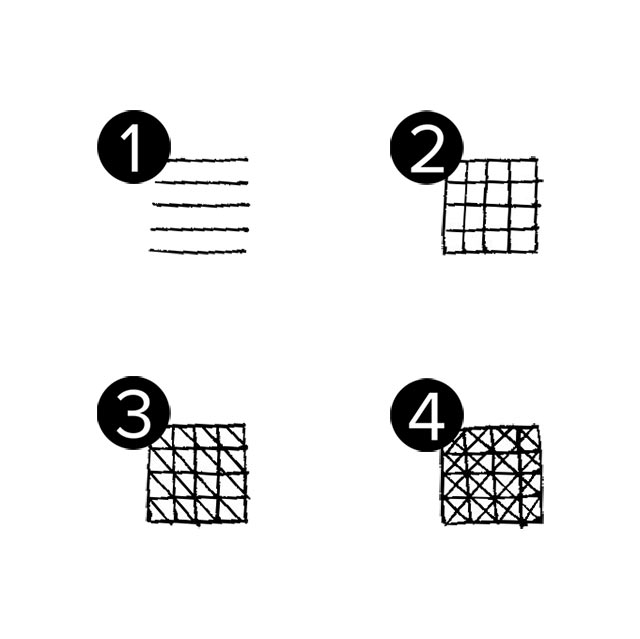
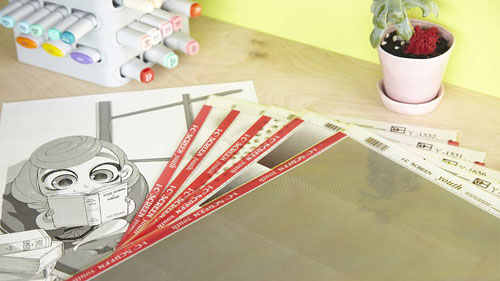
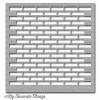
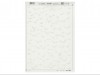
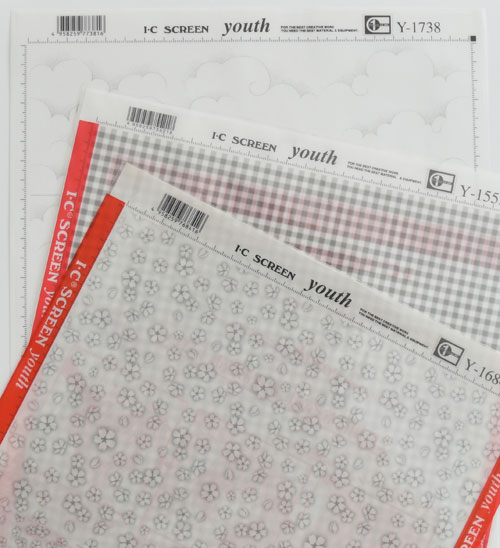
Hi everyone!  I tried a new (to me) product yesterday that I want to share. Available in the Imagination International, Inc. store are Screen Tones. In a nutshell, they are clear, printed stickers used to create backgrounds or to cover areas where you might otherwise stamp or sketch in designs.  They are transparent, repositionable, can be layered, mixed and matched and are incredibly easy to use! (You can find more detail HERE).

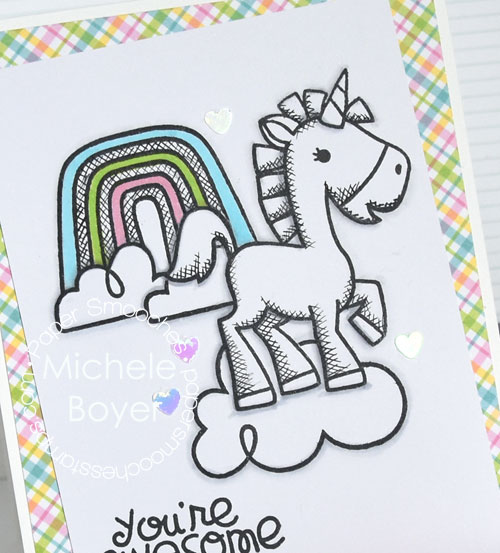
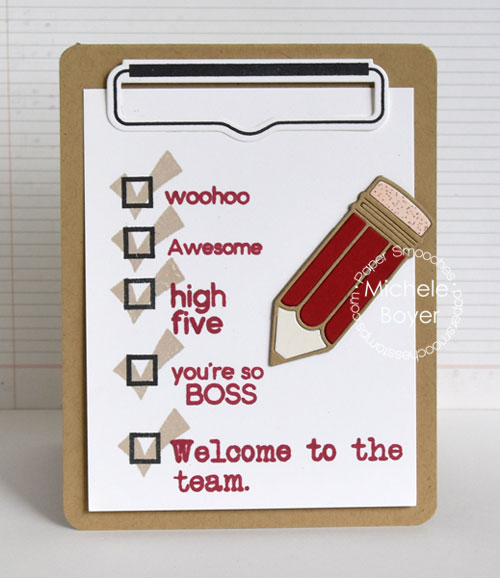
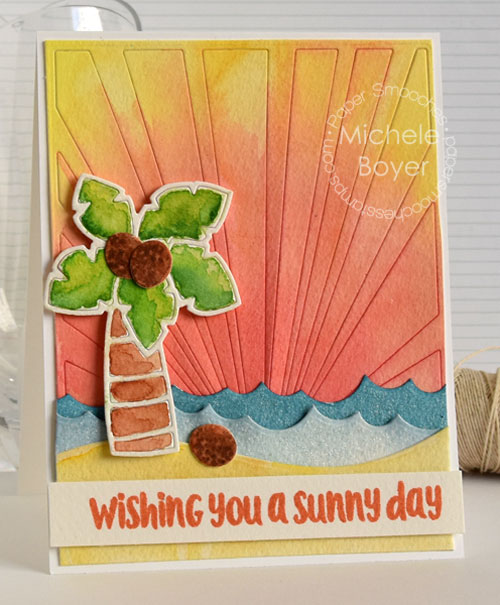
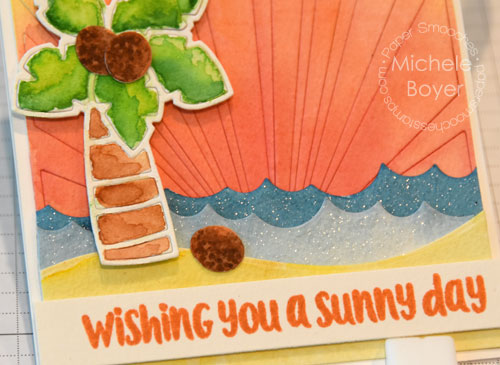
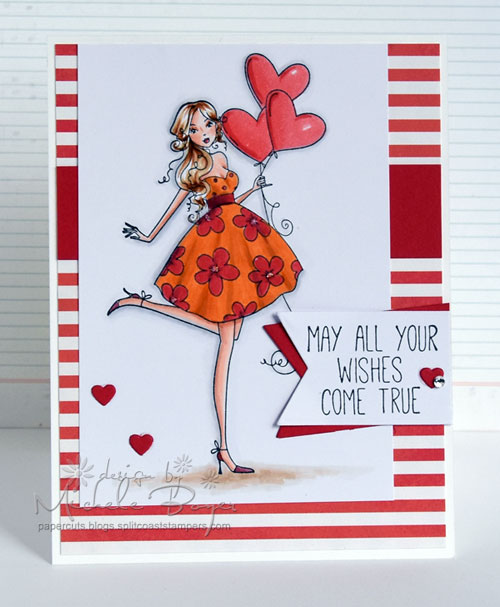
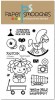
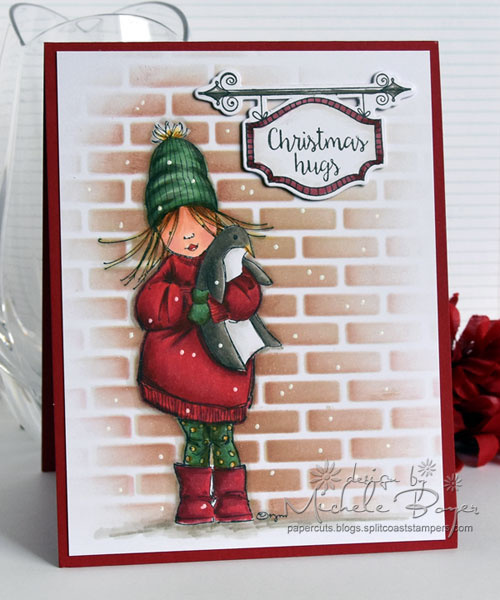
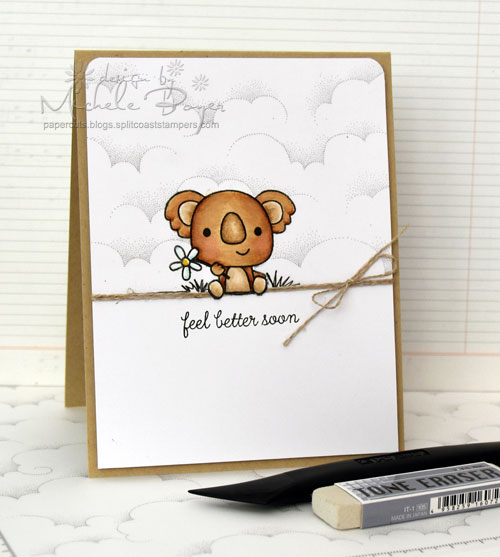
On my card, I paired a Sky Screen Tone with Reverse Confetti‘s cute Bear Hugs koala.

Michele Boyer - Reverse Confetti

Each screen tone sheet is 12.5″ x 9″ so there is plenty of area for use on many cards. You can check out the (over) 200 prints HERE.

Feel-Better-Soon-Screentones

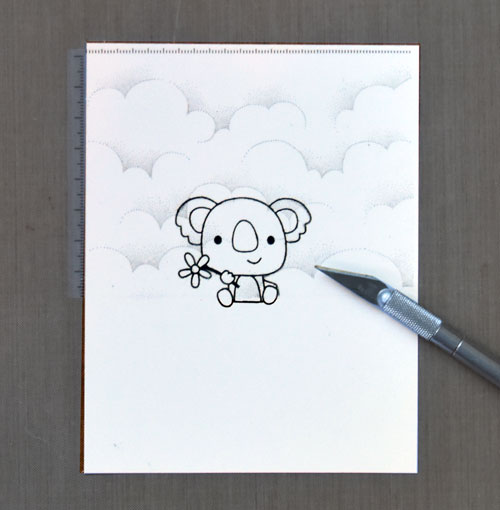
They are super easy to use! I first stamped my image onto X-Press It Blending Card then cut a piece of Sky screen tone to size*. After removing the backing, I applied the screen tone over my image, pressing just enough (very lightly) to adhere the sheet over my card stock. I then gently used a kraft knife to cut away the portion of the screen tone that covered my image. My knife blade cut very easily through the screen tone without cutting through the card stock.

* It is recommended that the screen tone be cut to size then layed over the image without removing the backing, using a knife to cut away the excess screen tone and then removing the backing and placing the screen tone over the card stock/image. I removed the backing, then cut, using a gentle hand with my knife and it worked fine. If I were using a screen tone on a more artistic/”special to me” piece, I would have followed the adviced instructions, leaving the backing in place to protect my artwork. If I had accidentally cut through to the card stock here, I could easily restamp the bear so I wasn’t overly concerned with cutting through (but I tried not to).

Feel-Better-Soon-ST1

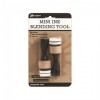
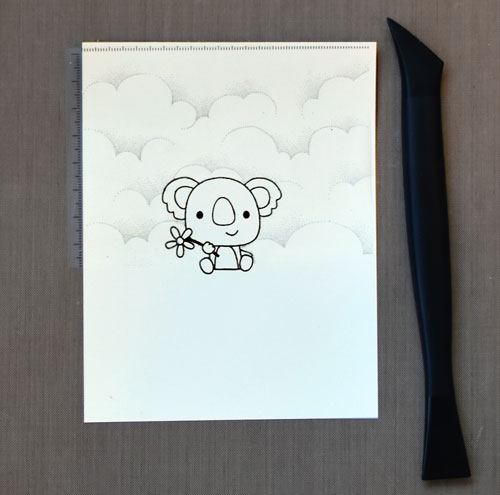
Once the outline was cut, I used the tip of my blade to peel away the portion of the screen tone covering the image. I then firmly adhered the screen tone to the card stock using a burnishing tool. There are different sizes available depending on the size of the are you want to burnish. You can see all HERE.  I used this one.

Feel-Better-Soon-ST2

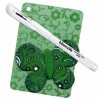
I then colored my image with Copic markers and drew in some grass using a 0.3 black Multiliner. Multiliners can be used on top of the screen but the ink requires drying time or it will smudge.

Michele Boyer - Reverse Confetti

Copic markers – BG11, E31, E33, E35, E41, E42, E43, R20, Y19

There was a small area of cloud pattern at the bottom left that I did not want so I used a Tone Eraser to easily remove it.  I added linen thread to camoflauge the bottom edge of the screen tone and used my kraft knife to cut around the bear’s feet, allowing them to hang over the thread.

I’ll be back soon with another project using screen tones!  (They’re super cool!)

Thanks for visiting!

1amichele siggy