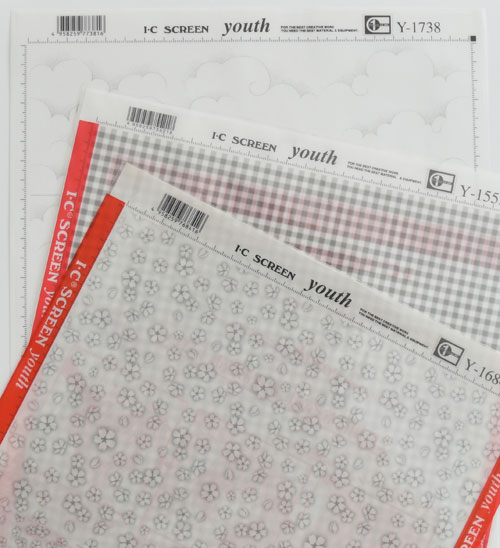
Hi everyone! I tried a new (to me) product yesterday that I want to share. Available in the Imagination International, Inc. store are Screen Tones. In a nutshell, they are clear, printed stickers used to create backgrounds or to cover areas where you might otherwise stamp or sketch in designs. They are transparent, repositionable, can be layered, mixed and matched and are incredibly easy to use! (You can find more detail HERE).
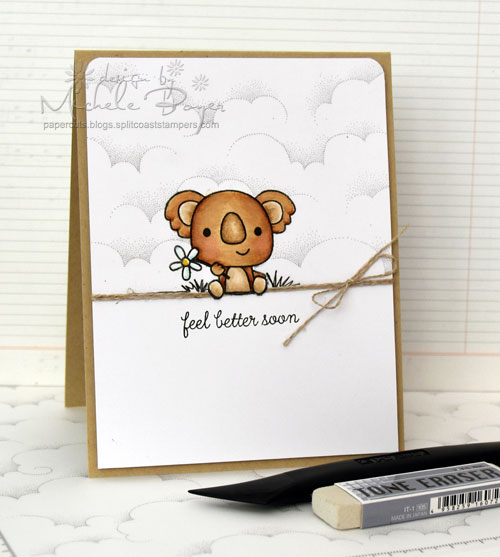
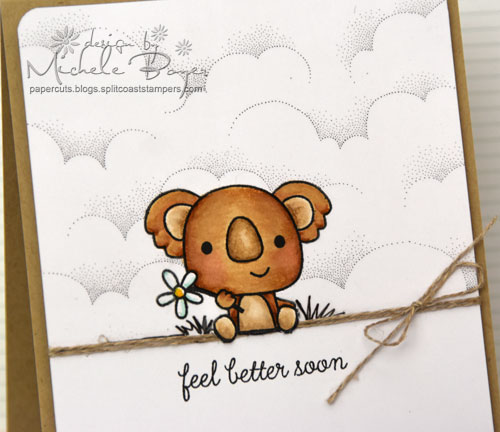
On my card, I paired a Sky Screen Tone with Reverse Confetti‘s cute Bear Hugs koala.
Each screen tone sheet is 12.5″ x 9″ so there is plenty of area for use on many cards. You can check out the (over) 200 prints HERE.
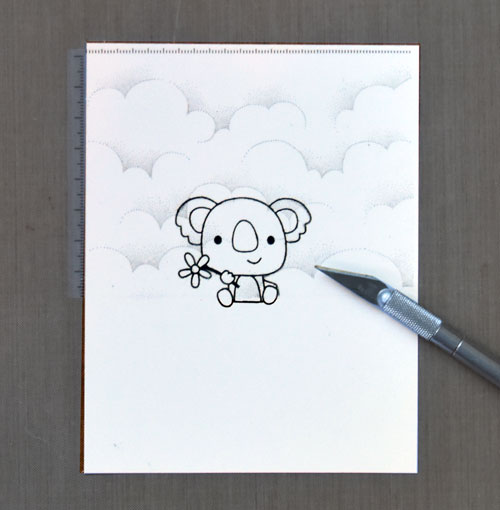
They are super easy to use! I first stamped my image onto X-Press It Blending Card then cut a piece of Sky screen tone to size*. After removing the backing, I applied the screen tone over my image, pressing just enough (very lightly) to adhere the sheet over my card stock. I then gently used a kraft knife to cut away the portion of the screen tone that covered my image. My knife blade cut very easily through the screen tone without cutting through the card stock.
* It is recommended that the screen tone be cut to size then layed over the image without removing the backing, using a knife to cut away the excess screen tone and then removing the backing and placing the screen tone over the card stock/image. I removed the backing, then cut, using a gentle hand with my knife and it worked fine. If I were using a screen tone on a more artistic/”special to me” piece, I would have followed the adviced instructions, leaving the backing in place to protect my artwork. If I had accidentally cut through to the card stock here, I could easily restamp the bear so I wasn’t overly concerned with cutting through (but I tried not to).
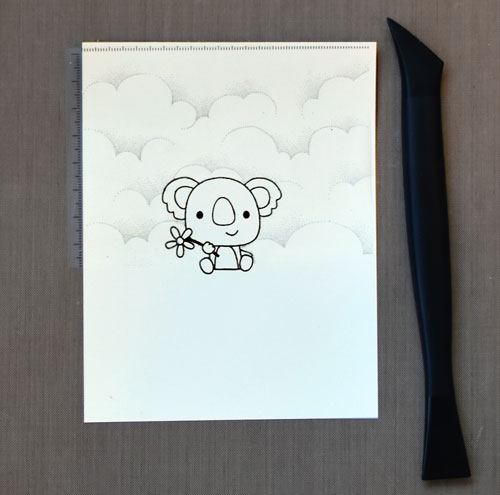
Once the outline was cut, I used the tip of my blade to peel away the portion of the screen tone covering the image. I then firmly adhered the screen tone to the card stock using a burnishing tool. There are different sizes available depending on the size of the are you want to burnish. You can see all HERE. I used this one.
I then colored my image with Copic markers and drew in some grass using a 0.3 black Multiliner. Multiliners can be used on top of the screen but the ink requires drying time or it will smudge.
There was a small area of cloud pattern at the bottom left that I did not want so I used a Tone Eraser to easily remove it. I added linen thread to camoflauge the bottom edge of the screen tone and used my kraft knife to cut around the bear’s feet, allowing them to hang over the thread.
I’ll be back soon with another project using screen tones! (They’re super cool!)
Thanks for visiting!





6 responses to “Using Screen Tones to Create Quick and Easy Backgrounds”