Monthly Archives: December 2016

Paper Smooches January Release is Turtley Awesome!

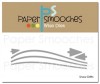
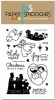
It’s Pep Rally week and we are here today to share a sampling of the NEW Paper Smooches JANUARY 2017 release!  TWO new stamp sets and FIVE new dies will be available to purchase at 8:00 p.m. PT on December 30th. You will find our new products HERE once they go live.

To add extra fun to our hop, we are offering a $25 gift code to choose what you like from the PS online store.

Here are the details:

  • FOUR winners will be chosen at RANDOM from any of the design team blogs and the PS Blog to win the $25 prize.
  • Just leave a comment on any of the design team blogs listed below or the PS blog for your chance to win!  (You do not need to comment on all blogs to qualify but it increases your chances.)
  • Deadline: You have until midnight PT on Sunday, January 1st to leave a comment.
  • Please check the Paper Smooches blog on Monday, January 2nd to see if you are one of the FOUR lucky winners.

To increase your chances of winning:

  • Tell us that you Facebooked about our blog hop.
  • Tell us that you Tweeted about our hop.
  • Tell us that you posted on your blog about our blog hop.

(That’s up to three extra chances to win on each blog!)

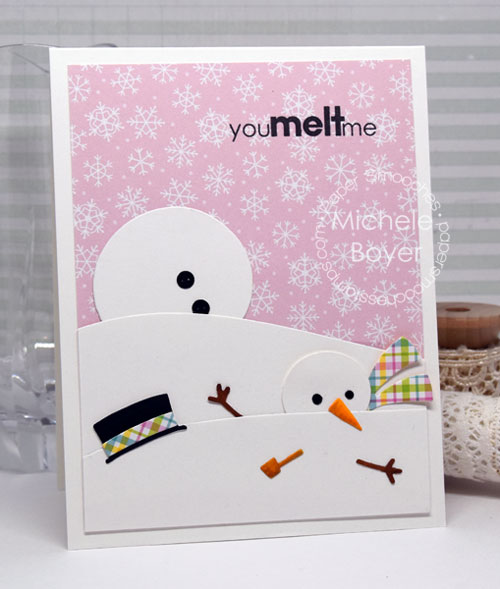
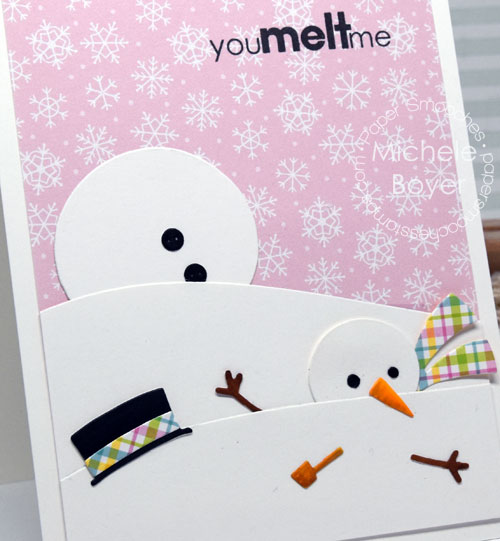
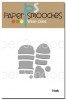
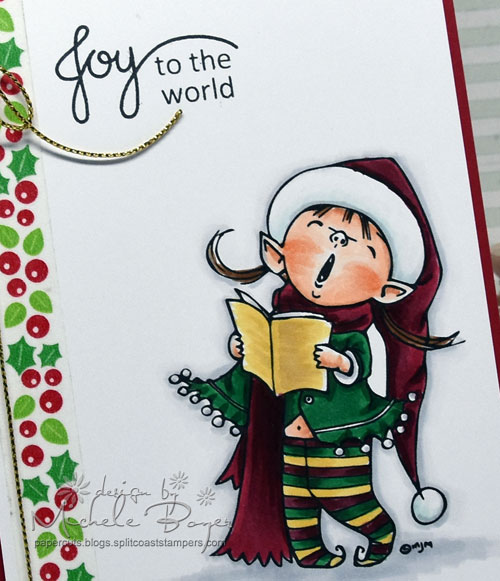
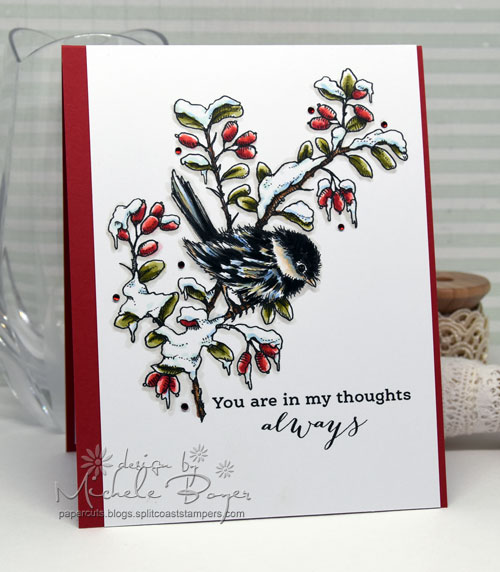
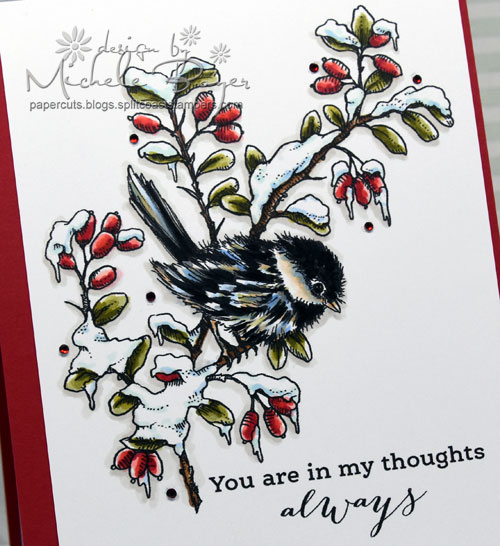
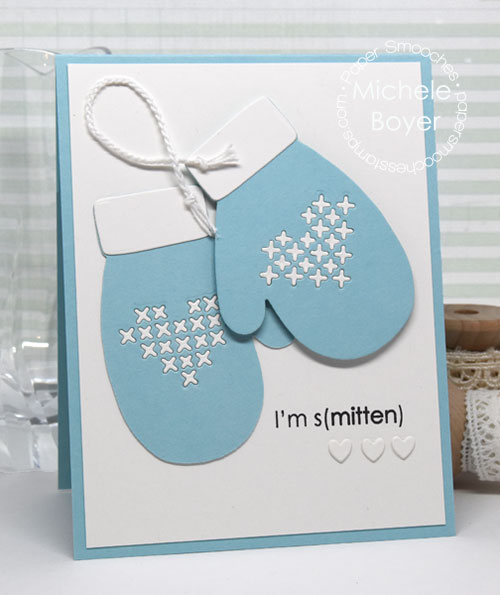
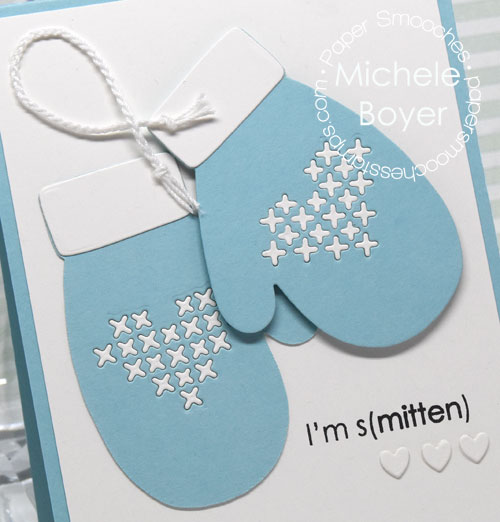
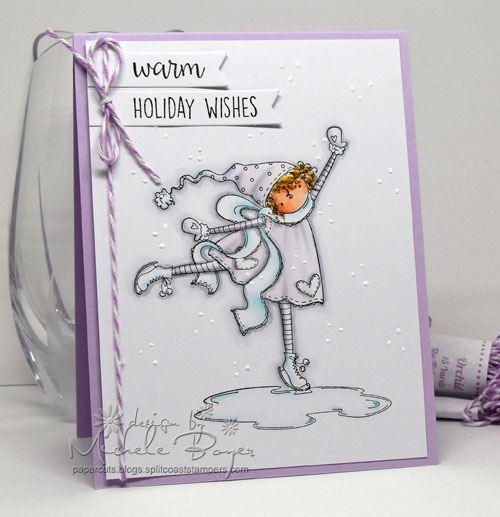
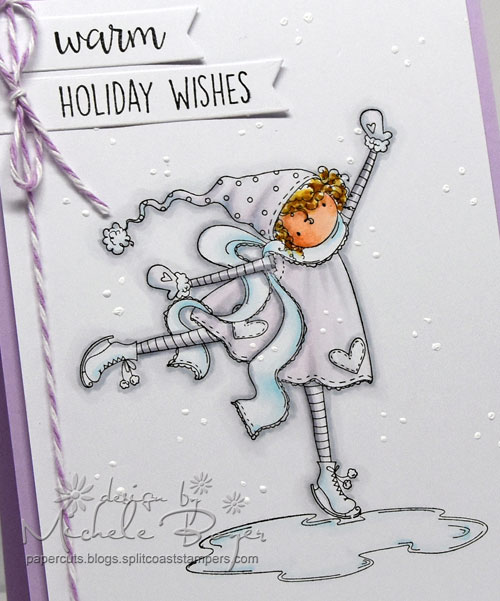
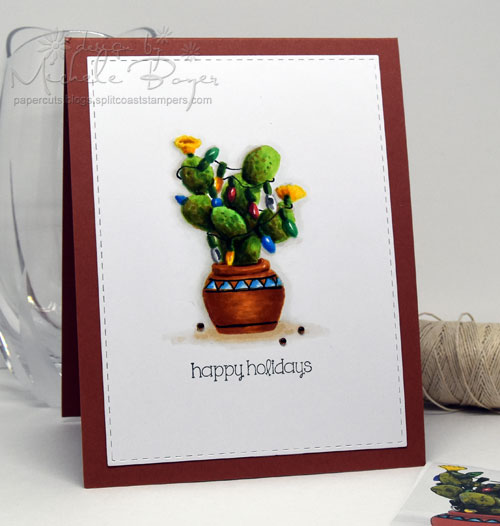
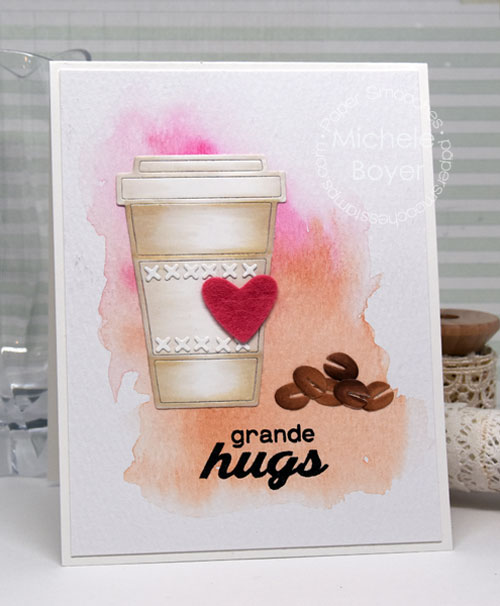
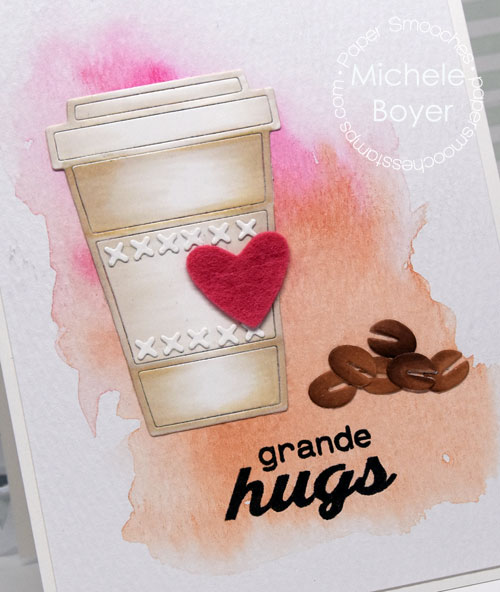
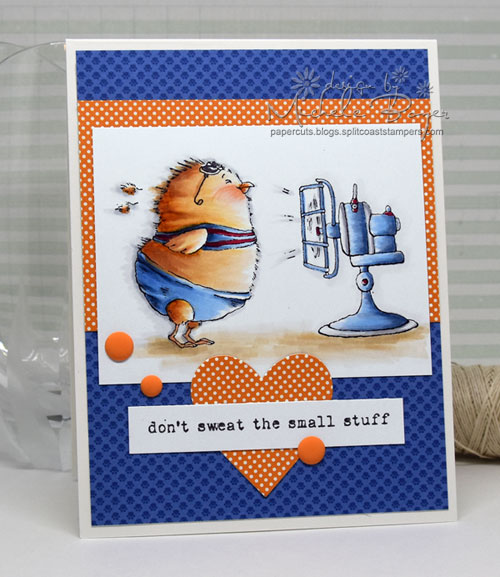
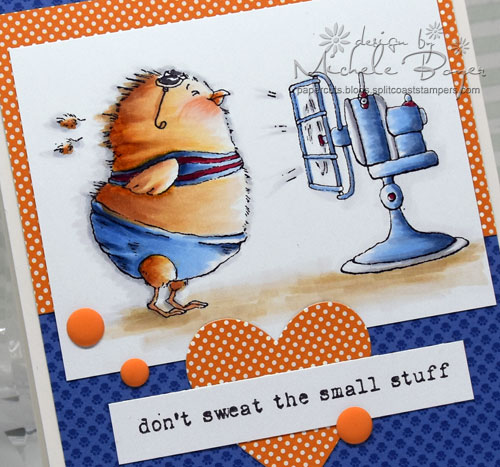
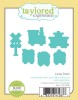
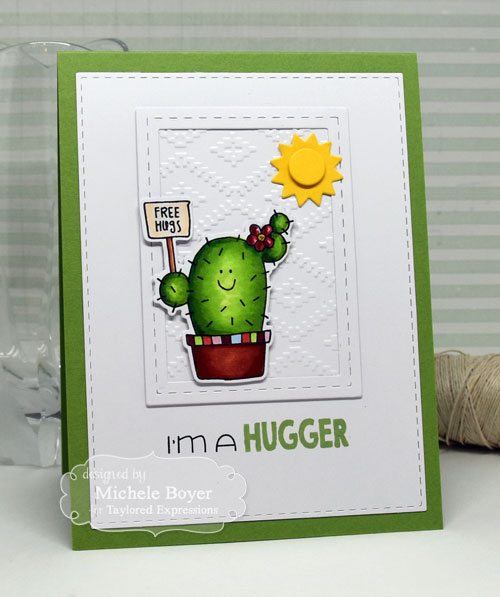
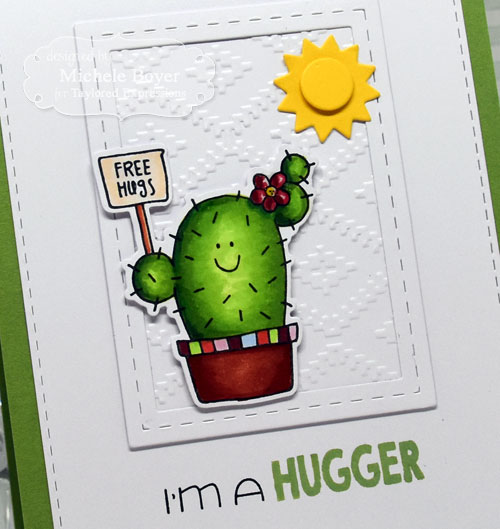
On my card I used the CUTEST Courteous Cuties stamps and dies with Ocean Scene dies. Oh gosh, I adore this set, and I can’t tell you how happy I am to see more of Kim’s critters. SO happy! (And I **love** the sentiments.)  🙂

Michele Boyer - Paper Smooches

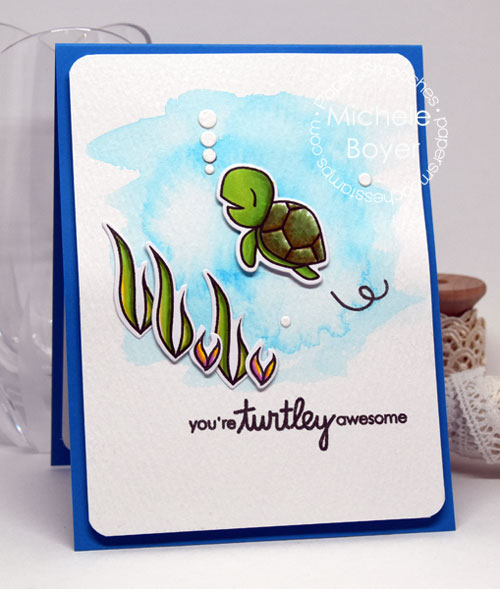
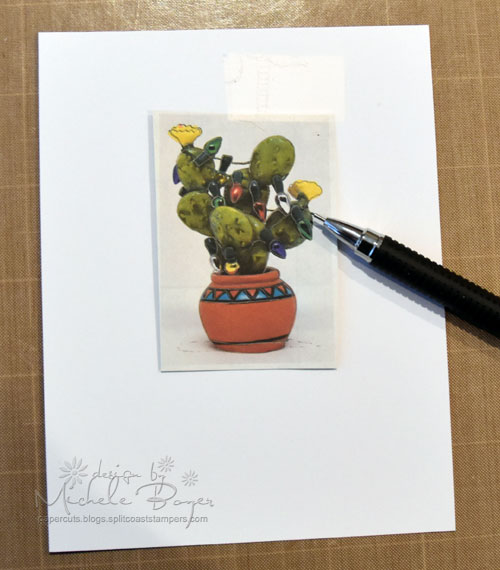
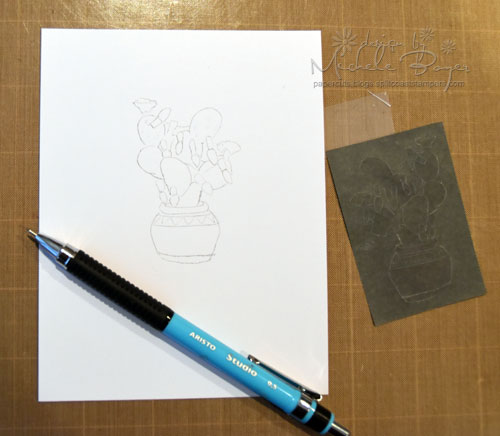
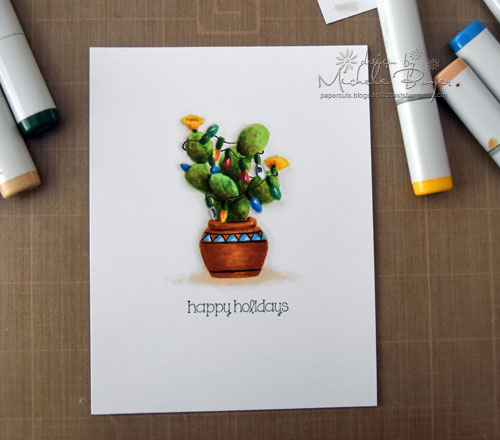
I first creatred a bit of a background with watercolor paper and a blue Zig Clean Color brush, then stamped and colored the turtle and seaweed with Copics, die-cut and assumed the pieces.  I colored over the turtle’s shell as well as the seaweed with a clear Wink of Stella glitter brush.

Michele Boyer - Paper Smooches

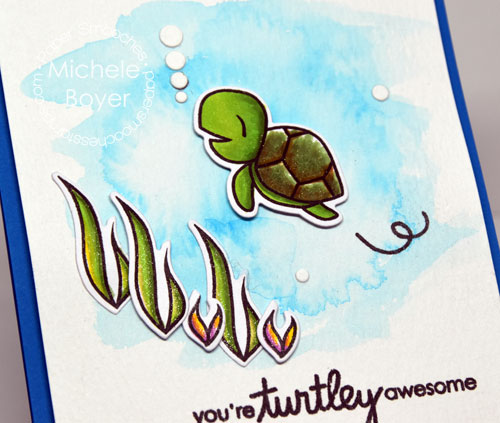
Copic markers – RV63, V05, Y18, YG03, YG06, YG17

Be sure to hop along and comment with the rest of the DT to increase your chances of winning one of the four $25 gift codes!

 Thanks for visiting!  Good luck, and happy hopping!  🙂

1amichele siggy

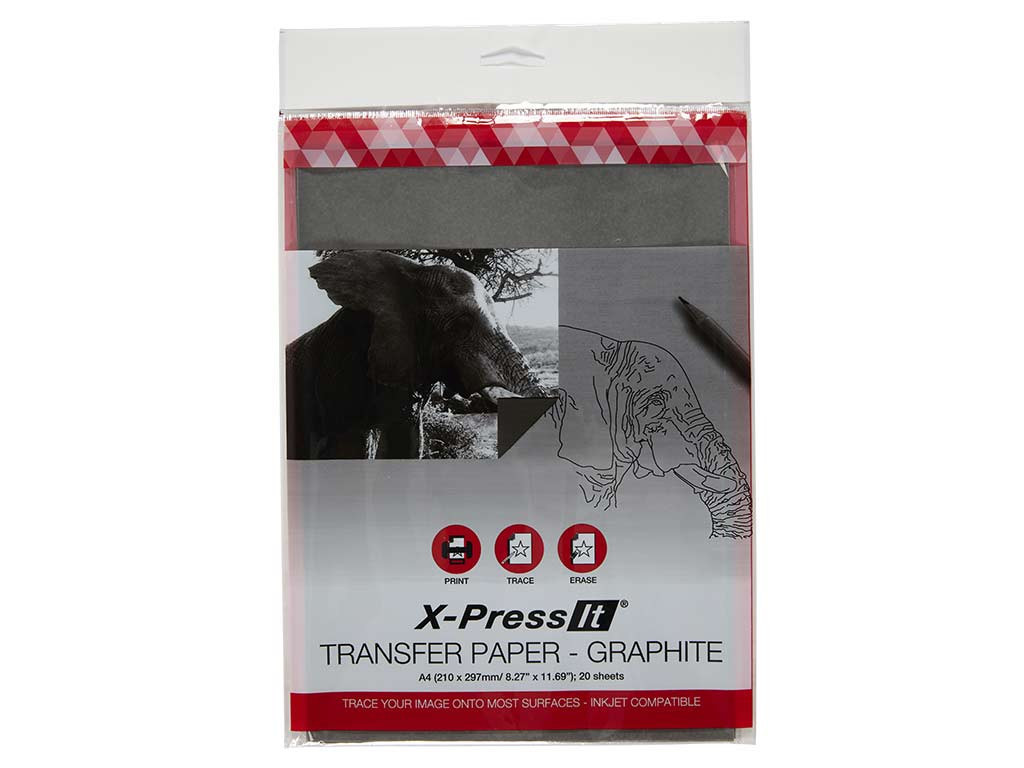
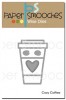
Stamps: Paper Smooches Courteous Cuties  Dies: Paper Smooches Courteous Cuties Icons, Ocean Scene  Ink: Taylored Expressions Oreo  Card stock: My Favorite Things Lush Lagoon, X-Press It Blending Card, Ranger Distress Watercolor  Other: Copic markers, Zig Clean Color Brush (blue), X-Press It 1/2″ Foam Tape, corner rounder, clear Wink of Stella glitter brush.

you MELT me (paper smooches)

Hello, everyone! Happy Boxing Day! If you’re one to shop the day after Christmas, I wish you lots of luck! I’m staying home.  🙂

Today I’m sharing a card using new Melted Snowman and Snow Drifts dies from Paper Smooches‘ latest release. The sentiment is from Winter Sampler, free with any $60 retail purchase through December 31.  Just a few more days!

Michele Boyer - Paper Smooches

The snowman parts are so fun to place any way you’d like. I love the little arm poking out of the snow drift.  🙂  The hat was die-cut using Hat dies.

Michele Boyer - Paper Smooches

Copic markers – E31, E33, E37, YR15, YR24

I hope you’ll come back on Thursday for Paper Smooches’ January release hop! Eeeee! I love it!  🙂   🙂   🙂

Have a great day!

1amichele siggy

Joy to the World (Mo’s Digital Pencil) and How I Refill My Copics

Merry Christmas Eve, everyone! It’s my favorite day of the year! There’s just something magical about it. There’s always so much to do…wrap the last few gifts, prepare for meals tomorrow, tidy the house, go to church… It’s always crazy busy, but I just love it. Eeeee!  🙂

My card today uses another digital stamp, this time from Mo’s Digital Pencil. I had a hard time choosing among these adorable singing elves, finally settling on Singing Elf Wynn. (I probably should have just purchased all three!)

Michele Boyer - Mo's Digital Pencil

While coloring my image, I realized I had several markers to refill so I thought I’d share how I do that. I actually use two different methods depending on my available time and how dry the marker is.

PP1

First I remove both caps. If the insides look like those above (yuck), I take the time to clean them.

PP2

I apply a bit of Colorless Blender to the end of a cotton swab (I use cheap ones, from the dollar store) and swish it around the inside of the cap until it is clean.  I also use a cotton swab with Colorless Blender to carefully clean the ink away from the tip of the marker (if it’s especially inky).

PP3

If time is short, I will simply apply drops of Various Ink (refill) to the chisel nib. If you look closely at a top view of the chisel end of the marker, you will see a small gap on each side of the nib. I add drops of the refill to the side of the nib and ink is drawn down into the marker.

PP4

When I’m not in a hurry and want to be certain the marker is completely filled, I remove the chisel nib and carefully drop ink into the barrel.

Always remove the chisel end, never the brush, to refill a marker as brush nibs are easily damaged when removed.

A Copic Nib Tweezer is inexpensive and makes pulling nibs super easy, plus it will keep your fingers clean. I can’t find mine at the moment so I used my fingers to remove the chisel nib. In my experience, the chisel nib always comes out fairly easily with fingers.

If you are replacing the brush end, the nib tweezer makes removal of the brush much easier. I tried using a regular tweezer once and only the outer edges of the nib came out. The Nib Tweezer is the way to go for removing a brush nib.

Once the chisel nib is removed, I usually add about 35-40 drops of Various Ink, holding the marker over a paper towel just in case I overfill and the ink drips out of the brush end. After filling, simply reinsert the chisel nib into the barrel.

Boosters are handy for filling markers cleanly. They’re reusable but must be thoroughly cleaned in between each use. I mostly use one to refill my Colorless Blender marker. Because the Colorless Blender is thin, it’s harder (almost impossible) to fill the marker drop by drop.

Michele Boyer - Mo's Digital Pencil

Copic markers – BG10, BG70, C00, C1, C2, E00, E01, E41, E42, E57, G09, G19, R01, R02, R37, R81, R56, R89, RV34, Y21

Thank you SO much for visiting today, or any day. I hope you have a very merry, healthy and happy Christmas!

1amichele siggy

You are in my thoughts always (power poppy)

Hi everyone. A few weeks ago I purchased this sweet digital image, Chickadee in Barberry, from Power Poppy. I love the little bird and bits of snow. 🙂

Michele Boyer - Power Poppy

The digital stamp actually comes along with four holiday sentiments. The one I used is from another Power Poppy digital stamp, Winter Pick Me Up.

Michele Boyer - Power Poppy

Copic markers – B21, B23, E27, E30, E34, E35, N5, N7, R20, R22, R24, R27, R37, W1, W2, YG93, YG95, YG97, YG99, 110

Once colored, I sprinkled several teeny tiny red rhinestones around the image. (I think that little bird is so very sweet.)

Thanks so much for stopping by today.  I appreciate your visit. ♥

1amichele siggy

I’m s(mitten) (paper smooches)

Hello everyone! Today I’m sharing a card using two super cute new sets from Paper SmoochesMitten die and Winter Sampler.

Michele Boyer - Paper Smooches

The mitten die is simply adorable. I cut two then flipped one so the thumbs would go in the right directions. I braided three strands of white string, knotted and trimmed the ends. I added bits of glue beneath the ends and the loop to secure it in place.

Michele Boyer - Paper Smooches

The sentiment is one of many from Winter Sampler, soooo cute and FREE with any $60 retail order through December 31st.   🙂

I’m off to tackle my enormous “to do” list. The more I accomplish today, the quicker I can relax and enjoy this week.  🙂 Thanks so much for stopping by! ♥

1amichele siggy

Warm Holiday Wishes (stamping bella)

Hello everyone. Welcome to another Bellarific Friday with Stamping Bella. Last week’s challenge was to create a winter white card. This might be the easiest (and quickest) coloring I’ve ever done.  🙂

Michele Boyer - Stamping Bella

I used Tiny Townie Skylar Loves to Skate (along with “warm” from Warm & Fuzzy Penguins /The Woodsies Collection).

After adding my bits of color with Copic markers, I used Copic’s Opaque White and a toothpick to add dots of snow.

Michele Boyer - Stamping Bella

Copic markers – B0000, B000, C00, C1, E00, E01, E11, E31, E35, V0000, V000, Y2; Copic Opaque White

We’ll be taking a short break from Bellarific Fridays until after the first of the year. The next challenge is anything goes. Stress free and plenty of time to do it.  🙂

Use any current Stamping Bella image then email your card to [email protected] by next Thursday to be featured on the SB blog and to be entered to win some Bella Bucks! (All challenge details can be found HERE.)

Thanks so much for visiting today!

1amichele siggy

How to Transfer a Photo Image onto Card Stock for Coloring (Yes, you can do it!)

Hi everyone! Today I tried a new (to me) technique/product to create a Christmas card for my in-laws. It was so easy!

1a-compare


Using X-Press It Graphite Transfer Paper, I transferred a photo of the ornament shown above (left) onto the card (right).  I actually impressed myself. Haha.

X-Press It Transfer Paper - Graphite

Here’s how to do it:

1-Photo

First, take a photo of your chosen item. I used an ornament that I bought a few years ago for both my in-laws and myself. (We’ll see if they notice!)

2-Trace

Size the photo using your program of choice. I used Photoshop. Using an inkjet printer, print the photo onto the white side of the tranfer paper, then trim the image. Use a piece or two of removable tape to hold the printed transfer paper in place onto your Copic compatible paper. As always, I used X-Press It Blending Card. Trace the image using a stylus, pen or pencil.

If you do not have an inkjet printer, simply place the photo over the transfer paper and then trace your image.

3-Remove-Graphite

If you’d like, you can add small hash marks to indicate shading or to mark any other areas of importance. Likewise, you can eliminate any areas you don’t want to use. I eliminated the ornament hanger and string.

4-Color

Lastly, color with your Copics.  I used a 0.5 black Multiliner to add in the pot detail and strings for the lights.

If you can still see the graphite lines once coloring is complete, simply use an eraser to remove the lines. I like to use a WHITE eraser because sometimes colored erasers will leave marks behind (and noone wants that).

5-Final

X-Press It Transfer Paper is available in graphite or white, can be used on a variety of surfaces (i.e. paper, wood, metal, glass, fabric, canvas etc.), is acid free, wax free, erasable and washes out of fabric.

This was fun! I may try again while I have the supplies handy. 🙂

Thanks so much for stopping by!

1amichele siggy

Grande Hugs (paper smooches)

Hello everyone! Today I’m sharing a card using one of my favorite die sets from Paper Smooches‘ latest release Cozy Coffee.

Michele Boyer - Paper Smooches

I first added a bit of watercolor to a watercolor panel then die-cut the pieces. I colored over the cup and coffee beans with Copics then added a felt heart. The x’s on the cup were die-cut using new Mitten dies, and the sentiment was stamped from Winter Sampler.

Michele Boyer - Paper Smooches

Copic markers – E23, E25, E27, E40, E41

Winter Sampler is free through December 31st with any $60 retail order. (It contains a lot of really cute sentiments!)

Thanks so much for visiting today!  🙂

1amichele siggy

Don’t Sweat the Small Stuff (stamping bella)

Hi everyone! It’s Friday already! This month is going to BLOW right on by and I want it to go s-l-o-w-l-y… I want to enjoy the holiday season, the decorations, the stressed shoppers (haha), every little bit.  🙂

It’s time for another {Mojo}Bella sketch with Stamping Bella. I *sort of* followed the sketch, which is ok since the sketch is inspirational. You can find it at the end of this post.

Michele Boyer - Stamping Bella

I used Helga the Hot Chick.  That name cracks me up.  I love the sentiment although I will be the first to admit that it is much easier said than done. I am a worrier (as opposed to a sweat-er, ew!) but I do try not to worry about the little things.

Michele Boyer - Stamping Bella

Copic markers – B21, B34, B93, B95, B97, C00, C1, C2, C3, E30, E31, E33, E41, E42, N7, R01, R02, R37, R89, Y21, Y32, YR02, YR20, YR21, YR23, YR27

You may (or may not) have noticed I used paw print paper as the background. No, it doesn’t match (categorically) but the color matched my coloring of the image and I’m on a mission to use my patterned papers. Hopefully the recipient won’t look too closely.  Haha! All supplies used can be found below, with markers listed beneath the photo above.

Next week’s challenge is to create a winter white card.  Hmmm… my thinking cap is on!  🙂   Use any current Stamping Bella image then email your card to [email protected] by next Thursday to be featured on the SB blog and to be entered to win some Bella Bucks! (All challenge details can be found HERE.)

Thanks so much for visiting today!

1amichele siggy

Taylored Expressions December Release Now Available!

Hi everyone! I hope you’ve enjoyed the design team previews ofTaylored Expressions‘ December release this week! I certainly enjoyed creating mine! You can find everything, now available, HERE. Before you head over to the TE store, I have two more samples to share.

First, I used Love Train stamp set with coordinating dies. I think this is my favorite of the new release. I actually gave this card to my husband, a train enthusiast, for his birthday. I was a bit concerned that it was not “adult” enough, but he loved it.  🙂

All-Aboard-500

I created an accordian card by first cutting an 11″ x 4 1/4″ block of Blue Corn card stock. I then scored vertical lines at 2 3/4″ and 5 1/2″. After folding along the score lines, I cut patterned paper to fit each panel then stamped, colored, die-cut and assembled the pieces.

All-Aboard-open-500

I adore this set.   ♥  ♥  ♥  (There is also a box car full of flowers but I left that one out since the card was for my husband.)

Next, I used SUPER cute Lookin’ Sharp stamp and die combo.

Michele Boyer - Taylored Expressions

I stamped the cactus using Oreo ink then colored with Copic markers. The Ikat embossing folder created a perfect background.

Michele Boyer - Taylored Expressions

Copic markers – B21, E08, E09, E51, E97, G29, R24, R37, R81, R89, YG05, YG17, YG25

I used a Little Bits Sun, placing a clear foam square beneath the center circle to add a bit of dimension. The sentiment was stamped in both Oreo and PeaPod inks.

To see more projects, please head over to the TE Blog for a complete list of our designers! Also on the TE Blog today, you’ll find a list of winners from the preview posts. Maybe you are one of them!

Thanks so much for visiting!  🙂

1amichele siggy