Monthly Archives: February 2017

One of My Favorite Peeps (a taylored expressions Easter treat)

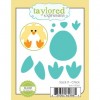
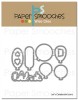
Hi everyone! We’ve had an early spring in this part of the country and so it seems only natural (not really, it’s kind of weird) to be thinking about Easter treats. Taylored Expressions has an adorable Sack It Chick die set which fits perfectly onto their Sack It treat box.

Favorite-Peep-Treat-500

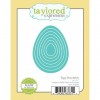
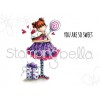
I used the largest Egg Stacklet shape as the base for the chick’s body and a bow from All Wrapped Up atop the chick’s head.

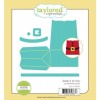
The box is incredibly easy to assemble.

box-asssembly

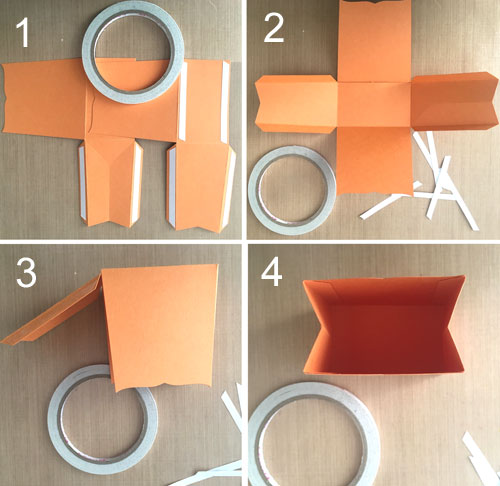
1 – Die-cut two box pieces and fold along the score lines. Apply double-sided tape to flaps on both pieces and bottom of one piece.

2 – Remove release tape; carefully align box bottoms and adhere, pressing firmly along tape areas. I use a bone folder to apply added pressure.

3 – Carefully aligning box sides, adhere flaps to inside of box.

4 – Finished!

X-Press It High Tack Double Sided Tape

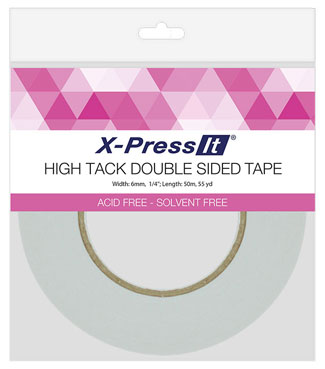
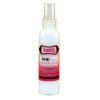
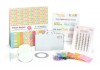
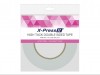
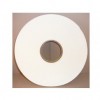
I always reach for X-Press It High Tack Double-sided tape for projects like this. It’s great for all weights of paper, especially heavier types such as mat board, cardboard and heavyweight card stock. It’s also great on wood, metal, plastic and fabric! It comes in 1/2″, 1/4″ and 1/8″ widths, features high grip and easy tearing by hand. It’s also heat resistant so if you heat emboss or iron over it , the tape will not be damaged. Also, the release paper is very easily removed and doesn’t stick to your fingers. (That makes me crazy.)

Favorite-Peep-Treat-CU

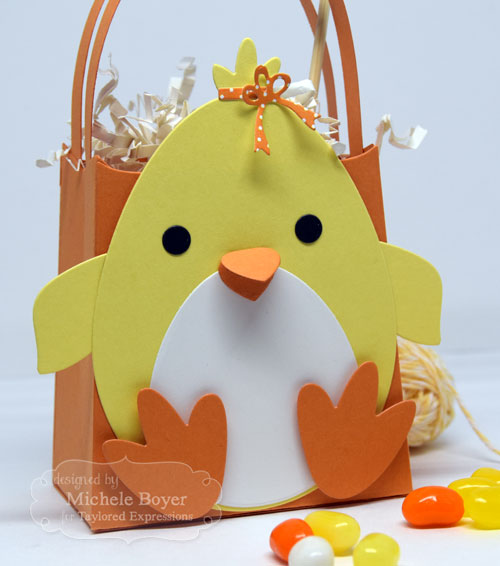
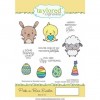
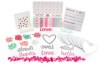
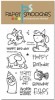
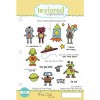
The cute sentiment is from new Peek a Boo Easter stamp set. You can find additional Sack It die sets HERE. (I also especially like the fox!)

Thanks for visiting today!

1amichele siggy

Let’s Celebrate (stamping bella)

TGIF, friends! Here in Virginia we have apparently decided to skip winter almost entirely. We had a very brief spring and now it seems we’ve moved on to summer! 70’s in February. It’s very weird, but if we can’t have snow, we might as well wear flip flops! And so I shall. 🙂

On my card today I used Stamping Bella‘s Winobella from the Bella 2.0 Collection.

Michele Boyer - Stamping Bella

We were to create using the photo below as inspiration.

Feb 24

I went with a bit of the color combo and definitely the theme of alcohol. (I prefer wine.)

Michele Boyer - Stamping Bella

Copic markers – B39, BG11, E00, E01, E11, E31, E33, E35, E51, G21, G24, G94, R00, R01, R11, R14, R22, R24, R37, R89, W00, W1, W2, Y21

Next week’s challenge is to create anything you’d like. No limitations other than to use a current Stamping Bella image. Email your card to [email protected] by next Thursday to be featured on the SB blog and to be entered to win some Bella Bucks! (All challenge details can be found HERE.)

Thanks so much for visiting!

1amichele siggy

Paper Smooches March Release Hop

It’s Pep Rally week and we are here today to share a sampling of the NEW Paper Smooches MARCH 2017 release!  THREE new stamp sets and FIVE new dies will be available to purchase at 8:00 p.m. PT on February 28th. You will find our new products HERE once they go live.

To add extra fun to our hop, we are offering a $25 gift code to choose what you like from the PS online store.

Here are the details:

  • FOUR winners will be chosen at RANDOM from any of the design team blogs and the PS Blog to win the $25 prize.
  • Just leave a comment on any of the design team blogs listed below or the PS blog for your chance to win!  (You do not need to comment on all blogs to qualify but it increases your chances.)
  • Deadline: You have until midnight PT on Sunday, February 26th to leave a comment.
  • Please check the Paper Smooches blog on Monday, February 27th to see if you are one of the FOUR lucky winners.

To increase your chances of winning:

  • Tell us that you Facebooked about our blog hop.
  • Tell us that you Tweeted about our hop.
  • Tell us that you posted on your blog about our blog hop.

I created a shaker behind a cute whale from Huge Hugs stamp set. I used the coordinating die (from Huge Hugs Icons dies) and a couple ocean plants from Ocean Scene.

Whale-Hello-500

I love the sentiment. So cute.  🙂

Inside the shaker I placed Queen & Company Diamonds (super sparkly) and Baby Beads.

Whale-Hello-CU

Be sure to hop along and comment with the rest of the DT to increase your chances of winning one of the four $25 gift codes.  Alice is away on vacation, so Katie Gehring was super sweet to fill in for her.  We are all in for a treat!

 Thanks for visiting!  Good luck, and happy hopping!

1amichele siggy

love you more (Queen & Co. Heart Throb Kit)

Hello crafty friends! Today I’m sharing a double shaker card using the new Heart Throb Kit from Queen & Company.  I thought it would be fun to create a love themed card with a common shaker area containing a mix of the two different topping colors.

Michele Boyer - Queen & Co.

I simply nipped away the overlapping portion of the second foam heart frame, ensuring that the two pieces aligned tightly once adhered so none of those adorable toppings could escape.

Love-You-More-CU500

Within the mix, I also added a few diamonds and some clear/white heart sequins (also from the kit). On the Queen & Co. blog today you can find a bit more detailed instruction as to how I assembled the shaker elements.

Thanks so much for visiting today! ♥

1amichele siggy

almost perfect (stamping bella)

Today I tried something new. It is most certainly *not* almost perfect. But I am learning.  I love the new Danielle Donaldson stamps from Stamping Bella. I so want to use them but I don’t know what to do with them. It’s a completely new style for me. SO… for today, I pretty much tried to mimic some of the watercolor style I found online. I left white around the image as recommended in Danielle’s (amazing) book, “creativeGIRL: Mixed Media Techniques for an Artful Life.” And I copied Danielle’s white dots (using Copic’s Opaque White and a toothpick). Maybe if I try to replicate other people’s ideas, I will eventually have one of my own. That is my hope. For now, I give complete credit to Danielle.

Stamping Bella Almoststella

After watercoloring, I wanted to add some flower stems for these adorable new Pom Flowers from Queen & Co.  A couple of my Copic Multiliners were running low on ink so I took this opportunity to replace the cartridges. It was super easy.

Replacing Copic Mutiliner Ink Cartridges

As described on the Copic website, the A and B refills contain different ink viscosity to aid ink flow, depending on the nib size, so it’s important to choose the correct one.

Replacing Copic Mutiliner Ink Cartridges Step 1

After removing the cartridge from the package, simply remove the clear cap.

Replacing Copic Mutiliner Ink Cartridges Step 2

Then remove and toss the empty cartridge from the pen barrel. (Sometimes a coin helps to remove it.  I was able to use just my fingers.)

Replacing Copic Mutiliner Ink Cartridges Step 3

Simply pop in the new ink cartridge. Done! So easy! And no mess!

Stamping Bella Almoststella

Once I drew in the stems, I glued my flowers atop.

Thanks so much for visiting today!

1amichele siggy

Happy Birthday (paper smooches)

Hello, everyone. I’m back today with another birthday card, this time using Paper SmoochesCelebrate Balloons dies.

Michele Boyer - Paper Smooches

I thought it would be fun to tie the balloons to the leg of the chick from Birthday Buddies. He just can’t put his foot down! 🙂

Michele Boyer - Paper Smooches

Copic markers – BG13, G05, G14, R01, R27, Y17, Y19, YR15, YR16, YR27, YR31

I hope you’ll stop back on Thursday for Paper Smooches’ March release hop. Thanks for visiting!

1amichele siggy

Super Quick and Easy Birthday Shaker Cards (Queen & Co.)

Hello everyone! I’m excited to be sharing two shaker cards using  new Foam Front Kits from Queen & Company. These cards are so quick and so easy. (I ♥ them.)

Today I’ve used the new Candles Card Kit (2 Pack). Also available is a Candles Foam Front Die but I didn’t use that today. Maybe soon!

Michele Boyer - Queen & Co.

Basic kit instructions:

  • Adhere pre-cut foam to card base.
  • Fill with toppings.
  • Cover with transparency.
  • Adhere pre-cut card stock cover.

Michele Boyer - Queen & Co.

I filled the openings with Pastel Diamonds, Posies and Donuts, adhered the transparency sheet then added a simple orange mat. To do so, I cut the patterned paper to size (5 1/2″ x 4 1/4″) and trimmed away the inside to reveal the candles. I’m saving that piece for another project.

Once the mat was adhered using Scrap Happy Sheer Glue, I added the pre-cut candle card stock cover atop. SO easy! The sentiment is from Taylored Expressions’ Far Out stamp set. The words were cut to simple tag shapes and adhered, with a Rivet to each left side.

My next card is a bit more sparkly and girly.

Lets-Celebrate-500

I filled all openings with Sequin Sprinkles and super sparkly Pastel Diamonds.

Lets-Celebrate-CU500

The sentiment was stamped from Paper Smooches’ Birthday Sampler, ends cut to flag shapes and topped with a flower.

Before playing with Queen & Co. kits, I was somewhat intimidated by shaker cards. But they make it SO easy! And SO much fun! I hope you’ll give it a try!  🙂

Thanks for visiting today!

1amichele siggy

those who don’t believe (stamping bella)

Hi everyone! It’s Bellarific Friday with Stamping Bella! Last week’s challenge was to use a die in creating a card. Such a simple task.  🙂   I used three.

Michele Boyer - Stamping Bella

How adorable is this Set of Dragons? (There is actually a fourth but I only used three today.) Each was stamped onto X-Press It Blending Card and colored with Copic markers, then die-cut with each coordinating die. Mission accomplished. 🙂

Before assembling, I zig-zag stitched around the border and adhered three tiny Posies Toppings from Queen & Co. The sentiment is from Stamping Bella’s Unicorn Add-ons.

Michele Boyer - Stamping Bella

Copic markers – BG11, BG32, E31, E33, R00, R01, V12, W1, W3, W5, YG01, YG03, YG93

The whole design of my card was inspired by my Bellarific sister (and long-term artistic idol) Paula Williamson. I love every single thing she colors/creates. Every. Thing. ♥

Next week’s challenge is to create using the photo shown below as inspiration.

Feb 24

Use any current Stamping Bella image then email your card to [email protected] by next Thursday to be featured on the SB blog and to be entered to win some Bella Bucks! (All challenge details can be found HERE.)

Thanks so much for visiting!

1amichele siggy

You are Sweet (stamping bella)

Hello everyone.  Today I’m sharing a card using one of Stamping Bella‘s latest releases, Tiny Townie Sammy is Sweet. (I think she is *very* sweet.)

Michele Boyer - Stamping Bella

After stamping her onto X-Press It Blending Card, I colored with Copic markers. I added a strip of Queen & Co.‘s Heart Throb patterned paper along the side then added a beaded border using X-Press It 1/4″ High Tack Double-Sided Tape and silver Bitty Beads.

025-2x-tape-REVsmall

I reach for this tape quite often. I use it to adhere card layers, attach embellishments and more. It comes on a 55-yd roll, is acid and solvent free, can easily be torn by hand, even used as instant hemming! It works great on metal, glass, wood, paper, plastics and fabric. Also available in 1/2″ width as well as 1/8″. (I actually use all three.)

Michele Boyer - Stamping Bella

Copic markers – BG11, BG13, BG32, BG34, C1, E00, E01, E11, E31, E33, E35, E37, E50, E51, E53, R00, R01, R81, R83, R85, RV32, W00, W1, W2, Y21

I firmly adhered a strip of the 1/4″ double-sided tape, removed the release tape, then poured the beads. (I laid the paper into a tray to contain the beads for easy replacement back into the container.) I pressed the beads firmly onto the adhesive tape and they are there to stay!

I’ll be back tomorrow with Bellarific Friday! Thanks so much for visiting!

1amichele siggy

you a-maze me (taylored expressions)

Hello, everyone! Happy Valentine’s Day!  I have a quick and easy card to share, most appropriately, with a heart. 🙂  

Michele Boyer - Taylored Expressions

I used You Amaze Me stamp set from Taylored Expressions.  In the center of the heart, I adhered a tiny black rhinestone.

I used my MISTI to easily stamp the sentiment in both red and black inks. I simply masked off each portion of the stamp before moving on to the next color.

Super simple.  🙂

Michele Boyer - Taylored Expressions

Thanks so much for visiting! 🙂

1amichele siggy