
Hi everyone! Today I’m sharing some tips on how I create clear cards. I find working with acetate to be a little tricky at times, specifically in reference to adhesive. What is the best adhesive to use, and how can I avoid that adhesive being seen on the inside of the card?
X-Press It Double-sided Adhesive Sheets (available from Imagination International, Inc.) are my “go-to” adhesive for clear cards. They are perfect for mounting, laminating and basically making any surface sticky. They are acid-free, provide an excellent hold and are ideal for die-cutting. Win/win for papercrafters!
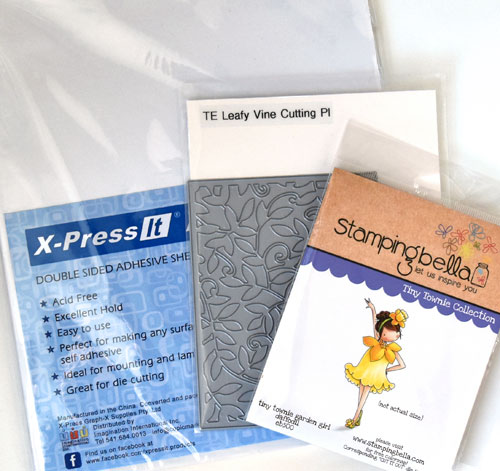
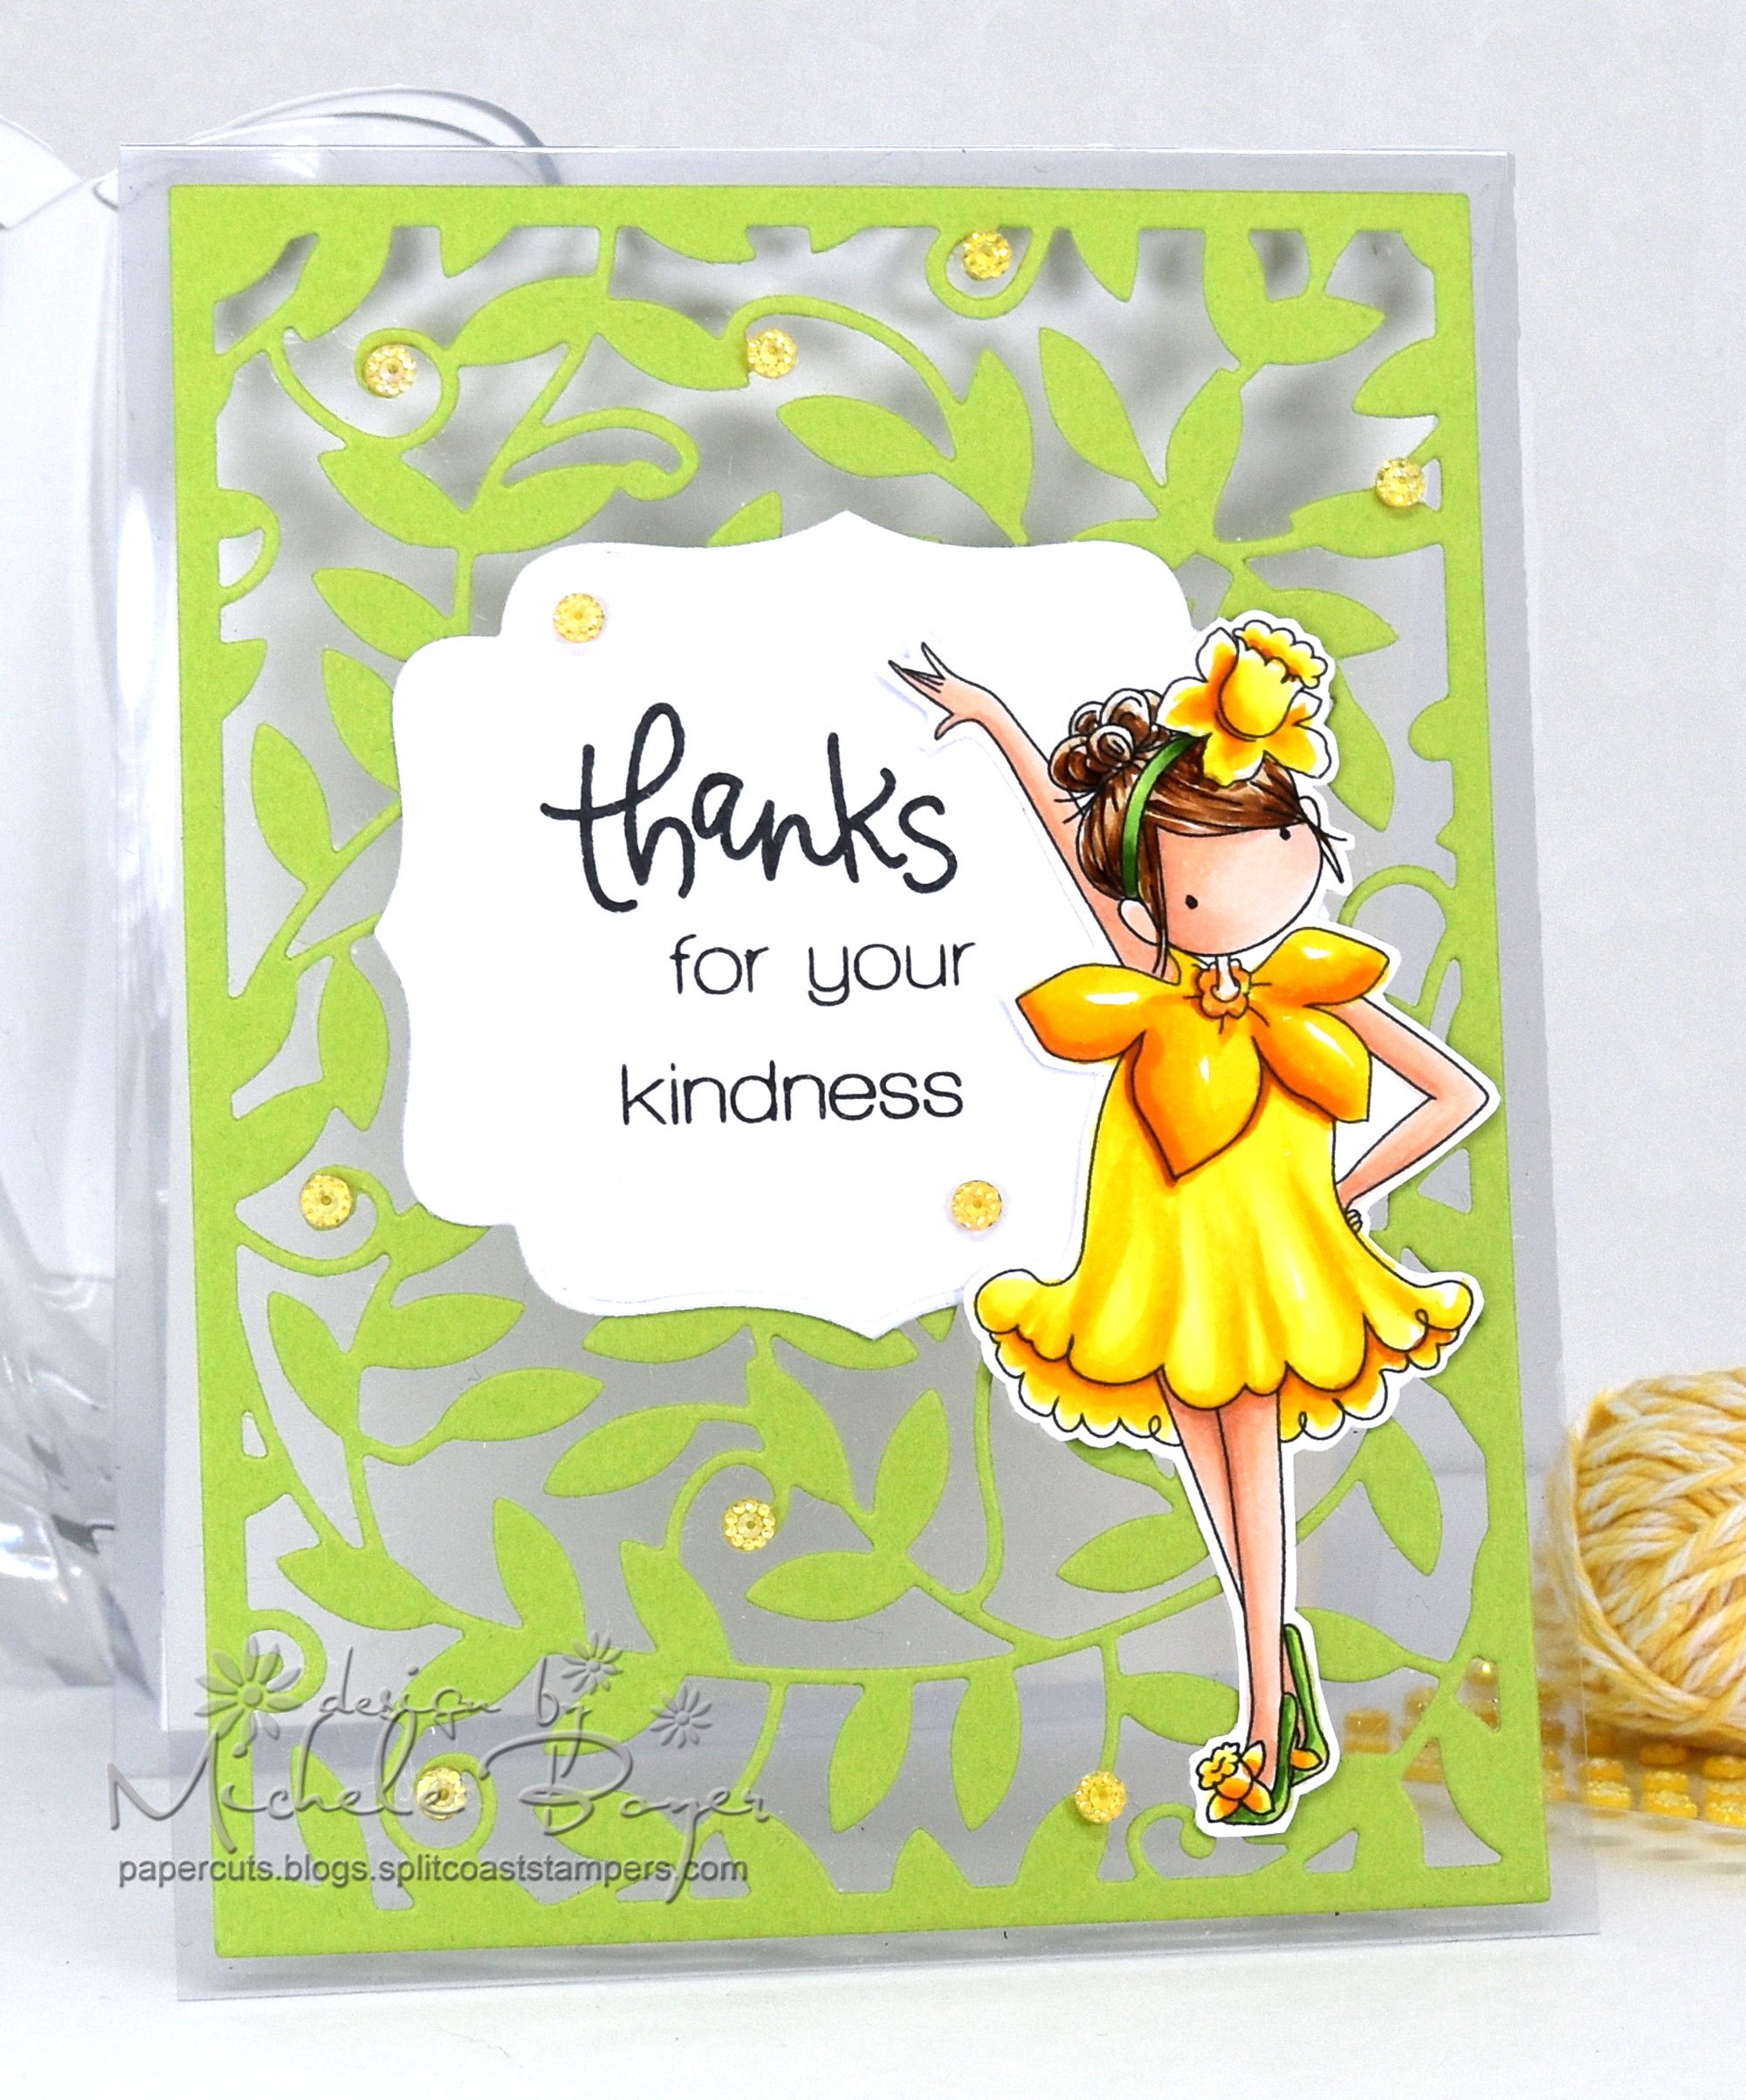
For my card today, I used the double-sided adhesive sheets, acetate, Taylored Expressions‘ Leafy Vine Cutting Plate and Label Stacklets 2, Stamping Bella‘s Tiny Townie Garden Girl Daffodil and Simon Says Stamp‘s Thanks stamp set.
Here’s how I created my card:
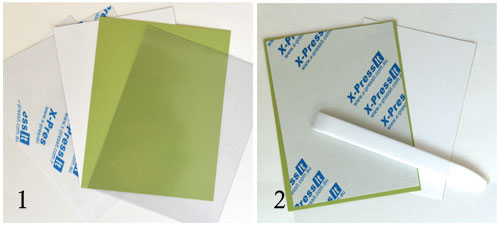
1 – Cut two adhesive sheets to 4 1/4″ x 5 1/2.” One piece will be adhered to the green card stock for die-cutting. The other will be adhered to white card stock which will serve as the “inside” portion of the card for writing a personal message.
2 – Remove one side of the release paper from the double-sided adhesive sheet and adhere each to green and white card stock. Using the side of a bone folder, apply firm pressure over both surfaces. Trim the white card stock piece to slightly smaller than 4″ x 5 1/4″.
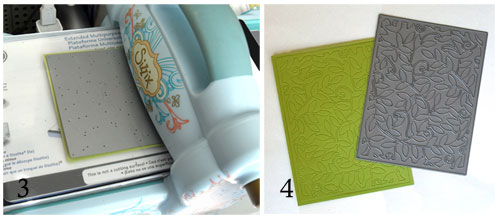
3 – Place the die face down onto the green card stock and die-cut. I used a shim (added in after the photo was taken) and ran the stack through my Big Shot several times to ensure a good cut.
4 – The die will likely not cut through the remaining release paper but that’s ok.

5 – Use a sharp pin to carefully peel away the negative pieces from the die-cut.
6 – Remove release paper from the back and carefully adhere the die-cut panel to the front of the acetate card. Again, burnish over the die-cut using a bone folder to ensure all edges are firmly adhered.

Remove release paper from the white card stock. Open card and carefully align the edges of the white card stock with the green front. Close card to adhere white card stock to inside of card. You can see in the photo that the back side does not show messy adhesive at all. 🙂

Copic markers – E00, E01, E11, E31, E35, R00, R01, Y06, Y08, Y15, Y17, YG03, YG06, YG17, YR14, YR15
If desired, die-cut a second label and adhere to the back side of the front. As well, a second image shape can be die-cut and adhered to the back of the colored image before adhering to the card. In doing so, no Copic marker coloring will show through to the inside of the card.
Once my card was complete, I adhered a handful of super sparkly Queen & Company yellow Petite Posies. (They’re so very pretty!)
Thanks so much for vistiting today!


