
Hello everyone. I’ve had the flu this week and although I am still coughing (a lot), I feel much better and decided to get back into my stamp room for some inky fun.
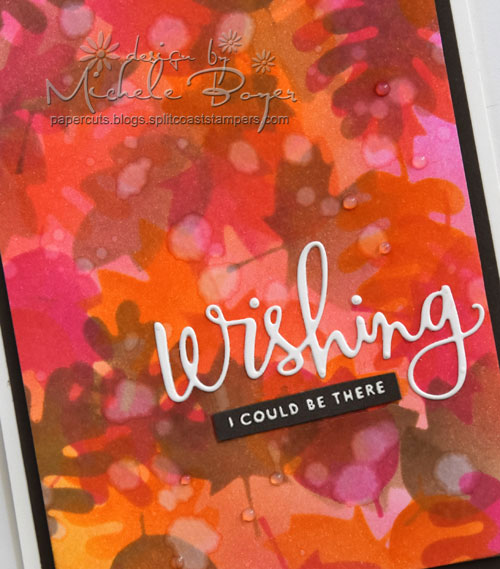
Earlier in the month, I created a simple stenciled background using a large background die and stencil sheet. Today I decided to return to the stencil sheets, this time creating the stencil with three leaf dies… and lots of ink layering.
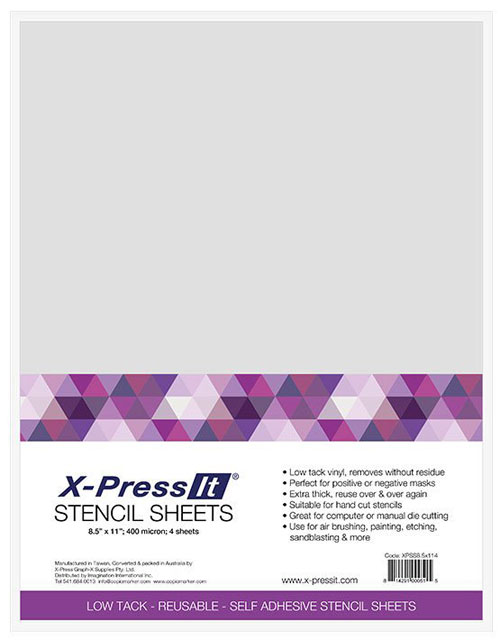
One of the great things about X-Press It Stencil Sheets is that they are backed with a low tack adhesive that sticks firmly to card stock yet lifts away easily with no residue left behind. If the sheet is cut larger or wider than the card stock, the adhesive also holds the work surface in place, making ink application so much easier.

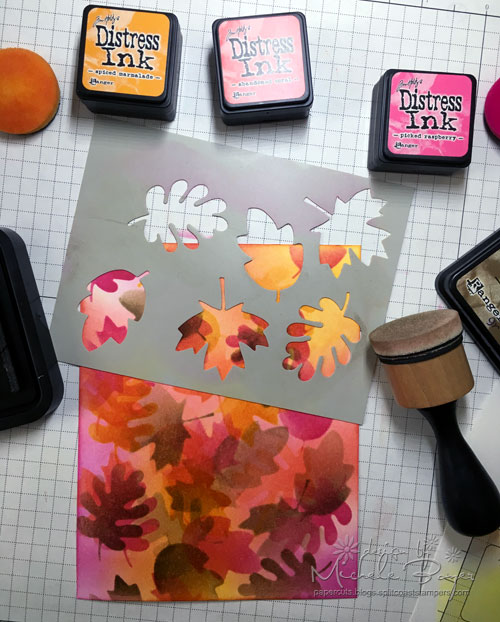
I first die-cut leaves from the stencil sheet. I cut six which required two passes through my die-cutting machine. I found it easiest to remove the die-cut shapes before sending the piece through the machine again for the additional cuts.

I blended Spiced Marmalade, Abandoned Coral and Picked Raspberry distress inks onto white card stock, leaving some white peeking through.
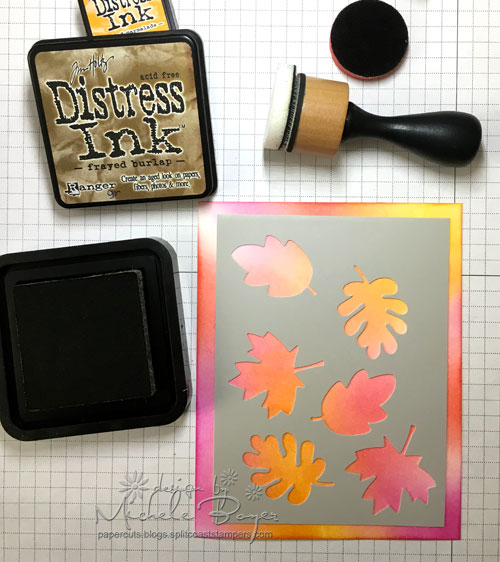
I removed the backing* from the stencil sheet, adhered the sheet over my card stock and inked the leaf openings using Frayed Burlap distress ink. (*Save the backing as the stencil sheet can be reapplied and saved for later use!)
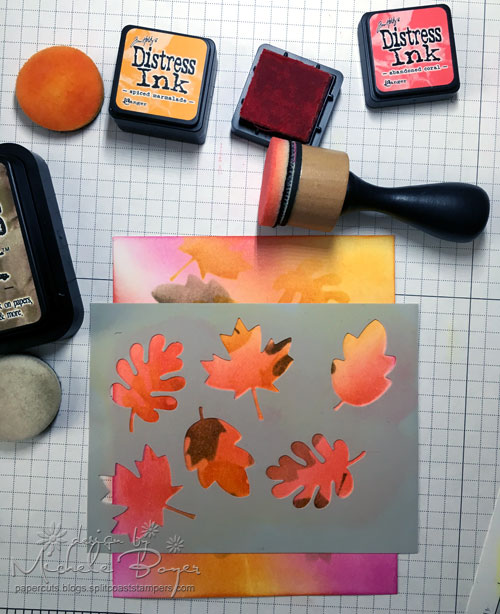
I lifted then rotated the stencil sheet, reapplied and inked again using the distress inks.
As I repeated the process, the stencil sheet did not stretch at all. (It’s fabulous!)
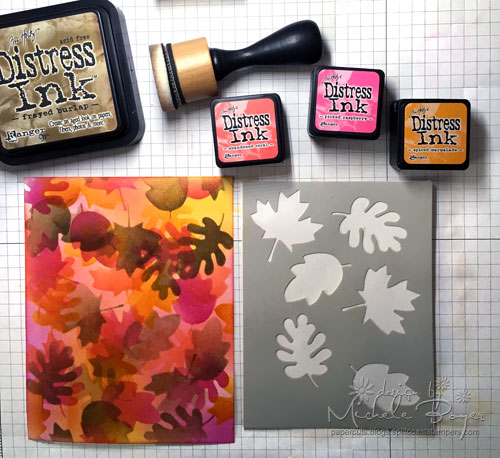
Once I was satisfied with the coverage, I wiped the ink from the stencil sheet using a baby wipe then re-adhered the sheet to the release paper, saving for later use.
Note: Stepout photos were taken in a location different from that of the final photo so colors appear a bit darker.
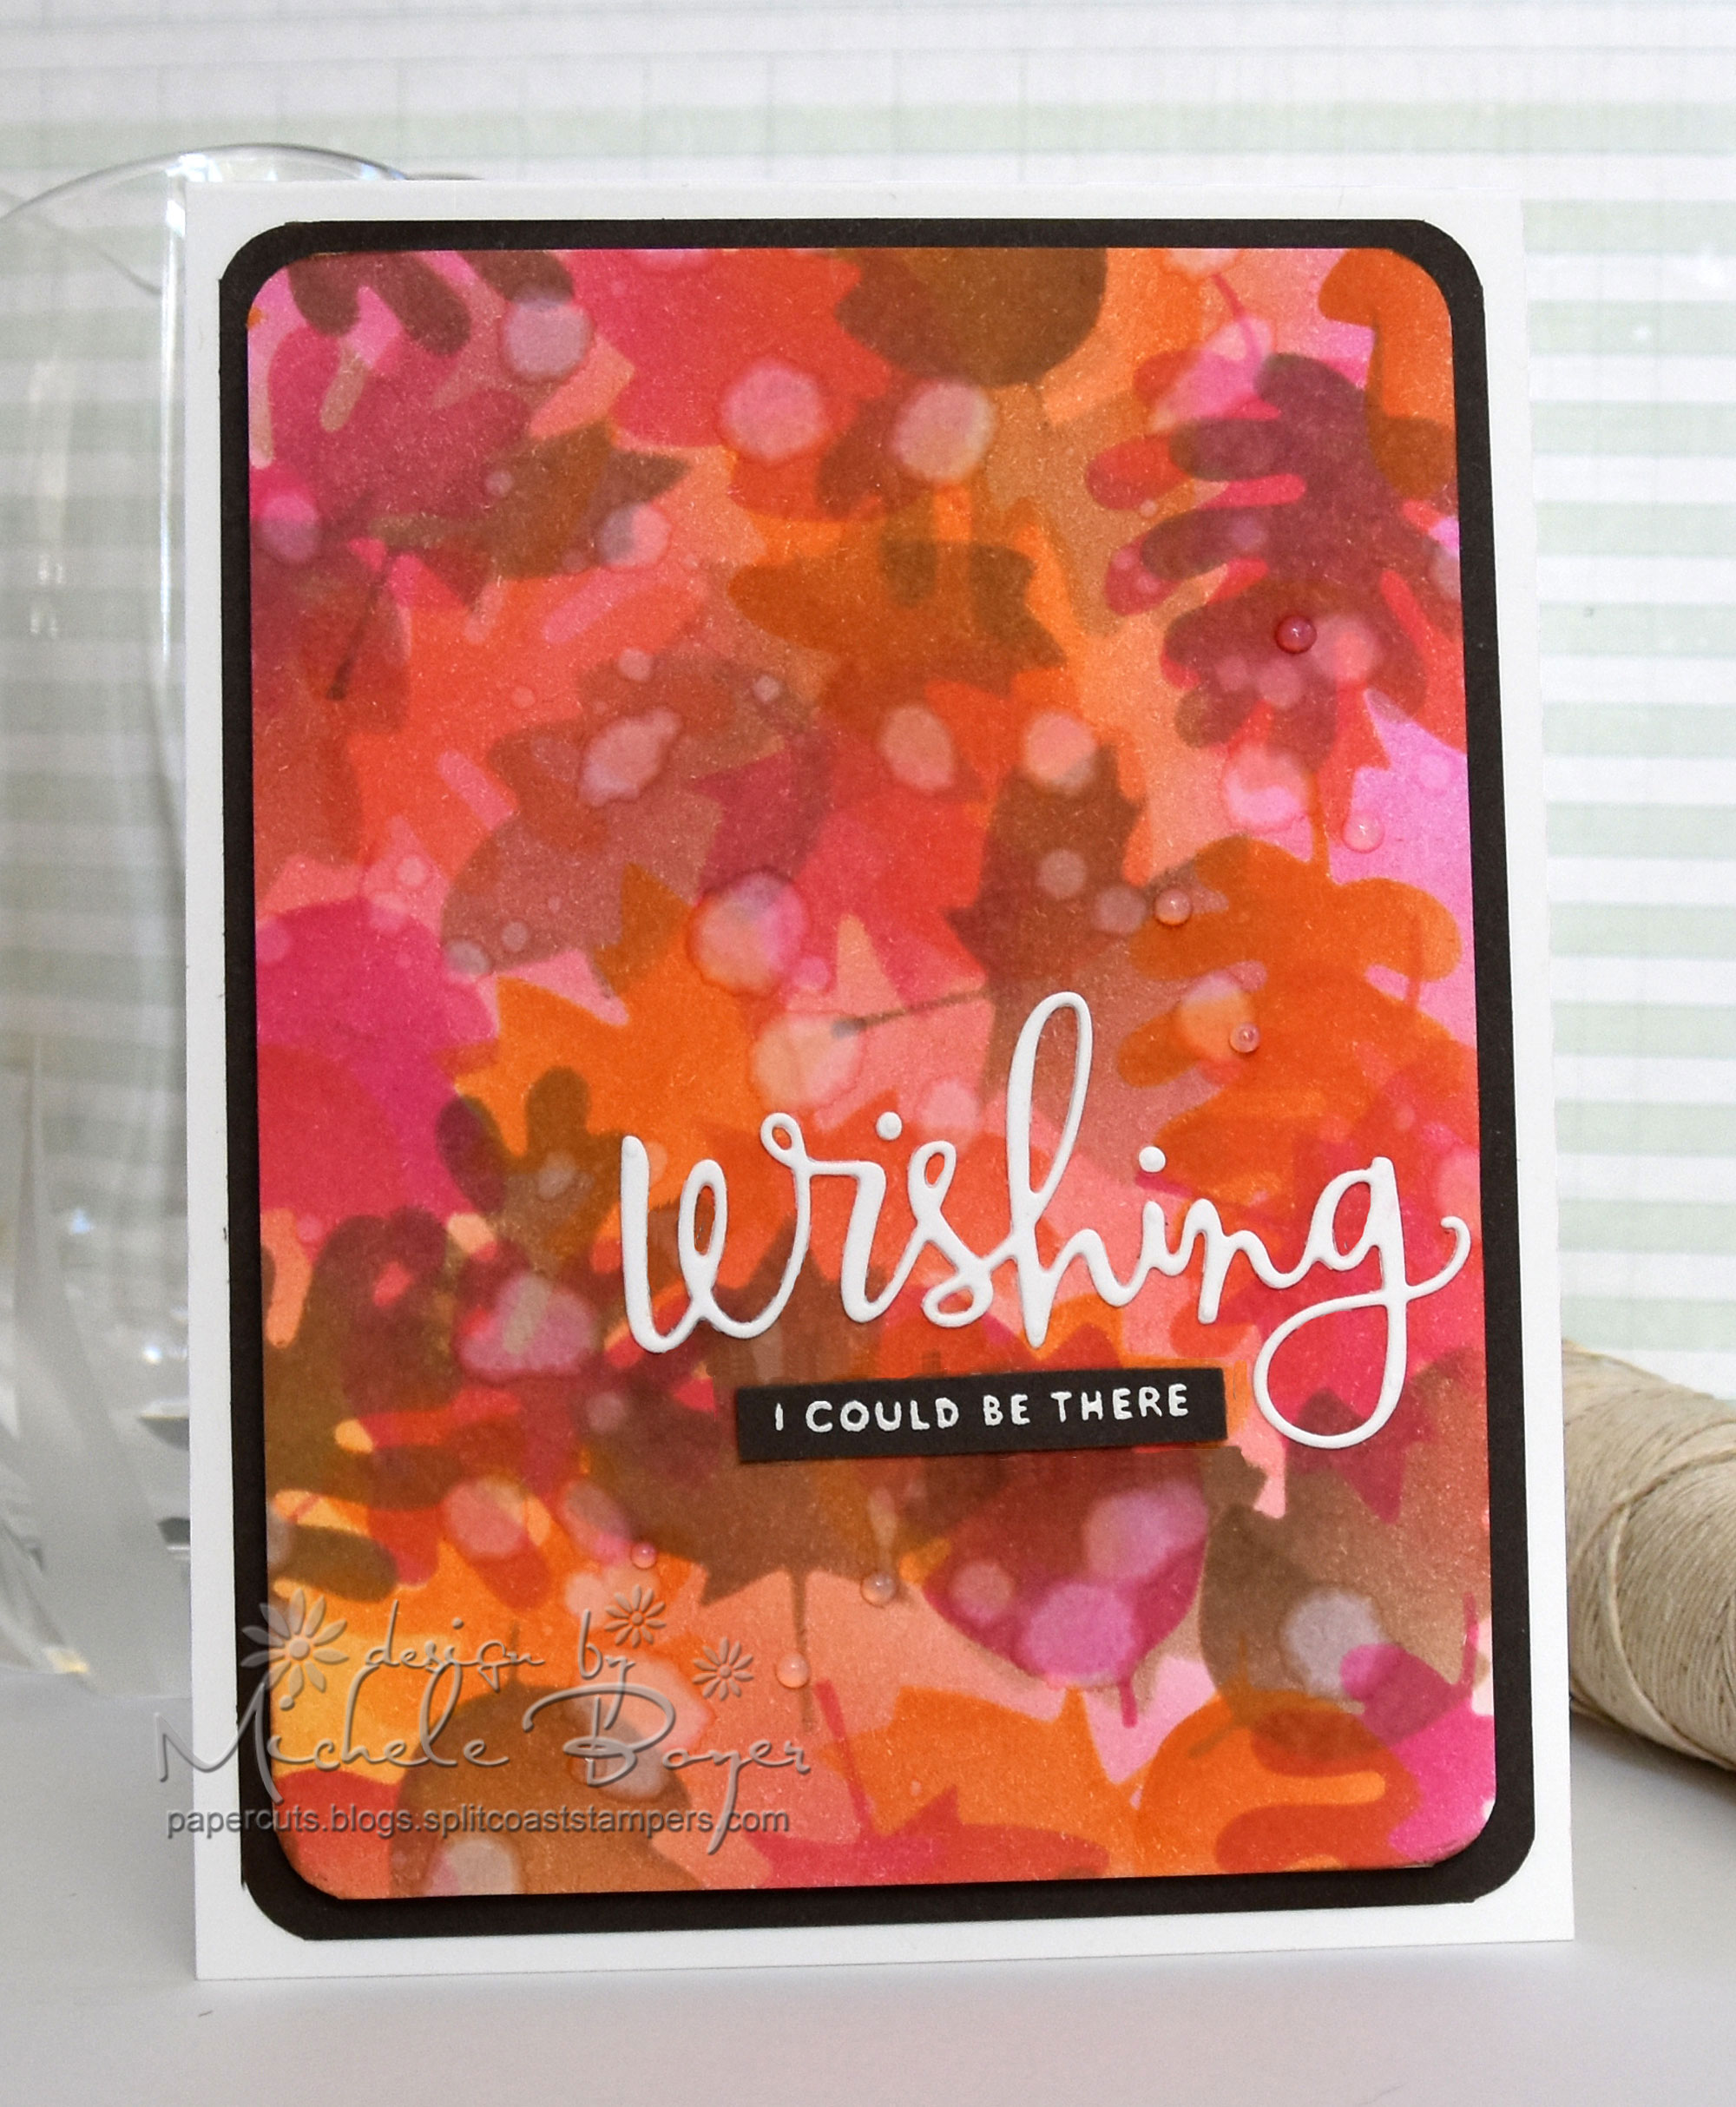
Before assembling my card, I dripped water across the panel, allowed the drops to dry then added some dots of Glossy Accents diagonally above and below the sentiment.
I may add some more doo-dads to my card, I’m not sure. I feel it may need something more…but I don’t want to cover too much of the background. What do you think?
Thanks so much for visiting today! 🙂

Stamps: Simon Says Stamp Sending and Wishing Dies: Simon Says Stamp Wishing; Paper Smooches Large Leaves Ink: Taylored Expressions Sugar Cube; Spiced Marmalade, Abandoned Coral, Picked Rapsberry, Frayed Burlap Distress Paper: Taylored Expressions Sugar Cube, Mocha Other: X-Press It Stencil Sheets, blending tool, white embossing powder, corner rounder, foam tape.


12 responses to “Creating a Layered Background with Stencil Sheets”