Monthly Archives: October 2017

Boo Ya

Hi everyone! Just popping in to share a very quick and easy Halloween card using X-Press It’s new 1″ Black Glitter Deco Tape. Unfortunately, these photos don’t show near the amount of sparkle on the card.  It’s super shimmery!

BooYa--CU

I used grid paper as a guide for placement of both 1″ and 7/16″ black glitter tape, alternating each as I covered the white card stock.

X-Press it 1" Black Glitter Deco tape

The tape is easy to apply or adjust, or even to remove. It leaves no sticky residue and can be used to decorate pretty much anything.  (The 7/16″ black glitter tape is one of ten colors packaged together.)

BooYa-500

Once covered, I die-cut the letters then stacked each on additional (12) die-cuts of each letter.  The little ghost is from Stamping Bella’s Little Bits Mummy, Frankie and Ghosty. I had stamped and die-cut him previously so he was just hanging out on my stamp table, waiting for a home.  🙂

Thanks so much for stopping by!

1amichele siggy

You’re Kinda Sorta Basically Always on My Mind

Hi everyone. TGIF! This week with Stamping Bella we were asked to create using the inspiration photo found at the bottom of this post.

Stamping Bella Tiny Townie Faye Loves Fall

I chose to use Tiny Townie Fay Loves Fall with a sentiment from Marching Chick.

Stamping Bella Tiny Townie Faye Loves Fall (close-up)

Copic markers – BG96, E00, E01, E07, E08, E09, E11, E331, E35, E37, E40, E42, E43, E44, G24, G94, R20, W00, W1, W2, Y17, Y21, Y38, YR14

I colored with markers onto X-Press It Blending Card then adhered a few small brown adhesive pearls.

Next week’s challenge has no bounds. Create anything you’d like.  Simply use any current Stamping Bella image then email your card to [email protected] by next Thursday to be featured on the SB blog. By doing so, you’ll also be entered to win some Bella Bucks! (All challenge details can be found HERE.)

Enjoy the weekend! Thanks so much for stopping by!

1amichele siggy

Paper Smooches November Release Hop

It’s Pep Rally week and we are here today to share a sampling of the NEW Paper Smooches NOVEMBER 2017 release!  TWO new stamp sets and FOUR new dies will be available to purchase at 8:00 p.m. PT on October 30th. You will find our new products HERE once they go live.

To add extra fun to our hop, we are offering a $25 gift code to choose what you like from the PS online store.

Here are the details:

  • FOUR winners will be chosen at RANDOM from any of the design team blogs and the PS Blog to win the $25 prize.
  • Just leave a comment on any of the design team blogs listed below or the PS blog for your chance to win!  (You do not need to comment on all blogs to qualify but it increases your chances.)
  • Deadline: You have until midnight PT on Sunday, October 29th to leave a comment.
  • Please check the Paper Smooches blog on Monday, October 30th, to see if you are one of the FOUR lucky winners.

To increase your chances of winning:

  • Tell us that you Facebooked about our blog hop.
  • Tell us that you Tweeted about our hop.
  • Tell us that you posted on your blog about our blog hop.

Today I’ve used new Baby Birds stamp set with Baby Birds Icons dies. This set is sooooo cute!

Paper Smooches Baby Birds

I stamped and colored my flamingo with Copic markers on X-Press It Blending Card. I die-cut several flamingo shapes to create a thicker chipboard piece over Doodlebug’s Milk and Cookies patterned paper. My MISTI made the two-color stamping of the sentiment super easy. I simply taped off each portion, inked and stamped, all without moving the stamp.

Paper Smooches Baby Birds (close-up)

Copic markers – RV02, RV04, RV06, Y32, YR21, YR23, YR27

Be sure to hop along and comment with the rest of the DT to increase your chances of winning one of four $25 gift codes.

 Thanks for visiting!  Good luck, and happy hopping!

1amichele siggy

More Halloween Hooplah (Queen & Company)

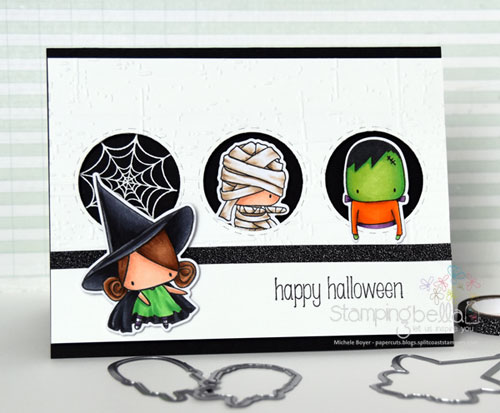
Hi there crafty friends!  Today I’m sharing two more cards using Queen & Company’s latest hit, Halloween Hooplah Shaker Kit.  (You can find my two previously posted Halloween shaker cards here.)  There are so many fun elements to this kit. My favorites are the patterned paper and the teeny tiny toppings – candy corn, eyes, spider webs, stars… As my daughter would say, it’s “chill.”  🙂

Queen & Company Halloween Hooplah Shaker Kit

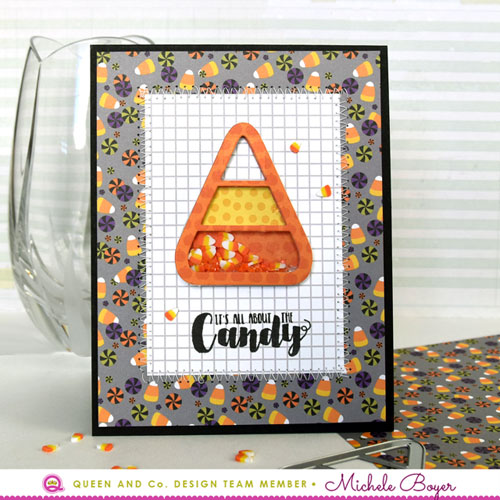
On my first card, I just had to use those tiny candy corn toppings, so I used the candy corn foam shaker shape with the candy corn dies. A wonderful element to this kit is the additional candy corn die pieces, making it super easy to cut the yellow and orange parts of the candy.

Queen & Company Halloween Hooplah Kit (close-up)

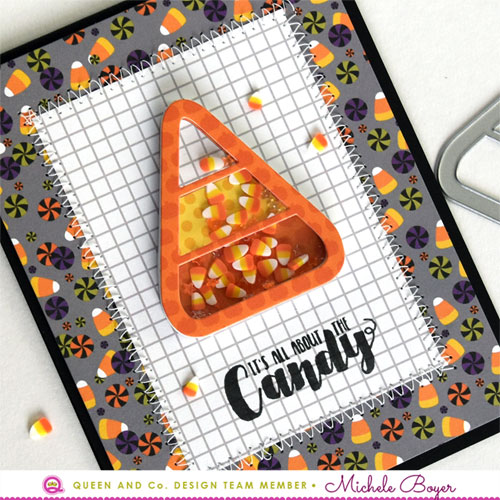
Once the sentiment was stamped and the shaker was in place, I adhered the panel to one of my favorite prints from the coordinating patterned paper then stitched a zig-zag border around the edges. I added a few “escaped” candy corns outside of the shaker for a bit more interest.

Queen & Company Halloween Hooplah Kit

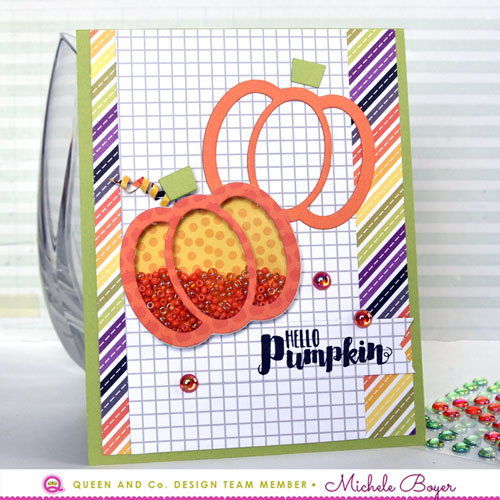
Next I used the cute pumpkin shaker and die elements. When adhering the pumpkin outline next to the pumpkin shaker, I nipped away the part of the outline that would have fallen behind the shaker. Doing so allows the shaker pumpkin to lay flat without any raised areas inside the shaker border.

Queen & Company Halloween Hooplah Kit (close-up)

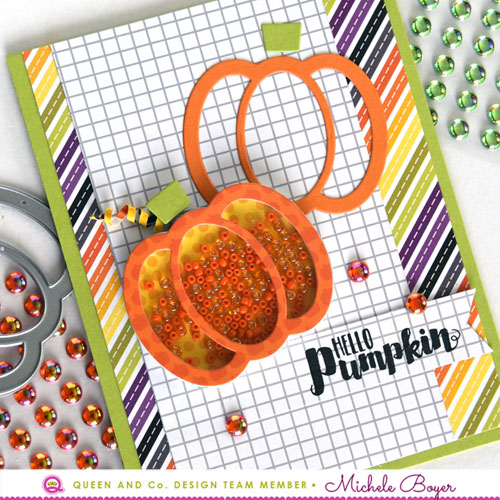
Beneath the stem on the shaker pumpkin, I placed a piece of foam cut from the negative pieces of the pumpkin foam outline. I always save those pieces just for this purpose. It ensures that the popped up parts are the exact same height as the shaker.

The curly stem was created by cutting a thin strip of yellow patterned paper then wrapping tightly around a round toothpick. Once wrapped, I slid the toothpick away, trimmed to the desired length and adhered the piece beneath the stem using Scrap Happy Sheer Glue.

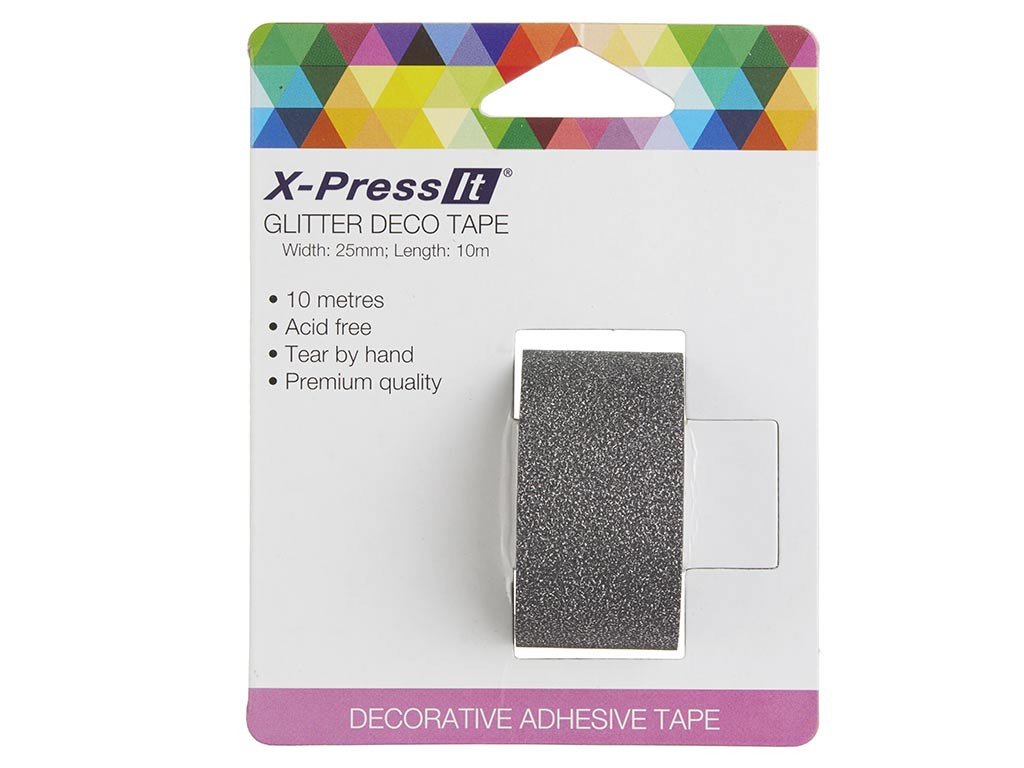
Be sure to check out the Halloween Hooplah kit before it’s gone! Also available are refills of patterned paper, foam shaker elements, toppings, and Halloween tape.

Thanks so  much for stopping by!

1amichele siggy

We Are All Winging It (and a winner)

Good morning everyone. Today I’ve used a new image from Stamping Bella‘s super amazing latest release. (I love so much of it, I didn’t know where to begin!)

We-Are-All-Winging-It-500

Sweet Tiny Townie Annie the Angel comes along with three sentiments (I used my favorite), and could easily be paired with any of the new Holiday Sentiments to create a Christmas card.

We-Are-All-Winging-It-CU

After coloring with Copic markers, I added fine shimmer to her wings and halo using a Clear atyou Spica glitter pen. The white dots on her dress and surrounding area were added using a toothpick and Copic Opaque White. I stamped the sentiment onto translucent vellum using white pigment ink, then white/heat embossed.

I want to thank those who commented for the chance to win my small, impromptu giveaway (here). I appreciate each and every one of my blog readers and wish I could share more of my favorite crafty things.

Capture2

Using Random Number Generator, the winner is…#4 Gilda (McStamper). Congrats, Gilda. I hope you enjoy your cave kids!  🙂

Thanks, everyone for stopping by!

1amichele siggy

Quick and Easy Season’s Greetings

*STAMPING BELLA GIVEAWAY HERE*

Hi everyone! Thanks for stopping by today.  🙂

With the holiday season (quickly) approaching, I’m doing my best to stock up on Christmas cards. My card today is super quick and easy using a bit of distress ink and a few dies by Paper Smooches.

Paper Smooches Season's Greetings and Holiday Sweets

In the center of my card, I first sponged Squeezed Lemonade, then Spiced Marmalade and finally Picked Raspberry distress inks. I started with the lighter color, overlapping inks as I moved down toward the bottom.

Paper Smooches Season's Greetings and Holiday Sweets (close-up)

From gold foil card stock (which is lovely), I die-cut trees from Holiday Sweets, Season’s Greetings and a tiny star from Gift Tags 3.  To help balance the card and add a bit more interest, I adhered a thin strip of gold foil card stock to the left and right edges of the sponged panel.

Not only did my card come together quickly, it’s flat which is a big plus for mailing. 🙂

I’ll be back on Thursday with Paper Smooches’ November release hop. Hope to see you then!

1amichele siggy

The Cutest Cave Kids Ever (and a small give-away)

Hi everyone! I’m popping in today to share a card I created using Stamping Bella‘s adorable Cave Kids.

Stamping Bella Cave Kids (close-up)

As a child, I always loved the Flintstones (yes, showing my age but that’s ok) so maybe that’s why I’m drawn to them. They seriously are so cute, don’t you think?

Stamping Bella Cave Kids

As a quick background, I colored Cave Kids Backdrop, scribbling in a bit of lava coming from the small mountain in the center.

Stamping Bella Cave Kids (close-up)

Copic markers – B0000, B000, BG95, E00, E01, E11, E30, E31, E33, E35, G20, G21, G24, G85, W00, W1, W2, Y21, YR0000, YR23

The sentiment, from Cave Kids Add-Ons, was stamped onto a die-cut heart then attached with clear foam squares.

      **GIVEAWAY**

Stamping Bella Cave Couple

Also available, along the Cave Kids line is Cave Couple, as used HERE.  I happen to have an extra to send to one lucky commenter. I’ll also toss in some of my favorite Copic compatible paper, X-Press It Blending Card. Just leave a comment below. I’ll pick a winner on Wednesday.  Please note:  While I’d love to share Stamping Bella with everyone, this giveaway is limited to those with a US address. 

Thanks so much for visiting!

1amichele siggy

happy halloween (stamping bella)

Hi everyone! TGIF! This week with Stamping Bella we are using circles. 🙂

Happy-Halloween-littles-500

I used a die to create windows for Littles Witchy, Little Bits Mummy & Frankie, and spider web from Haunted House Outdoor Decor.

Happy-Halloween-littles-CU3

I first die-cut the circles then embossed the top two thirds of the panel with Taylored Expressions’ Weathered embossing folder. I stamped the Fall Sentiment, added a strip of X-Press It black glitter Deco Tape then popped up the panel on foam tape.

Next week’s challenge includes this lovely inspiration photo:

Oct-27-small

Use any current Stamping Bella image then email your card to [email protected] by next Thursday to be featured on the SB blog and to be entered to win some Bella Bucks! (All challenge details can be found HERE.)

Enjoy the weekend! Thanks so much for stopping by!

1amichele siggy

Happy Fall (stamping bella)

Hi everyone! Just popping in with another card using more from one of Stamping Bella‘s latest releases. I have so many stamps that have not yet been used.  For now, I’m tackling Halloween/Fall so I can move on to the Christmas pile. So sad. (Not enough time in the day.)

Today I’ve used Fall Backdrop with Little Bits Nature.

Stamping Bella Fall Backdrop, Little Bits Nature

I’ve been wanting to practice coloring larger areas with Copic markers and Stamping Bella’s new backdrops are the perfect way to do so. To color the sky, I first used B00, starting at the top then moving toward the ground using B000 and finally B0000. I’m happy with it.  🙂

Stamping Bella Fall Backdrop, Little Bits Nature (close-up)

B0000, B000, B00, E08, E09, E11, E30, E31, E34, E35, E37, E42, E43, E97, YG91, YG93, YG95, YG97, YR14, YR16, YR18, YR68

I stamped the cute Little Bits fox and leaves onto white card stock, colored with markers and die-cut with the coordinating dies.

The Fall Sentiment was stamped, cut into  a tag shape and tied to a stitched rectangle frame using natural hemp.

Thanks for stopping by today!

1amichele siggy

Stamps: Stamping Bella Little Bits Nature, Fall BackdropFall Sentiment Set Dies: Stamping Bella Little Bits Nature Cut It Out, Taylored Expressions Stitched Frame Stacklets 1  Ink: Taylored Expressions Oreo  Paper:  X-Press It Blending Card, Taylored Expressions Sugar Cube  Other: Copic markers, natural hemp, adhesive pearls

Harvest Blessings with Kirarina Wink

Hi everyone!  With the cooler weather finally arriving, I’m in the mood to create something “fall-ish.”  🙂  I decided to make a fall greeting for framing using darker card stock, Kirarina Wink metallic pens and this Harvest Blessings digital file from SVG Salon.

5 Finished-No-Frame-IG

I used Kirarina Wink Gold  for the greeting with small dots added using White Pearl. I also used a 0.3 Wine inking pen to add a bit a definition.

1 Supplies

I first printed the greeting onto regular copy paper.

2 Trace-on-card-stock

I placed a sheet of Transfer Paper over my card stock and placed the printed greeting on top. Using removable tape, I held the layers in place then traced an outline with a pencil.  (Images can be printed directly onto the white side of the Transfer Paper. I chose not to do so because my printer is finicky and I wasn’t in the mood to battle.)

3 Trace-on-Trace-Oops-500

Tip:  When removing the transfer paper from the package, make certain you are only removing ONE SHEET. Otherwise, you will end up tracing your image onto the back of another sheet of transfer paper (shown above). eye roll emojii

4 Traced-on-CS-500

Once traced onto the CARD STOCK (haha), I carefully filled in the areas with a Gold Kirarina Wink. Once filled, I added a bit of definition with a 0.3 Wine Multiliner then added some random scattered dots of white.

Closeup

While it can be kind of scary sometimes to share zoomed in shots, I wanted to show how wonderfully the Kirarina Wink covers darker card stock.  Also, it’s hard to capture in the photo, but the ink holds tiny specks of glass, creating a soft, shimmery appearance. The pens can work great on glass, wood, plastic and photos!

Now to find a frame!  🙂

Thanks so much for visiting today!

1amichele siggy