Monthly Archives: August 2018

Stamping Bella September Release Previews – A Pile, a Bus and Baseball

Hi everyone! I have two more samples to share today using new stamps coming  to Stamping Bella on September 5.  I also have this week’s challenge.  All are colored with Copic markers (listed below each close-up photo).

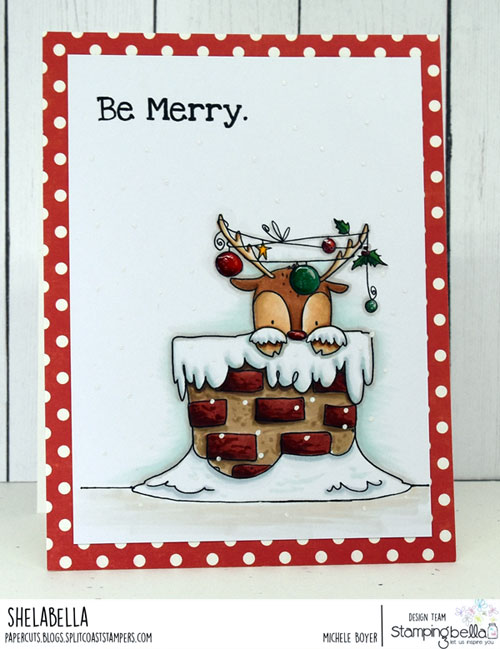
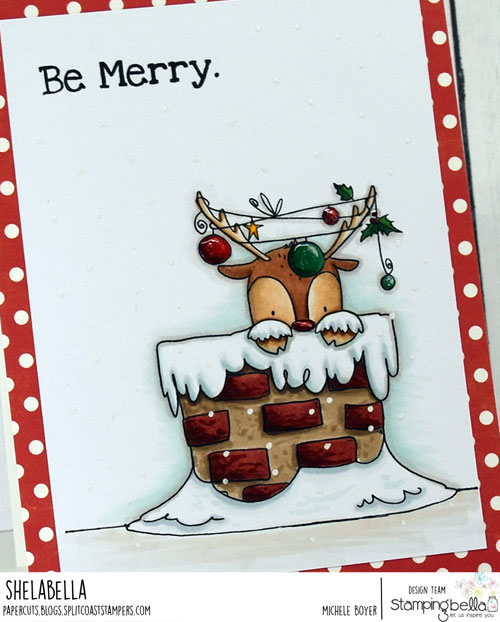
First up is Penquin on a Reindeer on a Polar Bear.

Stamping Bella Penguin on a Reindeer on a Polar Bear

My penguin and deer are on a brown bear instead of a polar bear.  It works either way.  🙂

Stamping Bella Penguin on a Reindeer on a Polar Bear (close-up)

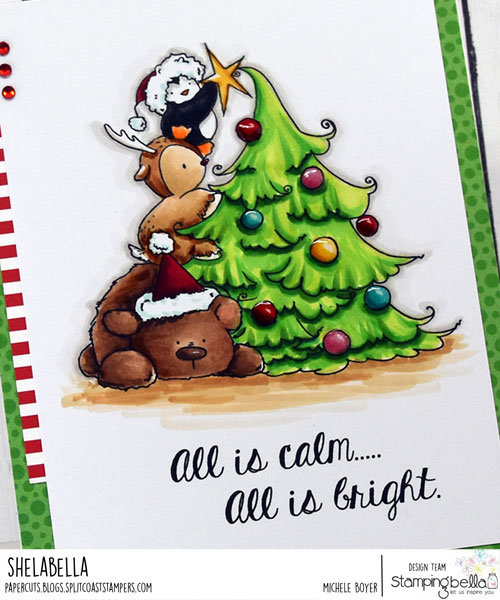
Copic markers – BG13, BG15, BG18, E23, E30, E31, E33, E35, E57, E59, G29, R01, R12, R29, R39, R59, R83, R85, RV32, N7, N9, W00, W1, W2, Y21, YG03, YG06, YG09, YG17, YR12, YR16, YR23; Glossy Accents

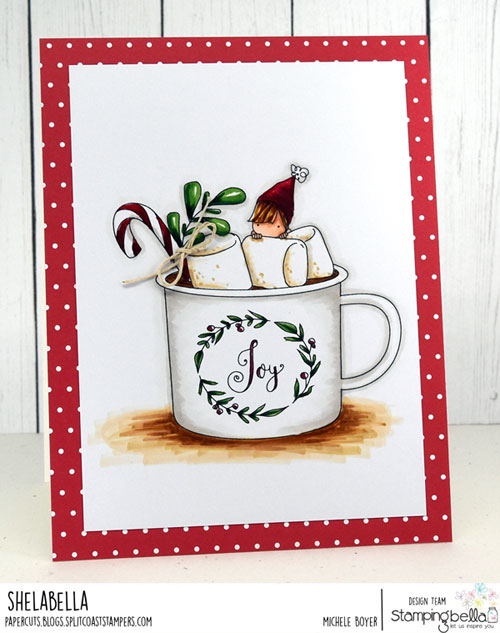
After coloring, I added Glossy Accents over each ornament.

Stamping Bella Rosie & Bernie in a Bus

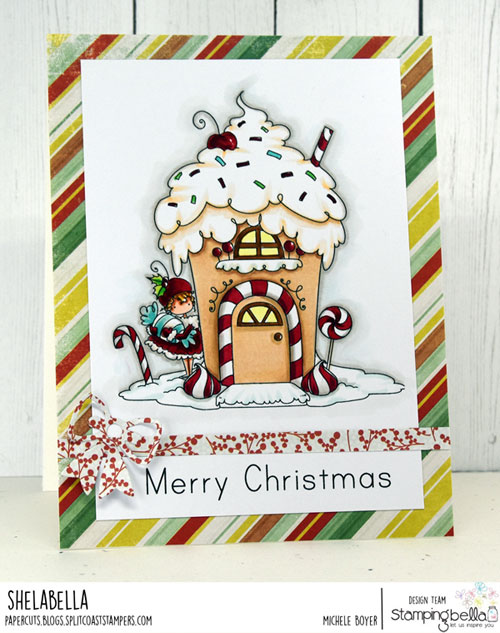
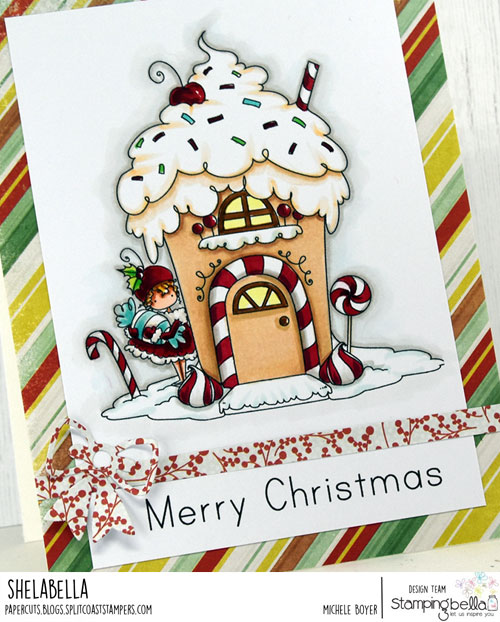
Next I’ve used new Rosie & Bernie in a Bus. I love that the sentiment is beach-themed. After coloring, I added dots of snow using a White Pearl Kirarina Wink pen.

Stamping Bella Rosie & Bernie in a Bus (close-up)

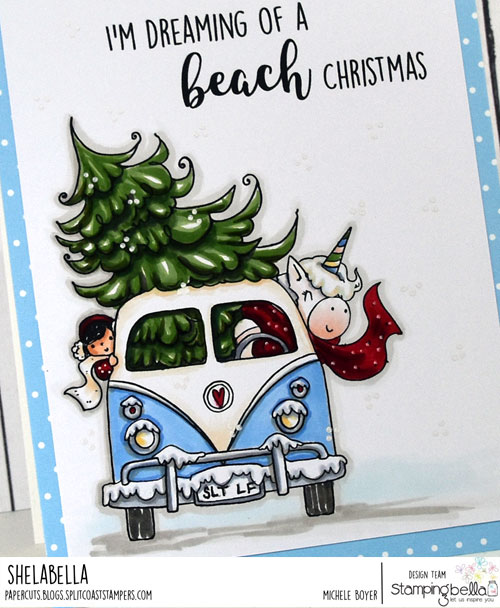
Copic markers – B0000, B000, B21, B23, C1, C2, C3, E00, E01, E11, E50, G29, G99, R000, R00, R01, R29, R39, R89, W00, W1, W2, W3, W7, Y21, YG63, YG67; Kirarina Wink White Pearl pen

You can find more in the Rosie & Bernie line here.

Be sure to stop by the Stamping Bella blog today to see more previews of additional sets. And leave a comment there for your chance to win a prize!

Since it’s Friday, I also have our challenge from last week. We were to use images from the latest release. I chose Baseball Squidgy.

Stamping Bella Baseball Squidgy

I’m not much of a baseball fan, but if I’m going to watch, I’ll choose the Cubs, thus the blue and white, uniform.  🙂

Stamping Bella Baseball Squidgy (close-up)

Copic markers – B16, B18, B26, C00, C1, C2, C3, C7, E00, E01, E11, E13, E21, E23, E25, E27, E31, E33, E51, R02

NEXT WEEK’S CHALLENGE

Use any current Stamping Bella image. (No restrictions.) If you’d like, email your card to [email protected] by next Thursday to be featured on the SB blog. By doing so, you’ll also be entered to win some Bella Bucks! All challenge details can be found HERE.

I’ll be back tomorrow with more samples from the new release.  Thanks for stopping by!  🙂

1amichele siggy

Stamping Bella September Release Previews – Reindeer and Mice

Hi everyone!  I’m back today to share two more samples from Stamping Bella‘s upcoming September 5 release!

Stamping Bella Peek-a-Boo Reindeer Stuffie First is Peek-a-Boo Reindeer Stuffie.  I love the tangle of ornaments hanging from his antlers.

Stamping Bella Peek-a-Boo Reindeer Stuffie (close-up)

Copic markers – BG10, BG70, C00, C1, C2, E07, E08, E09, E30, E31, E33, E35, E40, E41, E42, E43, E47, G07, G09, G16, G19, G28, R29, R39, R89, W00, W1, W2, Y17; Kirarina Wink White Pearl pen; Glossy Accents

I colored with Copic markers (listed above) then added dots of snow with a Kirarina Wink White Pearl pen. I also added Glossy Accents over each ornament.

The sentiment is from a soon-to-be previewed set.

Stamping Bella Mice in Boots

Next I’ve used new Mice in Boots.  So sweet.  🙂

Stamping Bella Mice in Boots (close-up)

Copic markers – BG000, BG70, G28, C00, C1, C2, C3, C5, C7, G28, R000, R00, R29, R39, R89, YG06, YG17

As before, I colored with markers, shading the mice with grays and leaving white to show as highlights on the boots.

Be sure to stop by the Stamping Bella blog today to see more previews of additional sets. And leave a comment there for your chance to win a prize!

I’ll be back tomorrow with more samples from the new release.  Thanks for stopping by!  🙂

1amichele siggy

Stamping Bella September Release Previews – Teeny Tiny Townies

Hello everyone! Today begins previews of Stamping Bella‘s upcoming September 5 release. If you love the Tiny Townies (like me), you just may also love the new TEENY Tiny Townies. I *adore* them! I have six to share.  🙂

All are colored with Copic markers.  Specific marker colors are shown below each close-up photo.

First, Teeny Tiny Townie with a Pumpkin Pie

Stamping Bella Teeny Tiny Townie with a Pumpkin Pie

She’s sooooo cute!  (And strong!)  🙂

Stamping Bella Teeny Tiny Townie with a Pumpkin Pie (close-up)

Copic markers – E00, E01, E07, E08, E09, E11, E30, E31, E33, E35, E37, W00, W1, W2, Y21, YR23

I sprinkled a few tiny die-cut leaves around the bottom of the image.

Next – Teeny Tiny Townie with a Pinecone. That little winter coat and hat! ♥

Stamping Bella Teeny Tiny Townie with a Pinecone

After coloring with markers, I added dots of white with a Kirarina Wink White Pearl pen.

Stamping Bella Teeny Tiny Townie with a Pinecone (close-up)

BG96, BG99, E00, E01, E11, E30, E31, E33, E35, E37, E50, E51, E53, G85, R01, R29 , W00, W1, W2, Y21; Kirarina Wink White Pearl

Next – Teeny Tiny Townie Gingerbread House.

Stamping Bella Teeny Tiny Townie Gingerbread House

The sentiment is from a soon-to-be previewed set called Reindeer with a Gift.

Stamping Bella Teeny Tiny Townie Gingerbread House (close-up)

Copic markers – BG11, BG13, E00, E01, E11, E30, E31, E35, E50, E51, R00, R29, R39, W00, W1, YG000, YG03, YG06

Next – Teeny Tiny Townie Chanukah.

Stamping Bella Teeny Tiny Townie Chanukah

She comes with two sentiments, both “Happy Hanukkah” and “Happy Chanukah.”

 Stamping Bella Teeny Tiny Townie Chanukah (close-up)

Copic markers – B23, B24, B26, B41, E00, E01, E11, E30, E31, E33, E35, E40, W00, W1, W2, Y21

Next – adorable new Teeny Tiny Townie Hot Chocolate.

Stamping Bella Teeny Tiny Townie Hot Chocolate

Once colored, I tied a bit of hemp cord around the candy cane.

Stamping Bella Teeny Tiny Townie Hot Chocolate (close-up)

Copic markers – E00, E01, E11, E30, E31, E33, E35, E37, G09, G28, R29, R39, R89, W00, W1, Y21, YG17

And lastly (for today), Teeny Tiny Townie Happy Holidays.

Stamping Bella Teeny Tiny Townie Happy Holidays

After coloring the dress and hat, I added tiny dots of white with my Kirarina Wink White Pearl pen.

Stamping Bella Teeny Tiny Townie Happy Holidays (close-up)

Copic markers – BG10, E00, E01, E11, E31, E33, E35, E50, R01, R29, R39, R89, W00, W1, W2, W3, Y21; Kirarina Wink White Pearl pen

Thoughts?  Adorable, right? I love them so very much.

Be sure to stop by the Stamping Bella blog today to see more previews of additional sets. And leave a comment there for your chance to win a prize!

I’ll be back tomorrow with more samples from the new release.  Thanks for stopping by!  🙂

1amichele siggy

I’m Done Adulting (stamping bella)

Hi everyone.  My last two months have been so insane, I *think* I’m finally seeing a teeny tiny light at the end of the tunnel. With that in mind, both of my cards today are appropriate. It’s time to take a deep breath and do all the things I haven’t had time to do.  #craycray

This week with Stamping Bella, our challenge was to use the color palette found at the bottom of this post.

Stamping Bella Tiny Townie Mermaid

I used Tiny Townie Mermaid. Isn’t she lovely?

Stamping Bella Tiny Townie Mermaid (close-up)

Copic markers – B0000, B000, B00, C1, C2, E00, E01, E11, E31, E35, R00, R01, Y21, YR23; Kirarina Wink White Pearl pen

After coloring with Copic markers (listed above), I white embossed the Under the Sea Sentiment then added sequins and white dots using a Kirarina Wink White Pearl pen.

Stamping Bella The Squidgy Who Couldn't

This is how I felt until yesterday afternoon.  Finally something went right. I may still be on the floor, but I can at least lift my head now. #ithasnotbeenfun #atall

Stamping Bella The Squidgy Who Couldn't (close-up)

Copic markers – B0000, E00, E01, E11, E31, E35, E37, R01, W00, W1, W2, W3, Y21, YR23, YG01, YG03, YG06

After stamping and coloring The Squidgy Who Couldn’t (markers listed above), I stamped the accompanying sentiment and added a second phrase from The Chicks That “Couldn’t Even.”

NEXT WEEK’S CHALLENGE

Use an image from the latest release.  If you’d like, email your card to [email protected] by next Thursday to be featured on the SB blog. By doing so, you’ll also be entered to win some Bella Bucks! All challenge details can be found HERE.

Thanks so much for visiting today!

1amichele siggy

More Bug Jar from Queen & Company

Hi there! I have two cards to share using a variety of fun new product from Queen & Company! (Their products are ALL super fun!)

My first card uses both Love Jar and Bug Jar kits, new Love Jar Flower & Stem dies and a sprinkling of new Wood Toppings. I was so very excited to see the Love Jar dies, and those wood toppings….adorable! There are six shapes, each packaged in new mini topping bottles.

Flying-By-500

I used a block of Birthday Bash patterned paper as my background. After stamping and die-cutting the flowers, I positioned each on the patterned paper, using the jar die as a guide. The bottom half of each stem was glued in place then the jar foam shape was adhered. I filled with Love Jar toppings, Bug Jar toppings, a few clear Diamonds and Wood Heart shapes. Before adhering the jar top, I nipped off the flower stems at the top of the jar, adhered the jar lid, then inserted each stem through the jar lid opening, tucking the top edges back under the flowers. Each end was secured using Sheer Glue. Each flower at the end of a stem was adhered using a foam square (cut from the negative space leftover from within the foam jar shape).

Flying-By-500-CU

Once the jar was assembled, I stamped, colored and die-cut a dragonfly and butterfly then attached each to the jar and patterned paper. I applied glue only to the body portion so that I could bend up the wings slightly. I tied a bit of string then stamped the sentiment.

Supplies:  Bug Jar kit, Love Jar kit, Birthday Bash patterned paper, Diamond Toppings, Wood Toppings, Sheer Glue

Life-is-Brighter-500

Next, I stamped the lightning bug from Bug Jar stamp set in a block pattern and colored the bodies with bright Copic markers.

Life-is-Brighter-500-CU

I also used a marker to highlight the word “brighter” in the sentiment. (I love the font!)

Once colored, I adhered the panel to a block of Fruit Basket patterned paper, then adhered to a card base.

I’ve been having a blast with the Bug Jar kit, and I love that it corresponds so nicely with the Love Jar.

Supplies:  Bug Jar kit, Fruit Basket patterned paper

Thanks so much for visiting today!

1amichele siggy

Feeling Fall(ish) – Stamping Bella

Hi everyone.  You may recall that Stamping Bella‘s Tiny Townie Bonnie Loves Bows is the August Stamp of the Month. She is 20% off through August 31st. This week, we’re using other images from that same Tiny Townie category. I chose Patricia Loves Pumpkins.

Stamping Bella Patricia Loves Pumpkins

After stamping the image onto X-Press It Blending Card, I colored with Copic markers then adhered to a brown dotted panel of patterned paper.

Stamping Bella Patricia Loves Pumpkins (close-up)

Copic markers – E00, E01, E07, E08, E09, E11, E30, E31, E33, E35, E37, R01, Y21, YG63, YG67, YR04, YR12, YR14, YR23, YR27, W00, W1, W2

Before adhering to my card base, I used a needle to punch a hole along the top and left border to thread the twine. Grid paper came in handy to ensure the holes were equal distance from the corner.

Stamping Bella Autumn Loves Autumn

Also this week (posted on Instagram), I used Tiny Townie Autumn Loves Autumn. (I’ve been in a fall mood…even though it’s still about 90 degrees outside.)

Stamping Bella Autumn Loves Autumn (close-up)

Copic markers – E00, E01, E07, E08, E09, E11, E30, E31, E33, E35, E37, E40, E42, R00, R01, Y21, YG63, YG67, YG97, YR23, W00, W1, W2

Once colored, I adhered a sprinkling of Taylored Expressions’ Little Bits Leaves (X-Press It Blending Card colored with Copic markers.)

NEXT WEEK – color CHALLENGE

Use the color palette below as inspiration.

38435783_2124705314237393_7300476145772789760_n

If you’d like, email your card to [email protected] by next Thursday to be featured on the SB blog. By doing so, you’ll also be entered to win some Bella Bucks! All challenge details can be found HERE.

Thanks so much for visiting today!

1amichele siggy

Especially Happy (stamping bella0

Hi everyone! I cannot believe how quickly summer is zipping by! It’s already time for another fun challenge with Stamping Bella.  🙂

This week the team is designing with any current image not from the latest release. I chose Tiny Townie Garden Girl Sweet Pea. I love her.  🙂

Stamping Bella Tiny Townie Garden Girl Sweet Pea

After coloring with Copic markers, I added a sentiment using a combination of new Happy dies (I used the smallest of the three) and a stamped sentiment from Tiny Townie Ellie the Elf.

Stamping Bella Tiny Townie Garden Girl Sweet Pea (close-up)

Copic markers – BV00, BV11, BV25, BV34, E00, E01, E11, E31, E35, E37, G28, G43, G46, R01, W00, W1, W2, Y21

Also, yesterday I posted the card below on Instagram.

Stamping Bella Squidgy Bookworm

Squidgy Bookworm was also colored with Copic markers (listed below). Isn’t she adorable?

Stamping Bella Squidgy Bookworm (close-up)

Copic markers – B21, B23, E00, E01, E11, E27, E31, E33, E35, E47, E50, E51, E53, E55, R29, R39, R89, W00, W1, W2, W3, Y21, YG03, YG06, YG09, YR14, YR16, YR18, YR23; Kirarina Wink White Pearl pen

NEXT WEEK’S CHALLENGE

Use an image from the same category as the March Stamp of the Month (Tiny Townie Bonnie Loves Bows), which means use an image from the Tiny Townie.  If you’d like, email your card to [email protected] by next Thursday to be featured on the SB blog. By doing so, you’ll also be entered to win some Bella Bucks! All challenge details can be found HERE.

Thanks so much for visiting today!

1amichele siggy

Life is a Circus (paper smooches)

Hi everyone. Thanks for stopping by! My card today uses Enjoy the Show stamp set from Paper Smooches. (My life has indeed been a circus the last couple months. I can relate to that clown.  Hopefully soon everything will return to a more normal pace. )

Paper Smooches Enjoy the Show

I first planned out my “scene” by arranging the stamps, overlapping where necessary. I determined the clown would be in the foreground so I stamped him first, then while the stamp was still inky, I stamped again onto a Post It note. I cut that out and used it as a mask over the stamped image before stamping the elephant, his box and sentiment.

Paper Smooches Enjoy the Show (close-up)

For balls, I used an assortment of Doodlebug’s Matte Sprinkles to match the dots on Doodlebug’s Puppy Love patterned paper.

I’ll be back soon.  🙂

1amichele siggy

Stamping Bella’s August Stamp of the Month (and an extra)

Hi everyone! It’s time to share Stamping Bella‘s August Stamp of the Month. Tiny Townie Bonnie Loves Bows is 20% off through August 31st. (You can find all of the sweet Tiny Townies here.)

Stamping Bella Bonnie Loves Bows

After stamping onto X-Press It Blending Card, I colored with Copic markers, choosing colors from the pretty patterned paper from Echo Park Have Faith.

Stamping Bella Bonnie Loves Bows (close-up)

Copic markers – BG11, BG13, BG15, BG18, BG70, E00, E01, E11, E31, E35, E37, R01, R02, R83, RV11, RV32, W00, W1, W2, W3, Y21

The full sentiment reads “Sending You Lots of Hugs.” I chose to use only the word “hugs,” stamping it into the heart.

Stamping Bella Uptown Girl Wilma Loves Wine

Also this week, I created a card using one of my favorites from the latest release, Uptown Girl Wilma Loves Wine.

Stamping Bella Wilma Loves Wine (close-up)

Copic markers – BG10, BG70, E00, E01, E11, E31, E35, E37, R01, V15, V17, W00, W1, Y11, Y21; Kirarina Wink White Pearl

Once colored, I added a pattern of white dots using a Kirarina Wink White Pearl pen.

NEXT WEEK’S CHALLENGE

Use a vintage Stamping Bella image, meaning one NOT from the current/most recent release. (If the image is not listed in the “what’s new” category, then it’s considered “vintage.”) If you’d like, email your card to [email protected] by next Thursday to be featured on the SB blog. By doing so, you’ll also be entered to win some Bella Bucks! All challenge details can be found HERE.

Thanks so much for visiting today!

1amichele siggy

Queen & Company’s New Bug Jar Shaker Kit

Hi everyone! Today I’m sharing two cards I created with Queen & Company’s adorable new Bug Jar kit. The kit ingredients work well on their own, or perfectly with my favorite, Love Jar kit.  The Bug Jar kit includes 30 stamps, 16 dies and 11 collections of the cutest little bug toppings!

Queen & Company Bug Jar/Love Jar Kits

To create my first card, I used the jar and lid die from the Love Jar kit, with patterned papers from Birthday Bash paper pad. Inside the jar, I placed cute tiny bee toppings along with some blue flowers from the Love Jar kit.

Queen & Company Bug Jar/Love Jar kits

I stamped, colored and die-cut several bees, attaching two to the shaker window using Sheer Glue. The glue was placed behind the body portion only so the wings were free to bend forward just a bit. I adhered a third bee over a stamped dotted trail and tucked the last one just inside the jar lid. He’s looking for a quick escape.  🙂 Lastly, I tied a bit of yellow twine (from the Love Jar kit) around the jar lid.

Supplies:  Bug Jar kit, Love Jar kit, Birthday Bash patterned paper, Sheer Glue

Queen & Company Bug Jar kit

I kept my second card very simple, using only stamps and dies from the Bug Jar kit. After stamping the branch and leaves, I added a bit of shadow using light gray markers to create dimension. The caterpillar was stamped, colored then die-cut and adhered above the branch.

Queen & Company Bug Jar kit

I stamped the cute sentiment beneath the branch then adhered the completed panel over Fruit Basket patterned paper.

Supplies: Bug Jar kit, Fruit Basket patterned paper, Sheer Glue

In addition to the Bug Jar Kit, a collection of refill Bug Jar Toppings are available.

I see the Bug Jar kit quickly becoming one of my favorites. I adore the sentiments and bugs!

Thanks so much for visiting today!

1amichele siggy