Daily Archives: September 3, 2018

Queen & Company’s New Magical Characters Kit

Hi everyone! As a big Disney fan, I was super excited to see Queen & Companys new Magical Characters kit. The kit contains a themed paper pad, 11 dies, 13 super-cute toppings, 15 foam shaker shapes and a coordinating stamp set.  So much fun!

Im-All-Ears-500

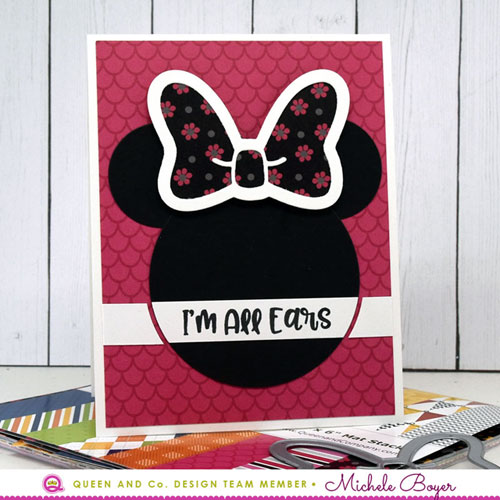
To create my first card, I die-cut one large and two small black circle shapes then glued them in place over pink patterned paper from the Magical Characters paper pad.  I used the bow die to die-cut the outline from white card stock, then used the outline of the die as a template to cut the floral paper. I adhered the floral paper behind the white die-cut outline then attached over the ears using foam tape.

Im-All-Ears-500-CU

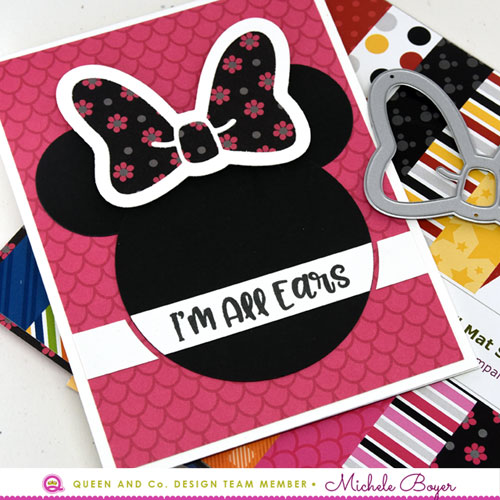
I stamped the sentiment onto a white card stock strip then used the larger circle die to cut the ends to the curve of the black circle. The left and right edges of the sentiment strip were adhered with a slight gap left between the two pieces.

Supplies: Magical Characters Kit, Sheer Glue

Quite-a-Character-500

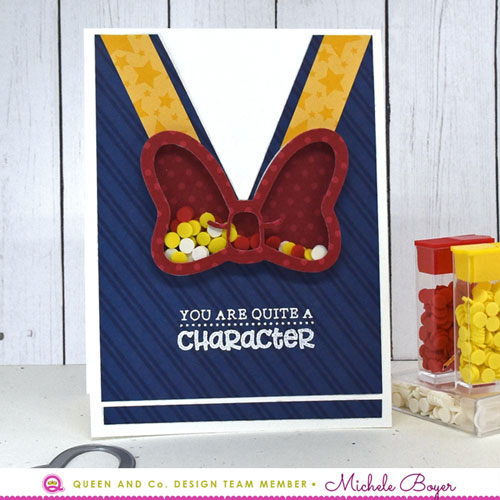
Next, I created a Donald Duck look-a-like card using patterned paper from the Magical Characters paper pad and the bow die.

Quite-a-Character-500-CU

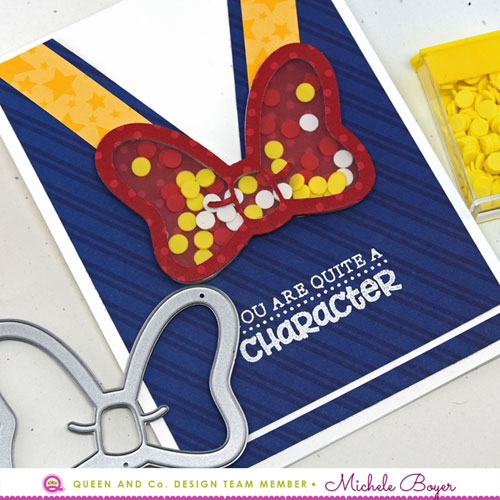
In the shaker, I placed red, yellow and white Confetti toppings, then stamped the sentiment in white ink and white embossed.

Supplies: Magical Characters Kit, Confetti toppings, Sheer Glue

There are so many possibilities with the Magical Characters kit. And it’s perfect for scrapbooking those magical vacation memories!  Magical Character foam/acetate refills, toppings, magical ribbon and paper pad are also available individually.

Thanks so  much for visiting!

1amichele siggy

Stamping Bella September Previews – Holiday Oddballs

Hi everyone! I’m back with one more set of Stamping Bella September 5 release previews! Today the team is sharing new holiday themed Oddballs!  I have three.  All were stamped onto X-Press It Blending Card and colored with Copic markers.

Stamping Bella Oddball Santa & the Missus

First I have Oddball Santa and the Missus.  They look tired…as they probably are. 😉  NOTE: I added the tiny scribbles onto Santa’s list. The stamp image of his paper is actually blank.

Stamping Bella Oddball Santa and the Missus (close-up)

Copic markers -BG10, E00, E01, E11, E33, E35, E37, E50, G05, G07, G29, R29, R39, R89, W00, W1, W2, W4, W5, W7, 100

The images are separate so they can easily be used together or individually. The sentiment I’ve used here is also included.

Stamping Bella Oddball Reindeer

Next I’ve used Oddball Reindeer. The set includes three reindeer and the sentiment I used here.

Stamping Bella Oddball Reindeer (close-up)

Copic markers – BG11, E30, E31, E33, E35, G09, G28, R01, R29, R39, R89, W00, W1, W2, W5, W7, W9

After coloring, I stitched two small jingle bells to the ends of the scarf on the reindeer on the right.  🙂

Stamping Bella Oddball Boy Elf

Lastly, I’ve used Oddball Boy Elf. He comes with the sentiment I used here.

Stamping Bella Oddball Boy Elf (close-up)

Copic markers – BG11, E00, E01, E11, E30, E31, E35, E37, G28, R29, R39, R89, W00, W1, W2, W7, W9, Y19, Y21, YG17, YG23, YG25

Before adhering the completed panel to my card front, I added a few gold cord stitches on the left.

Be sure to stop by the Stamping Bella blog today to see more previews of additional sets. And leave a comment there for your chance to win a prize!

Thanks so much for visiting today! 🙂

1amichele siggy