Monthly Archives: November 2018

Happy Chanukah (stamping bella)

Happy Friday, everyone! This week the Stamping Bella team is revisiting our latest release. I absolutely adore the new Teeny Tiny Townies (and I had a need for a Chanukah/Hanukkah card) so I chose to use Chanukah.

Stamping Bella Teeny Tiny Townie Chanukah

The set includes the sentiments Happy Chanukah as well as Happy Hanukkah so whichever your preference, you’re all set.  🙂

Stamping Bella Teeny Tiny Townie Chanukah (close-up)

Copic markers – E00, E01, E11, E31, E33, E35, E37, E40, E41, E42, V09, V15, V17, W00, W1, W2, Y21, YR23; clear Wink of Stella glitter brush

After coloring with Copic markers (noted above), I added subtle sparkle to the Teeny Tiny Townie’s dress using a clear Wink of Stella glitter brush. I also added a few of Queen & Company‘s new Gems toppings as a quick little embellishment.

NEXT WEEK’S CHALLENGE

Use any current Stamping Bella image. (No restrictions.) If you’d like, email your card to [email protected] by next Thursday to be featured on the SB blog. By doing so, you’ll also be entered to win some Bella Bucks! All challenge details can be found HERE.

Thanks so much for visiting today!

1amichele siggy

Peace – Love – Joy (paper smooches)

Hello everyone. How is your holiday prep progressing? Mine is “eh.” But we’re getting there!  Today I have a card to share using A Holy Holiday by Paper Smooches.

Paper Smooches A Holy Holiday

I first created the background by stamping and white embossing snowflakes from Gently Seasoned Two.  I then sponged Wilted Violet and Broken China Distress Oxide inks, wiping away ink from the snowflakes.  I also sprinkled a bit of water over the ink to create a somewhat splotchy appearance.

Paper Smooches A Holy Holiday (close-up)

Distress Oxide Inks – Wilted Violet, Broken China

The sentiment and reindeer were stamped, then I added Queen & Company‘s new Gems to the snowflake centers and randomly within the background. (Gems are not just for shaker cards! I often use them as super sparkly embellishments!)

Thanks so much for visiting today!

1amichele siggy

Queen & Company – New Bubbles and Sentiment Dies

Hello everyone! Today I’m stepping away from seasonal cards to use a few of  Queen & Company’s latest products!

Queen & Company Spring Shaker kit with new Sentiment Dies

First, I created a sprinkling of spring showers using Spring Shaped Shaker kit dies with new Bubbles and new sentiment dies (coming soon). I die-cut the sun from yellow Simple Stripes patterned paper and the cloud from four pieces of white card stock. The cloud die-cuts were layered together to create a more dimensional shape. Once the sun and clouds were adhered using Sheer Glue, I arranged several colors of Bubbles as a rainbow of raindrops.

Queen & Company Spring Shaped Shaker Kit and new Sentiment Dies

New sentiment dies were used with yellow and orange Simple Stripes patterned paper to create a simple, easy greeting.

Supplies: Spring Shaped Shaker kit, new sentiment dies, Bubbles, Simple Stripes patterned paper, Sheer Glue

Queen & Company Love Jar Kit with new sentiment dies

Using new sentiment dies, Love Jar kit and new Gems Toppings, I created a bright summer greeting. After stamping the flowers and stems, I stamped a few extra flowers then die-cut each using Love Jar Flower & Stem dies. I used pieces of the leftover foam from the center of the jar to pop up/balance the extra flowers over the jar edges then placed new Bubbles in each flower center.

Queen & Company Love Jar kit with new Sentiment Dies

In the shaker are new Gems as well as silver Rubble. To ground the jar, I layered two oval circles then used the bottom of the jar die to remove the jar shape. In doing so, the jar is able to lay flat on the card base.

New sentiment dies were used with card stock to match the pink flowers then adhered over the shaker using Sheer Glue.

Supplies:  Love Jar kit, Love Jar Flower & Stem dies, Gems Toppings, Rubble, Bubbles, new sentiment dies, Sheer Glue

Thanks for stopping by today!

1amichele siggy

Mwah (stamping bella)

Hello friends! It’s time for another challenge with Stamping Bella. This week we were to use the inspirational photo at the bottom of this post.

Stamping Bella Uptown Girls Snapshots - I Heart You

I used Uptown Girls Snapshots I Heart You.  (I was channeling my fellow DT member Paula Williamson here.)  There are several Snapshots images. This one is my favorite.

Stamping Bella Uptown Girls Snapshots - I Heart You (close-up)

Copic markers – B23, BG11, BG13, BG15, BG18, BG70, E00, E01, E11, E13, E15, E23, E25, E31, E35, E37, E49, E79, R00, R01, R24, R29, R39, Y21

I colored with markers (listed above) then added a Snapshot Polaroid frame mounted on clear foam squares for a bit of dimension. I then die-cut the smallest MWAH die three times, layered together then adhered at the base of the photo. The tiny heart is by Doodlebug.

Stamping Bella Tiny Townie Pamela the Poinsettia

Also this week, I posted on Instagram the above card using Tiny Townie Pamela the Poinsettia.

Stamping Bella Tiny Townie Pamela the Poinsettia (close-up)

Copic markers – E00, E01, E11, E31, E35, E37, E41, E42, E43, E49, G28, G40, G43, G46, R24, R29, R39, R89, W00, W1, W2, Y17, Y21; Kirarina Wink White Pearl pen

Once colored (markers listed above), I added tiny dots of snow using a white Kirarina Wink pen.

NEXT WEEK’S CHALLENGE

Use an image from the latest release.  If you’d like, email your card to [email protected] by next Thursday to be featured on the SB blog. By doing so, you’ll also be entered to win some Bella Bucks! All challenge details can be found HERE.

Thanks so much for visiting today!

1amichele siggy

Thankful (stamping bella)

Hi everyone! I’m popping in to share one final fall/Thanksgiving card.

Stamping Bella Teeny Tiny Townie with a Pumpkin Pie

Today I’ve used Teeny Tiny Townie with a Pumpkin Pie by Stamping Bella. I adore the Teeny Tiny Townies. They’re just so tiny and cute!

Stamping Bella Teeny Tiny Townie with a Pumpkin Pie (close-up)

Copic markers – E00, E01, E07, E08, E09, E11, E21, E29, E31, E33, E35, E37, E79, G28, G85, G94, W00, W1, W2, Y21

I colored with Copic markers (listed above) then added a few die-cut leaves from Little Bits Nature.

I hope all of my American friends have a FABULOUS Thanksgiving! If you are travelling, be safe.  Thanks for visiting today!

1amichele siggy

Joy to the World (paper smooches)

Hello everyone! I hope you had nice weekend. We celebrated Thanksgiving early, having the big dinner on Saturday since many of us will be out of town. It was really nice.  🙂

My (very simple) card today features A Blessed Christmas with a corresponding Blessed Icons die by Paper Smooches.  (The dies are currently 50% off!)

Paper Smooches A Blessed Christmas

I could easily have stamped the bird onto the card but I chose to stamp and die-cut so I could slightly bend up the wings and branch.

Paper Smooches A Blessed Christmas (close-up)

Copic markers – BG10, G21, G24

I added just a bit of color to the bird using a BG10 Copic marker.

To add a bit more definition, I die-cut a pale blue circle to frame the bird beneath the stitched circle.

Thanks for stopping by today!

1amichele siggy

Here’s to gaining 10 pounds (stamping bella)

TGIF everyone! This week the Stamping Bella challenge was to use an image from the same category as the Stamp of the Month. The SOTM for November is Edna Loves the Ocean (25% off through 11/30) so that meant to choose any image from Edna the Fairy Godmother category.

Stamping Bella Edna Under the Mistletoe

I chose Edna Under the Mistletoe. I her. 🙂

Stamping Bella Edna Under the Mistletoe (close-up)

(I seem to have misplaced the list of markers used. If I find it, I will update here.)

After coloring with Copic markers, I used a white Kirarina Wink pen to add dots to the green tissue paper. (Snowflake Confetti from Taylored Expressions.)

Stamping Bella Santa's Speedy Delivery

Also, this week I posted the above card on Instagram using Santa’s Speedy Delivery.

Stamping Bella Santa's Speedy Delivery (close-up)

Copic markers – C00, C1, C3, C4, C5, C7, E00, E01, E11, G16, G28, N0, N1, N3, N9, R24, R29, R39, R83, R85, R89, Y35, YR16; Kirarina Wink White Pearl pen

NEXT WEEK’S CHALLENGE

Use  any current Stamping Bella image and the photo below as inspiration:

44187169_2265611300146793_4968149384664449024_n

If you’d like, email your card to [email protected] by next Thursday to be featured on the SB blog. By doing so, you’ll also be entered to win some Bella Bucks! All challenge details can be found HERE.

Thanks so much for visiting today!

1amichele siggy

Queen & Company new Happy Harvest paper and more

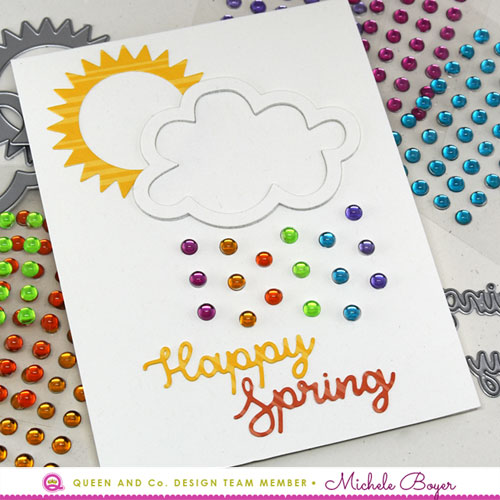
Hi everyone! Today I’m popping in to share two cards using Queen & Company’s new Happy Harvest patterned paper as well as new sentiment dies (coming soon).

Queen & Company Happy Harvest paper and new sentiment dies

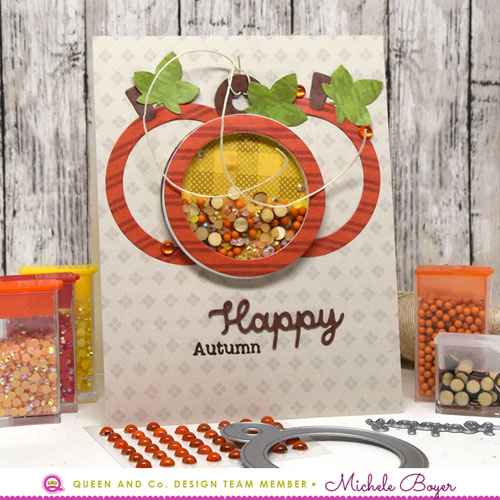
Happy Harvest is a lovely collection of fall themed patterns. I used the lighter paper as a background, stripes for the “pumpkins” and brown and green for stems and leaves. I used the circle tag die to create the tag as well as the plain circular frames. Here’s how I perfectly removed the tag loop on the left and right pumpkins:

1-Circle-Die-500

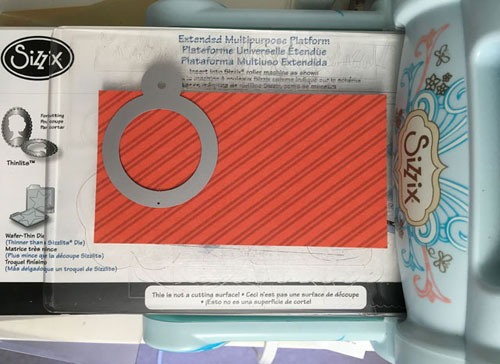
First, die-cut the tag shape from striped paper. I hung the die off the edge of the paper since I didn’t need the whole loop.

2-Circle-Die-500

Once the tag is die-cut, carefully place the paper back into the die, face down, with the extra loop area at the bottom. (That part could be along any side, just not at the top as that is the area we want to cleanly remove.)

3-Circle-Die500

Run the tag/die through the die-cutting machine a second time. The extra loop area is now perfectly removed. 🙂

Queen & Company Tag Shaped Shaker kit with new sentiment dies

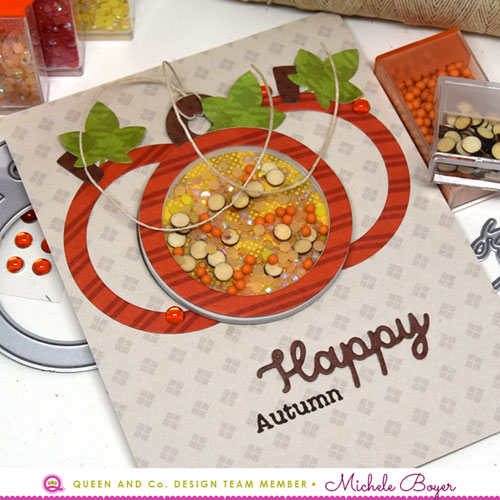
Inside the shaker, I placed new Gem Toppings mixed with circular Wood Toppings and orange Pops. Once the shaker and additional pumpkins were created and assembled, I tied on a bit of hemp cord, added a few new orange Bubbles, and new die-cut sentiment word “happy.” “Autumn” was stamped from the Windows Shaped Shaker kit stamp set.

Supplies: Happy Harvest patterned paper, Tags Shaker Kit, Gems Toppings, Wood Toppings, Pops Toppings, new sentiment dies, Bubbles, stamp from Windows Shaped Shaker Kit, Sheer Glue

Queen & Company Happy Harvest paper and new sentiment dies

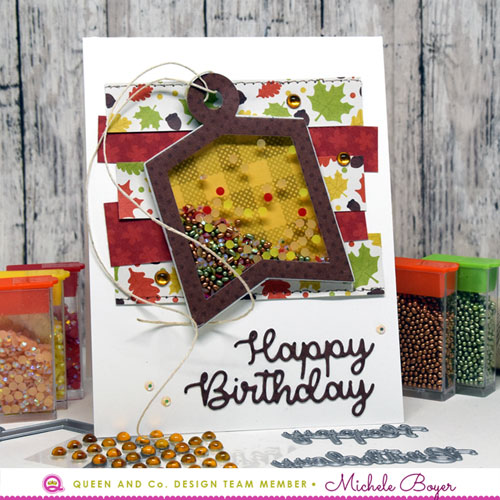
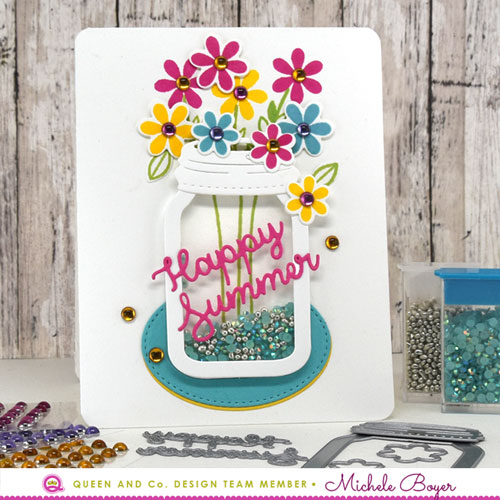
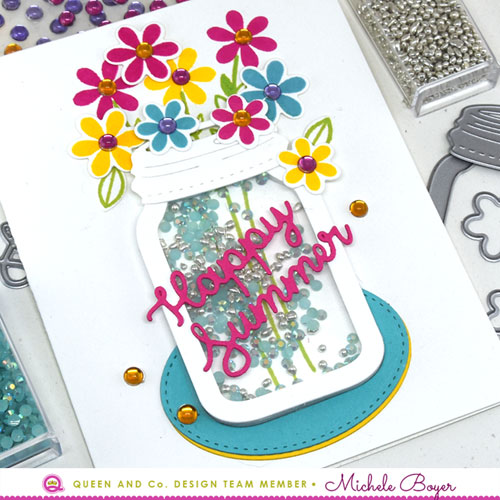
Next, I used Happy Harvest papers, new sentiment dies and Tag Shaped Shaker kit to create a fun fall birthday greeting.

Queen & Company Happy Harvest paper and new sentiment dies

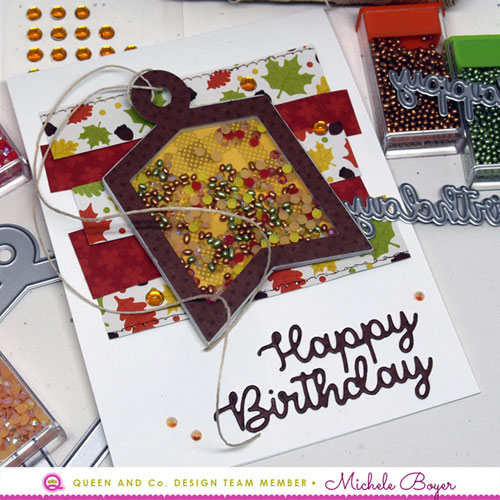
Inside the shaker, I sprinkled new Gems Toppings and gold and green Rubble. The new sentiment dies were used with brown patterned paper from Happy Harvest.  As a finishing touch, I adhered a few yellow Bubbles and then three tiny Gems around the sentiment. New Gems are perfect as tiny embellishments and easy to adhere as the backs are flat. I used Sheer Glue to adhere.

Supplies: Tags Shaker Kit, Gems Toppings, Rubble ToppingsHappy Harvest patterned paper, new sentiment dies, Bubbles, Sheer Glue

Thanks so much for visiting today!

1amichele siggy

A Few Bucks for You (paper smooches)

As I mentioned a few days ago, I’m trying to work on a stash of Christmas cards. I don’t send handmade cards to everyone on my list, but I like to have enough for those whom I know appreciate the effort.  🙂

Paper Smooches Santa Paws and Icons dies

Today I’ve used Santa Paws with Santa Paws Icons dies by Paper Smooches. (Santa Paws Icons dies are currently 50% off!)

Paper Smooches Santa Paws and Icons dies (close-up)

Copic markers – E31, E33, E35, E40, E42, E43, E47, E59, R29, R89; Glossy Accents

Each “buck” was colored with Copic markers (listed above) with the noses then covered with Glossy Accents.

Thanks so much for stopping by today!

Merry Christmas (stamping bella)

Hi everyone! This week with Stamping Bella we are working with any image that is not from the latest release (or “vintage”). I’ve been trying to focus a bit on  Christmas cards so I chose to use Elves with Treats from The Littles Christmas Collection.

Stamping Bella The Littles Elves with Treats

I used the stamp with the three elves and candies/cookie together. The elves and candies are also available as a set with each image as a separate stamp HERE. That way you can create your own Little scenes as well.  🙂

Stamping Bella The Littles Elves with Treats (close-up)

Copic markers – BG10, BG11, BG13, BG15, BG18, C00, C1, C2, C3, C9, E00, E01, E11, E13, E31, E33, G05, R24, R29, R83, R85, R89, RV10, RV11, RV32, Y23, YG03, YG06, YG09, YR12, YR14; Signo white gel pen; gold Zig Painty marker

Once stamped and colored, I added a die-cut string of Christmas lights (also colored with Copic markers, a Signo White gel pen and a gold Zig Painty marker).

Stamping Bella Little Bits Fall Fruit and Nature

This week on Instagram, I also posted the above card.  (Trying to fit in a quick fall card before fall disappears.) I used Fall Fruit and leaves from Nature from The Little Bits Fall Collection with a Fall Sentiment.

Stamping Bella Little Bits Fall Fruit and Nature (close-up)

Copic markers – E00, E01, E07, E07, E11, E31, E33, E35, E37, E59, G21, G24, G28, R24, R29, R59, R89, Y21, YR16, YR18

NEXT WEEK’S CHALLENGE

Use an image from the same category as the November Stamp of the Month (Edna Loves the Ocean, 25% off through 11/30), which means use an image from the Edna the Fairy Godmother.  If you’d like, email your card to [email protected] by next Thursday to be featured on the SB blog. By doing so, you’ll also be entered to win some Bella Bucks! All challenge details can be found HERE.

Thanks so much for visiting today!

1amichele siggy