Category Archives: My Favorite Things

Thankful (stamping bella)

Hello everyone. It’s time once again for our weekly challenge with Stamping Bella. This week we were to use vintage or older images, anything not included in the latest release.

Stamping Bella Teeny Tiny Townie with a Pumpkin Pie

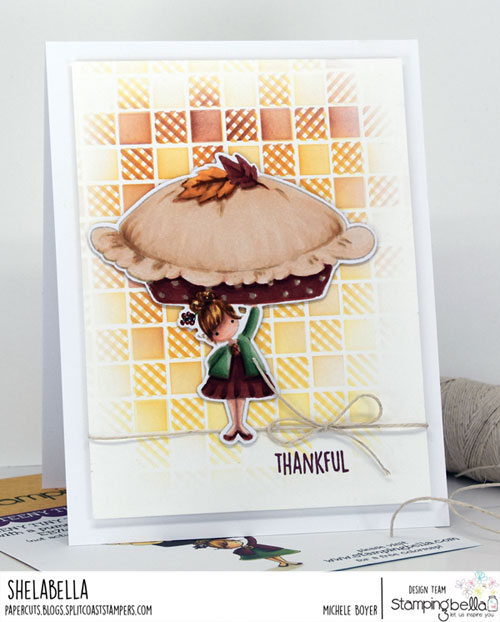
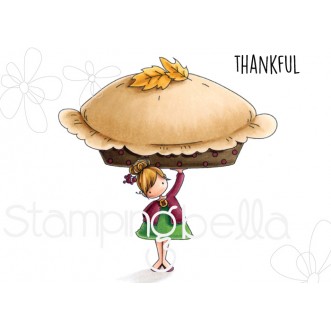
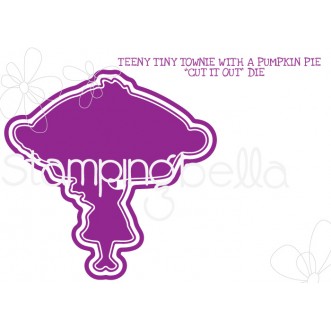
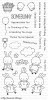
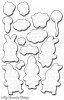
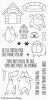
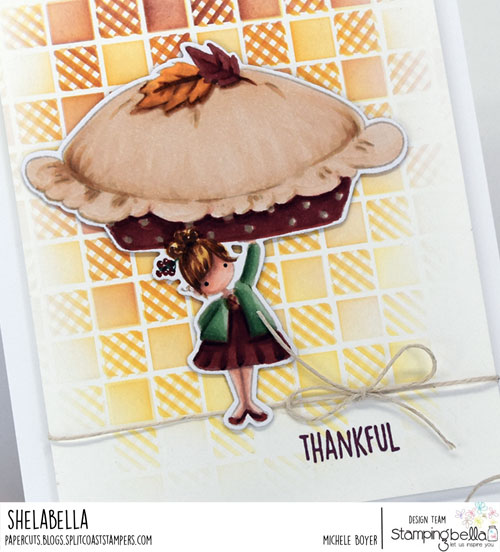
I chose Teeny Tiny Townie with a Pumpkin Pie. I stamped the image using a very light tan ink then colored with Copic markers for a “no line” look.

Stamping Bella Teeny Tiny Townie with a Pumpkin Pie (close-up)

Copic markers – E000, E00, E04, E07, E08, E09, E11, E21, E30, E31, E33, E35, E37, E43, G21, G29, G94, G99, Y21, Y38, YR23

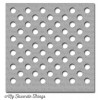
Behind the image, I blended Paper Smooches’ Buffalo Check (stencil) background using Fossilized Amber and Spiced Marmalade Distress Inks plus a bit of Taylored Expressions’ Mulled Wine ink.

Stamping Bella Little Bits Fall Fruit

Copic markers – E000, E00, E04, E07, E08, E09, E11, E15, E17, E18, E21, E30, E31, E33, E34, G21, G94, G99, Y21, YR14, YR23; Kirarina Wink White Pearl glitter pen

Also this week, I posted the card above using Little Bits Fall Fruit in Instagram.

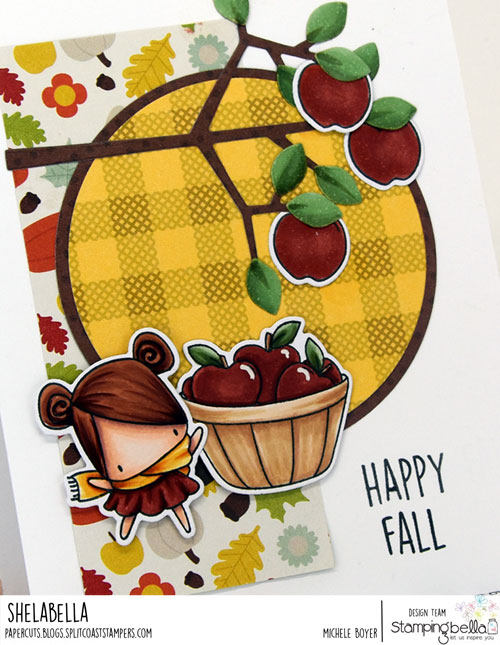
I used Paper Smooches’ Trees 2 with leaves from Seasonal Tree, and layered all over Queen & Company‘s Happy Harvest patterned paper. Sentiment is from Fall Sentiment Set.

NEXT WEEK’S CHALLENGE

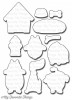
Use an image from the same category as the September Stamp of the Month (Oddball Bouquet), which means use an image from the Oddball category.  If you’d like, email your card to [email protected] by next Thursday to be featured on the SB blog. By doing so, you’ll also be entered to win some Bella Bucks! All challenge details can be found HERE.

Thanks so much for visiting today!

1amichele siggy

Affiliate links used at no cost to you. Thanks for supporting Paper Cuts!  

TEENY TINY TOWNIE WITH A PUMPKIN PIE…
[ STM ]
TEENY TINY TOWNIE WITH A PUMPKIN PIE…
[ STM ]
Buffalo Check Stencil
[ PPR ]
Blending Card, 25 sheets – X-Press It
[ XPR ]
Blending Card, 125 sheets – X-Press It
[ XPR ]
Copic Sketch Markers – BLICK art…
[ BLIC ]
Brand New Memento Full Size Dye Ink…
[ AMZUS ]
TE Premium Ink – Full Ink Pads
[ TE ]
Ranger Tim Holtz April Distress Ink…
[ AMZUS ]
21155-4510 – Ranger Tim Holtz…
[ BLIC ]
Blender Brushes
[ TE ]
Double-Sided Tape Runner, 1/3″ x…
[ XPR ]
Double-Sided High-Tack Foam Tape,…
[ XPR ]
Foam Mounting Squares, 12mm x 12mm,…
[ XPR ]
Hemptique NATURAL Hemp Cord Twine…
[ SSS ]
14987-1001 – Sizzix Big Shot Die…
[ BLIC ]
Misti Stamp Tool Original Size Misti…
[ AMZUS ]
Tonic Studios Guillotine Paper…
[ AMZUS ]
LITTLE BITS FALL FRUIT COLLECTION…
[ STM ]
LITTLE BITS FALL FRUIT COLLECTION…
[ STM ]
Seasonal Tree Dies
[ PPR ]
Trees 2 Dies
[ PPR ]
FALL SENTIMENT SET
[ STM ]
Happy Harvest Paper Pad – Queen & Co
[ QNN ]
Amazon.com: Copic Marker KWINKWPRL…
[ AMZUS ]

forever and for all eternity

Hi everyone! Today I’ve had some fun with heat embossing.

I used MFT’s Garden Flourish Background to white emboss on pink, then used a pink Copic to outline the left edges of most of the flourishes. I love the look of the added dimension.

Final-Full-500

The sentiment, from Pretty Phrases by Paper Smooches, was gold embossed on vellum.

Final-CU-500

For a complete step-by-step tutorial and tips on heat embossing, please check out my post HERE on the Craftsy Blog.

Thanks for visiting!

1amichele siggy 

Additional supplies/info: Gold cord, R00 Copic marker. Finished size 4 1/4″ x 5 1/2″.

Quick and Easy Card Ideas

Hi everyone!  I’m posting a bit later today than I had planned. My kids had a swim meet this morning, then it was delayed almost two hours for a passing storm (because we haven’t had enough rain already this summer…I shouldn’t complain, I know, but we have had a LOT of rain. Our back yard is a spongy mess.)

ANYway…

BeFunky-Collage4

On the Craftsy Blog today, I have nine ideas and tips for creating cards in 15 minutes or less.  A couple of the samples you may have seen shared here on my blog but most are new.  You can find the post HERE.

Thanks for stopping by!

1amichele siggy


Three Fast & Fun Birthday Cards (with tutorials)

Hi everyone! I have three birthday cards to share today, one cute and quirky, one bright and cheery and one just plain cute.  🙂

You can find step-by-step instructions with complete supply lists for each here:

3 Fast & Fun Homemade Birthday Card Tutorials

First I combined a couple different stamp sets, sentiments and dies to create this cute chick on a wire.  🙂

Michele Boyer - Paper Smooches

I used bright white X-Press It Blending Card for the background and Copic marker coloring of the chick.

Michele Boyer - Paper Smooches

Next I created a fun/festive card by embossing a background stamp then sponging over with bright inks.

Michele Boyer - My Favorite Things

I used coordinating colors to brighten the sentiment as well.

Michele Boyer - My Favorite Things

Lastly, I have a cute little 3-d cupcake with a bit of patterned paper.

Michele Boyer - Paper Smooches

Don’t forget the sprinkles!  🙂

Michele Boyer - Paper Smooches

Again, you can find a complete list of supplies and instructions on the Craftsy website following the link below:

3 FAST & FUN HOMEMADE BIRTHDAY CARD TUTORIALS

Thanks so much for stopping by!

Joyous Easter Wishes and Blessings

Just in case you’re looking for a few quick, last minute Easter card ideas, I have three featured on the Craftsy Blog today.

Trio

Thanks for checking it out.  🙂

MFT March Die-namics Design – Cover-Up Craze

Hi everyone! Today the MFT team is exploring creative ways to use our Cover-Up Die-namics.

First, I used Modern Morocco Cover-Up to create a sort of stained glass effect on a clear card.   The sentiment, from Words of Inspiration, was stamped in Golden Glitz Delicata.  ♥ ♥ ♥ ♥

God-Understands-500

I die-cut two panels of the Cover-Up, using one as a guide beneath the acetate for coloring. (I used Copic markers.)  Once colored, I placed one die on top of the acetate and one below, aligning the panels with the acetate in between, like a sandwich. I then die-cut another Cover-Up from a sheet of X-Press It High Tack Double-Sided adhesive, applied that to the back of the “sandwich” and adhered to an acetate base.

God-Understands-CUInside, I stamped a second sentiment and added three tiny inked hearts die-cut from Blueprints 11.

God-Understands-SG-In

On my second card, I used one of my *most* favorite Cover-Ups, Floral Fusion. I first inked a block of card stock using Lemon Chiffon, Daffodil and Golden Glitz inks. I lightly inked over the entire panel with the gold ink once all ink was applied so there is a nice shimmer on the entire sheet.

Grateful-for-You-CU-500

“Grateful” was die-cut (and gold inked) using Words of Gratitude Die-namics and “for you” was stamped from Fall Foliage.

Grateful-for-You-CU-CU

Inside, I masked off part of the bottom, inked then adhered a partial panel of Floral Fusion Cover-Up. The partial sentiment was stamped from Words of Inspiration.

Grateful-for-You-CU-In

Be sure to check out the MFT Blog for a list of participating DT to see more creative ways to use Cover-Ups!

MFT_DienamicsDesign_SideBar

Thanks for stopping by!

God Understands card

Additional supplies/info:  Copic markers (V25, YR15, BG13, B93, R83), X-Press It Double-sided adhesive sheet, acetate.  Finished size 4 1/4″ x 5 1/2″.
.
Grateful for You card
Additional info: Finished size 4 1/4″ x 5 1/2″.

MFT March Creative Challenge – Stylin’ with Stencils

Hi everyone!  For this  month’s Creative Challenge with My Favorite Things, we’re playing with stencils.  I have two samples, one inky, one bumpy.  🙂

First, I combined Grid Stencil with Birdie Brown’s You’re Super.

Have-a-super-day-MarCC-500

After stamping the girl onto X-Press It Blending Card, I created a mask using a Post It note, taped the stencil over and sponged with Lemon Chiffon then Coral Crush inks. This blending tool made it super easy. Once the background was applied, I removed the mask and colored with Copic markers.

The yellow star was cut from Lemon Chiffon card stock using Blueprints 8 then raised on a clear foam square.

Have-a-super-day-MarCC-CU

Inside, I stamped the girl, reapplied the mask and sponged a smaller background.

Have-a-super-day-MarCC-In

On my second card, I used an embossing pad to emboss Large Polka Dots onto Smooth White card stock.  The cute elephant and sentiment were created using Lisa Johnson’s Beautiful Baby stamp and Die-namics sets.

Congratulations-MarCC-500

To achieve different levels of dimension, the elephant is raised on Kool Tak clear foam squares while the white panel is raised on X-Press It 1/2″ foam tape.  (I like the variation.)

Congratulations-MarCC-CU

Inside, I stamped an additional sentiment from the set along with three little Pink Lemonade hearts.

Congratulations-MarCC-In

Be sure to check out the MFT blog for direct links to more stencil projects.  🙂

Print

Thanks for stopping by!

Have a SUPER Day card

Additional supplies/info: Copic markers (E00, E11, BV000, R01, R02, Y21, E31, E35, R05, BG07, BG09, BG78, G21, G24, G46, C00, C1, C3, C7), white embossing powder, enamel dots, Recollections Opaque White pen.  Finished size 4 1/4″ x 5 1/2″.
.
Congratulations card

Additional supplies/info: Corner Chomper.  Finished size 4 1/4″ x 5 1/2″

Organization for Your Creative Space – Taming Your Tools

Hi everyone!  Today the MFT DT is sharing how we manage our tools. My photos are not neat or pretty, but I did straighten things as much as possible. 🙂

My main storage unit is a round-about I purchased from Michaels quite a while ago. In it I store four scissors, an assortment of foam dots and squares, sanding block, extra acrylic blocks, a mini-stapler, glue pens, piercing tool, kraft knife and my Stamp-a-ma-jig. On the side, I hang tweezers and pliers. I have a small jar in one compartment where I keep a few pens and pencils, and on those I hang two rolls of foam tape. There are also a few drawers where I place small miscellaneous “things.”

Tools-Caddy-500In front of the round-about is my most used paper trimmer.  Beside that I keep a variety of rulers – clear T-square, magnetic ruler, Tim Holtz Design Ruler and a short (6″) ruler.  Yes, I use them all.  🙂

Tools-Trimmer-RulersTo the left of my stamp table I have this very unique tea cup in which I keep a couple of Wink of Stella glitter brushes, a small paint brush, steel nips (for cutting apart dies), a water brush, my QuickStik Pick-Up tool, a Tool n’ One, a spritzing tool, Fantastix and a tab of large sewing needles. In front of the cup is my valued powder tool along with low tack adhesives.  Are you snickering because the cup looks so ordinary? It isn’t.  🙂

Tools-Stamp-Tea-CupIt’s a stamping tea cup.  In case you spill your tea, you can stamp your napkin…or whatever.   (Hee, hee)  I received a set of two, long ago, from a friend. Each has a different design on the bottom.  I have no idea who makes them or where she found them.  But they’re pretty neat.  🙂

Tools-CupOn the left side of my stamp table, I have a container of wipes, on which I keep my stamp press.  And to the left of that and behind just a bit is my Vagabond. Behind my Copics and next to my Vagabond is a stack of extra die-cutting plates, embossing pads and a metal shim. Barely visible to the right is my iHome portable speaker which I love.

Tools-Vagabond

Below my table, I keep additional paper trimmers, a Scor Pal, my Crop-a-dile and Corner Chomper.

Tools-Cutter-ScorPal

And lastly, I keep my  heat gun on my window sill which is just to the left of where I work.

Tools-Heat-Gun

None of my tool storage is fancy, but it’s definitely functionable and I suppose that’s what matters most.  🙂

Check out the MFT Blog for links to participating DT sharing their taming of the tools.  Thanks for stopping by!


Creative Construction with Blueprints – Wonky Panels

Hi everyone!  It’s time for some more Creative Construction with Blueprints and MFT.  This month we’re using the wonky panels from Blueprints 15 and 18

For my first card, I chose a sample sketch using Blueprints 18, Happy Trio (this month’s Free with $60) and Pinstripe Background.

HB-CBP-500I layered the largest “happy” from Happy Trio Die-namics and stamped the word “birthday” from Celebrate You.

HB-CBP-CU

Inside, I added a few star frames and another sentiment from Celebrate You.

HB-CBP-In

On my second card I combined elements from both Blueprints 15 and 18, using super cute Somebunny stamp set and Die-namics.

Somebunny-Hugs2-CBP-500

The bunny was stamped onto X-Press It Blending Card, colored with Copic markers and popped up on Kool Tak Clear Foam Squares.

Somebunny-Hugs-2CBP-CU

Inside, I stamped another bunny and added a couple of elements from Blueprints 15.

Somebunny-Hugs-CBP-In

Head on over to the MFT Blog for a list of participating DT to see more Blueprints versatility.  

MFT_CreativeConstruction_SideBar

Thanks for visiting!

Happy Birthday card

Somebunny is Sending You Hugs card

MFT March Release Rewind

Hi everyone! I have a couple more cards to share today using MFTs latest release. (You can find all the new products HERE.) 

I adore Lisa Johnson’s new Circle Scribble Flowers.  I die-cut the shapes from Ripe Raspberry and Sour Apple card stock using Circle Scribble Flowers Die-namics, stamped each coordinating image using Sweet Tooth ink then white embossed. The two smaller flowers are raised on foam tape.

Be-Happy-Mar-RR-500The sentiment, from Totally Happy, was also white embossed.

Be-Happy-Mar-RR-CU

Inside, I used a scrap of Grid Background and stamped flowers in Ripe Raspberry and Sour Apple ink.

Be-Happy-Mar-RR-In

Next, I used Birdie Brown’s You Make My Tail Wag along with Dog House Die-namics and Pet Accents. The dog house was cut from Tropical Teal and Summer Splash card stock then popped up on foam tape.  The dog was cut from X-Press It Blending Card, colored with Copic markers and also popped up on foam tape.

Tail-Wag-Mar-RR-500

I cut two bones from Pet Accents, cut one end off of each and adhered behind the dog to create the appearance of a longer bone.

Tail-Wag-Mar-RR-CU

Inside, I added a paw from Pet Accents and stamped a sentiment from Friends Like Us using Tropical Teal ink.

Tail-Wag-Mar-RR-In2

You can find direct links to more design team samples using this month’s release on the MFT Blog.  

Print

Thanks for stopping by!

Be Happy and Smile card

Additional supplies/info: White embossing powder, enamel dots, Corner Chomper. Finished size 4 1/4″ x 5 1/2″.
.
You Make My Tail Wag card

Additional supplies/info: Copic markers (R01, E40, E41, E42, E43, E44), White embossing powder, enamel dots, Corner Chomper.  Finished size 4 1/4″ x 5 1/2″.