Category Archives: Queen & Co.

(Not) Feeling Crabby about Queen & Company’s Under the Sea Shaker Kit

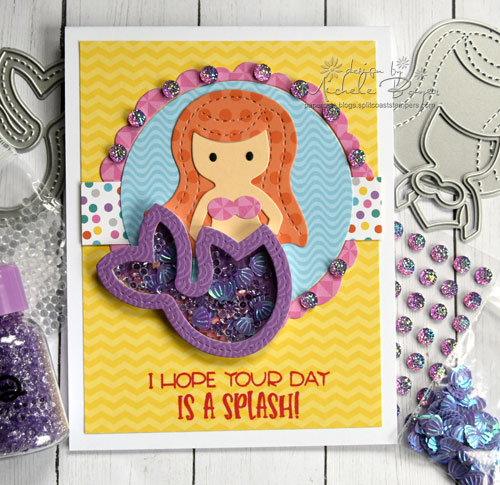
Hi everyone! I’m back today with more from Queen & Company‘s new Under the Sea Shaker Kit. (You can see my previous post HERE.) The kit is so much fun, and so easy. Basically, all you need in addition to the kit is base card stock and glue.  🙂

I first used this cute crab. After die-cutting his body from patterned paper, I die-cut him again from white card stock, placing the white under the patterned paper for a bit more stability. Once the crab was assembled and adhered over the blue wave paper, I cut pieces from the leftover foam (from the middle of the body) to place under the claws and eyes.
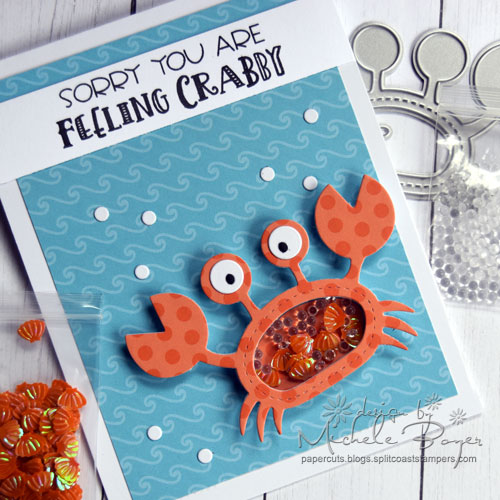
I also used a Paper SmoochesPolka Dots Border die to cut “bubbles.” The dies cut many small circles at once so I keep that set handy. There are so many uses for it.

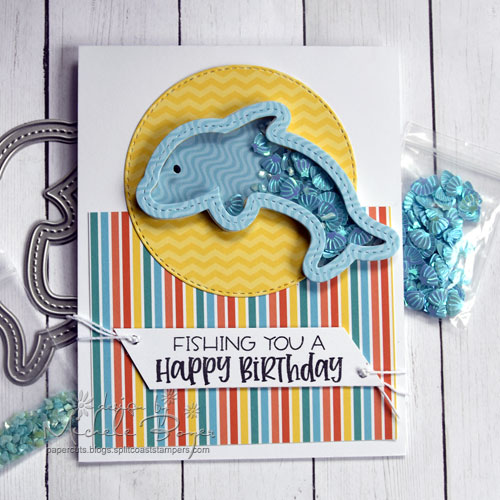
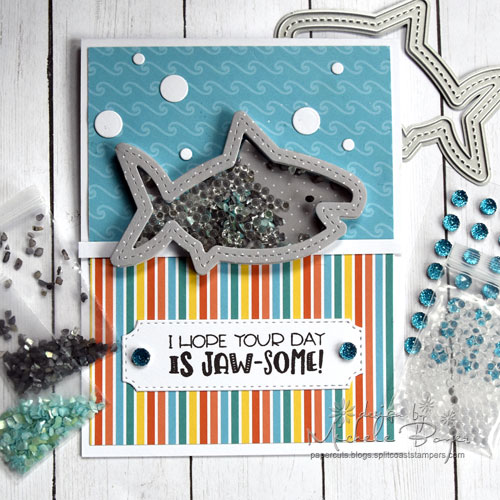
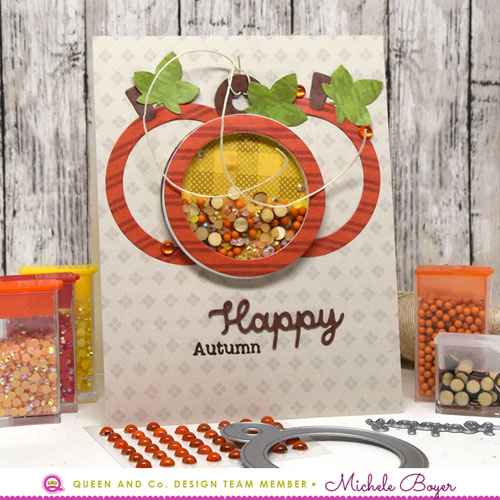
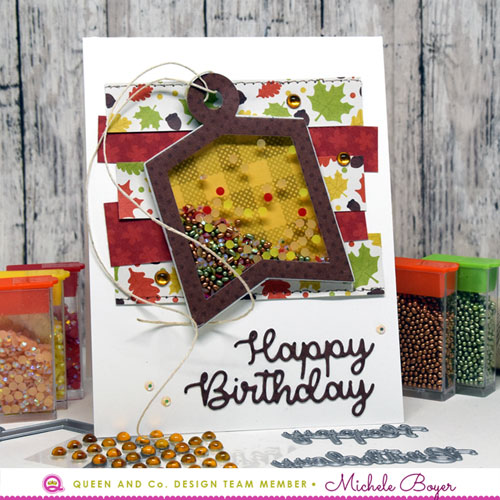
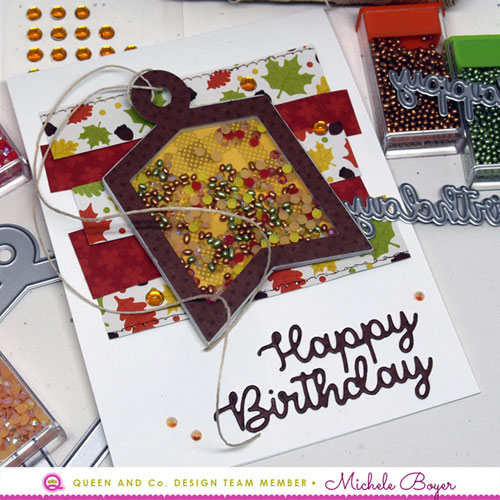
Next, I used the cute dolphin. Inside I placed toppings from the kit.

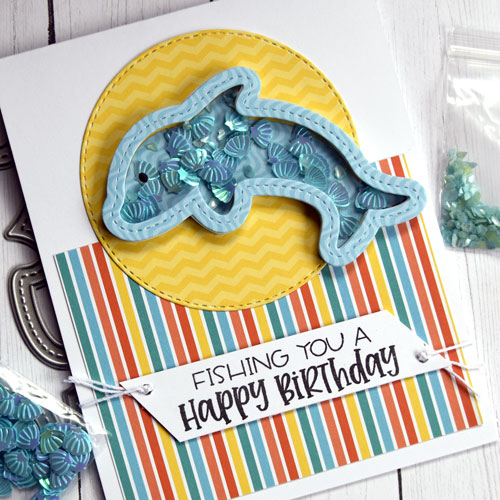
After stamping the sentiment, I cut the sides at an angle, punched holes and tied in place using string. (It is also secured in the center with adhesive.)

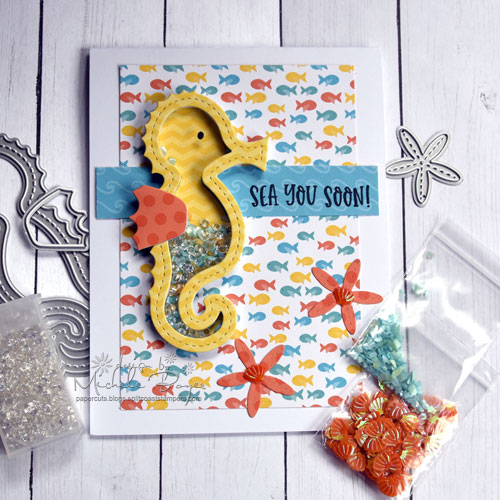
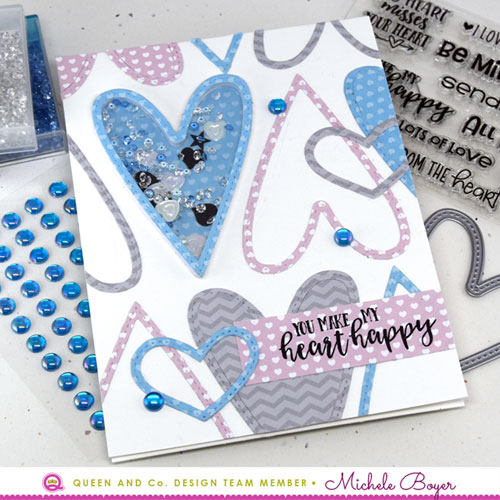
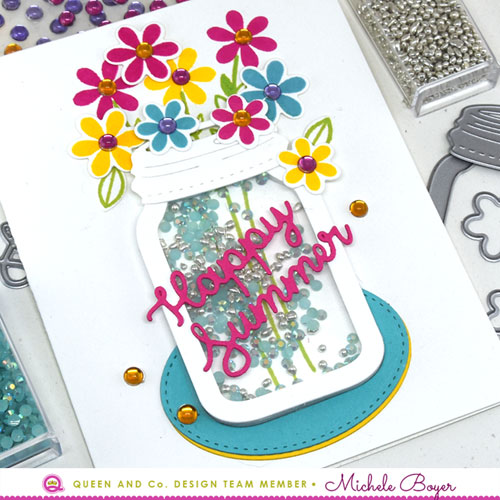
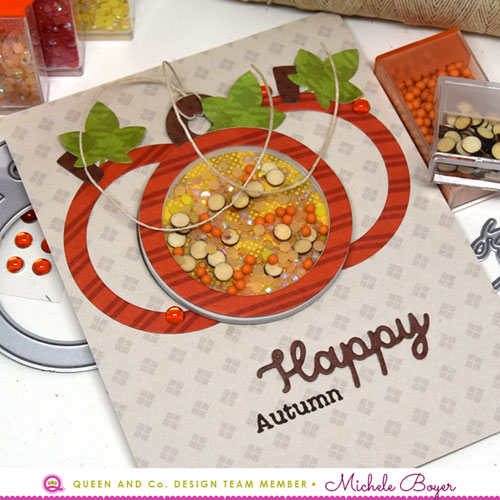
Lastly, I have a sweet seahorse. Inside, I placed a couple of the toppings from the kit as well as a sprinkling of clear diamonds.

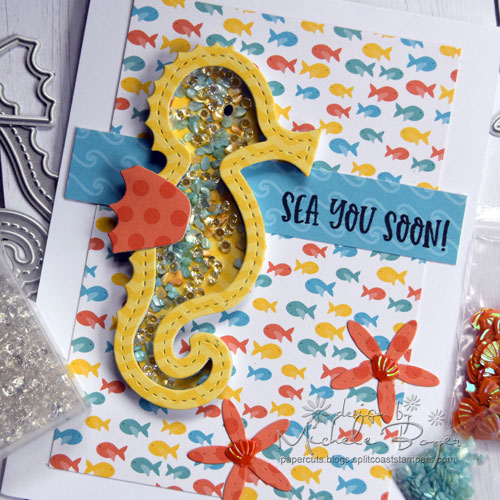
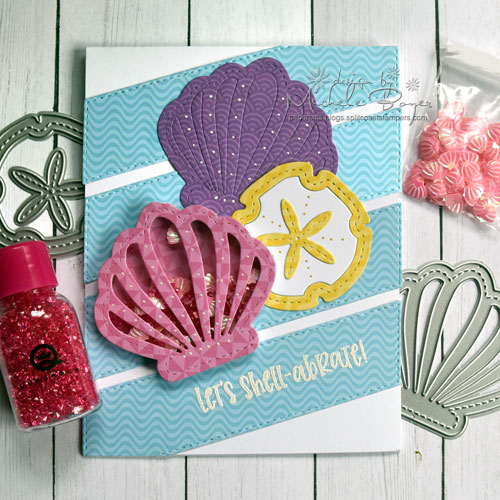
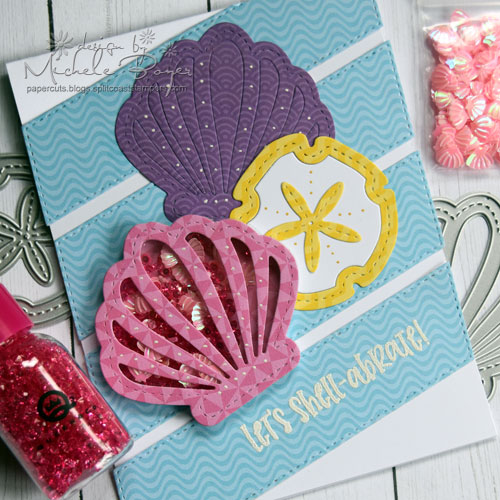
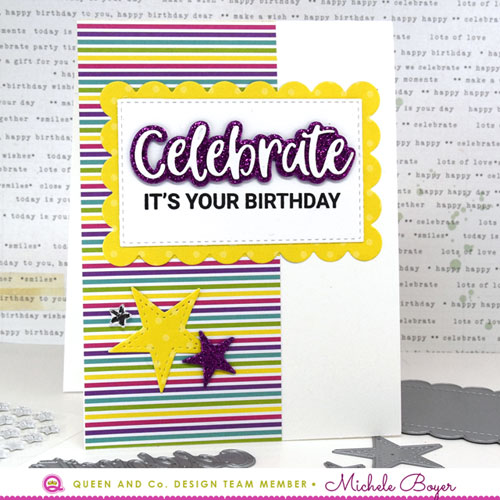
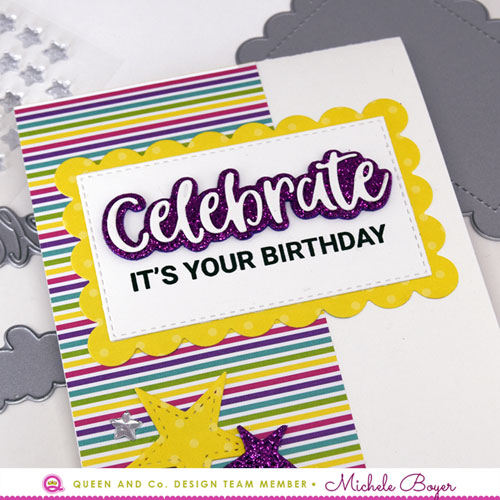
I added a couple of stars die-cut using the center piece from the sand dollar and adhered a sea shell sequin into each center.

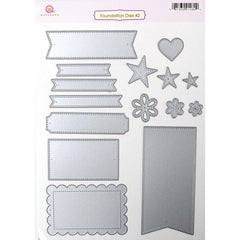
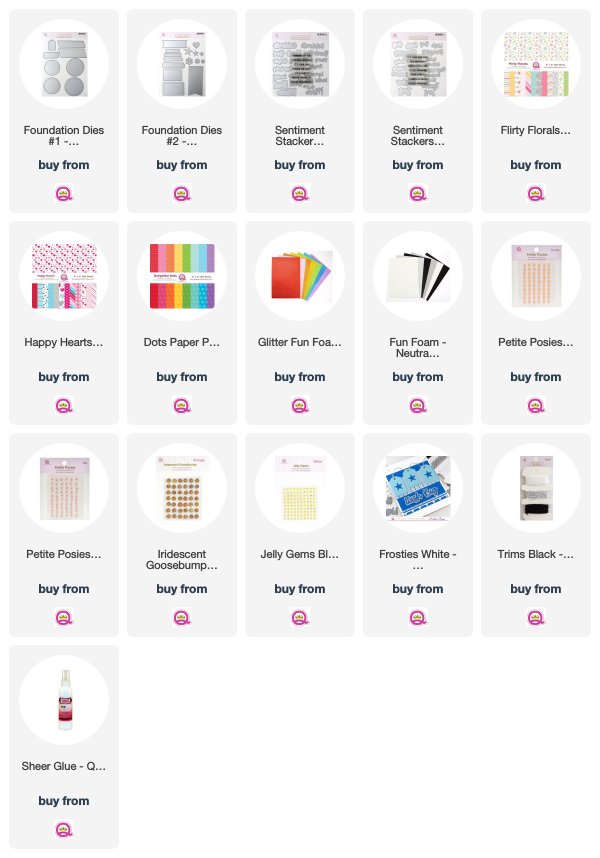
You can find all of the extras available for the kit HERE.

Thanks so much for stopping by today!

1amichele siggy

Queen & Company NEW Under the Sea Kit
[ QNN ]
Polka Dot Borders Dies
[ PPR ]
Refill Diamonds Clear – Queen & Co
[ QNN ]
Sheer Glue – Queen & Co
[ QNN ]

Queen & Company’s NEW Under the Sea Shaker Kit

Queen & Company has a new shaker kit, Under the Sea, and it is hugely addictive! And it is big! The set includes 16 dies, an Under the Sea paper pad, 27 foam/acetate pieces, custom toppings and a 4×6 stamp set.  I created six cards, three of which I’m sharing today. It is seriously soooo cute. Shaker cards are so much fun anyway…but these? Eek!

Queen & Company Under the Sea Kit - Mermaid

First I created an adorable mermaid. So so so cute! (I can’t help repeating myself.) The hair die cuts a little slit where the forehead is inserted. Such a nice touch.

Queen & Company Under the Sea Kit - Mermaid (close-up)

I used Foundation Dies #2 to cut the circle and scalloped border then placed Irridescent Purple Goosebumps between each scoop. In the tail I added shell toppings from the kit along with purple Under the Sea Diamonds. They’re SUPER sparkly. I love the diamonds because, you know…diamonds! 🙂

Queen & Company Under the Sea Kit - Sea Shells

Next I have a card using two of the different shell dies from the kit. I first die-cut diagonal strips from Foundation Dies #1 then white embossed the sentiment on the bottom strip.

Queen & Company Under the Sea Kit - Sea Shells (close-up)

Inside the pink shell I placed pink Under the Sea Diamonds, shell toppings and a sprinkling of glass flake toppings. I don’t really know if they’re glass, but they’re pretty.  🙂

Queen & Company Under the Sea Kit - Shark

And lastly (for today), I have a shark. He’s filled with the blue and black glass,  and clear bubbles (all included) as well as clear diamonds.

Queen & Company Under the Sea Kit - Shark (close-up)

The sentiment panel was die-cut using Foundation Dies #2 with a blue Goosebump on each side. (I ran the die-cut sentiment strip through my die-cutting machine twice, sliding down one side in the die to shorten the strip.)

Should you decide you love this kit as much as I do, there are refills available also: foam/acetate refills, topping refills, dies (available as part of the kit or separately), and Under the Sea paper pad. And don’t forget the super sparkly Under the Sea diamonds.  🙂

Thanks so much for visiting today! I’ll be back soon with three more cards using this fun set!

1amichele siggy

Queen & Company NEW Under the Sea Kit
[ QNN ]
Foundation Dies #2 – Queen & Co
[ QNN ]
Foundation Dies #1 – Queen & Co
[ QNN ]
Under the Sea Diamonds – Queen & Co
[ QNN ]
Refill Diamonds Clear – Queen & Co
[ QNN ]
Iridescent Goosebump Blue – Queen & Co
[ QNN ]
Iridescent Goosebump Purple – Queen & Co
[ QNN ]
Sheer Glue – Queen & Co
[ QNN ]

Foam and Foil Fun (queen & company)

Hello! Today I’m using some fun products from one of Queen & Company‘s latest releases — sentiment stackers and foundaton dies, fun foam, foil and flowers. A comprehensive list of all products used can be found at the bottom of this post.

This quick and easy birthday card was creating using Foundation Dies 2, Sentiment Stackers 1 and 2, pink glitter foam and Candy Land 6×6 patterned paper.

The glitter foam comes in a pack of seven sheets in rainbow colors. So sparkly!  I die-cut Celebrate from white foam and layered atop the glitter foam for added dimension.  So easy!

For this card, I adhered a block of foil to white cardstock then die-cut using “thanks” from Special Word Dies 2 and “friend” from Special Word Dies 1.

Orange Daisy Flowers were adhered using Sheer Glue with a sprinkling of orange and yellow Jelly Gems adhered in the centers. All pieces were adhered to a block of my favorite Simple Stripes 6×6 patterned paper.

Thanks so much for visiting today.  🙂

1amichele siggy


Shaker Garden of Baby Peonies

Hello everyone! Today I have a fun card to share combining a cute Stamping Bella image with the fun of Queen & Company‘s shaker elements.

Stamping Bella Peony Baby in a Pot

I used super-sweet Baby Peony in a Pot (and coordinating die) with a sentiment from Mail Chick. After stamping onto X-Press It Blending Card and coloring with Copic markers, I die-cut each image then layered atop the shaker.

Stamping Bella Peony Baby in a Pot (close-up)

Copic markers – E000, E00, E04, E07, E08, E09, E11, E21, G21, G24, G28, R20, RV66, V01, V12

Unfortunately, the foam shaker kit, Lines, is not currently available. But inside, I placed Rubble (shaker topping), then used Simple Stripes paper over top. I cut a small slit in each pot to insert the sliver of black card stock (as a sign stick), assembled the signs and inserted each pot behind the stripes. To add a bit of dimension, the sentiment strips were each adhered using Kool Tak clear foam squares.

Thanks for stopping by today!

1amichele siggy

Affiliate links are provided where appropriate at no cost to you. Thanks for supporting Paper Cuts! ♥

Queen & Company’s New Foundation Dies, Sentiment Stackers and more!

Hi everyone! Did you know that Queen & Company has an *amazing* new set of foundation dies? Actually, two!  And a great set of layered sentiment dies? Actually, two!  All are perfectly interchangeable and so much fun! There are new embellishments in the shop as well as new foam (rainbow glitter and neutral)! Lots and lots of fun things!

On this card, I used Foundation Dies 1 (stitched scalloped circle from set of eight large dies), Foundation Dies 2 (flowers from set of 15 dies including base shapes, sentiment stackers, flowers, stars and a heart) and Sentiment Stackers 1. The Sentiment Stackers sets include 24 (set 1) and 23 (set 2) dies as well as a coordinating sentiment stamp set.  (Note: The leaves are actually petal loops from of the flower dies.)

I also used new Fun Foam to die-cut Mom. In the flower centers, I placed orange and pink Petite Posies and new Iridescent Goosebumps. Around the flowers, I also adhered a few orange Jelly Gems.

Supplies used: Foundation Dies 1, Foundation Dies 2Sentiment Stackers 1, Fun FoamPetite PosiesIridescent Goosebumps, Jelly Gems, Flirty Florals 6×6, Delightful Dots 6×6, Sheer Glue

Next, I die-cut foam tags (Foundation Dies 1) then layered with card stock tags and stars (Foundation Dies 2). The Wish Big layered sentiment is from Sentiment Stackers 2.

I looped into the holes a bit of twine and added a strip of white Frosties across the bottom. 

Supplies:  Foundation Dies 1Foundation Dies 2Sentiment Stackers 2twineFrostiesFun Foam, Happy Hearts 6×6, Sheer Glue

There are *many* other super cool new products in the Queen & Company shop. Check them out today!  🙂

Thanks for visiting!

1amichele siggy

Affiliate links are provided where appropriate at no cost to you. Thanks for supporting Paper Cuts! ♥

Queen & Company’s Happy Hearts Shaker Kit

Hi everyone!  Earlier this month I posted these two cards on Instagram but then realized yesterday I had not yet shared here.  Both use Queen & Company‘s new Happy Hearts Shaped Shaker kit.

The kit includes four heart dies, twelve foam/acetate shakers and a 3×4 clear stamp set. Toppings sold separately. I used pink and white Pops inside my shaker.

The super cute paper is from new Happy Hearts 6×6 paper pad.

On this card, I used two different heart dies from the kit and focused a bit more on a less feminine color scheme.

Inside the shaker I used Diamonds, Gems and black and white Sequins. As a finishing touch, I adhered a few blue Bubbles.

Thanks so much for stopping by today!

1amichele siggy

Affiliate links are provided where appropriate at no cost to you. Thanks for supporting Paper Cuts! ♥

Pompom Fun with Queen & Company’s New Love Monster Kit

Hi everyone! Have you seen Queen & Company‘s newset pompom kit, Love Monster?  Oh. My. Gosh.  It’s sooo cute and so much fun!  It coordinates perfectly with Monster Mash so all dies, pompoms, etc. allow for numerous possibilities. The Love Monster kit includes 20 (!) steel dies, Happy Hearts 6×6 paper pad, 4×6 clear stamp set, 150 large poms (50 per color), 75 small poms (25 per color), 8 sheets of specialty gloobers, 30 epoxy eyeballs, 30 google eyeballs.

My favorite parts of the new Love Monster kit are those long arms and legs. Here, I snipped the legs apart so I could create a super happy, dancing monster.

In the photo above in the bottom left corner you can see one of the dies for the body shape. Each of the embossed circles guides placement for each pompom. After die-cutting the body, I adhered a small Gloober to each circle then pressed pompoms firmly over each one.

On the above card, I gently bent each of the arms around a pencil before gluing in place to hold the die-cut heart. (I LOVE those arms!)

The wings were die-cut from translucent vellum then colored with a Copic marker.

There’s still time for you to grab a Love Monster kit!  Also available are refill pompoms.  (Can’t stress the amount of fun in this kit!)

Thanks so much for visiting today!

1amichele siggy

Affiliate links are provided where appropriate for ease of shopping, at no cost to you. Thanks for supporting Paper Cuts! ♥

Queen & Company – New Bubbles and Sentiment Dies

Hello everyone! Today I’m stepping away from seasonal cards to use a few of  Queen & Company’s latest products!

Queen & Company Spring Shaker kit with new Sentiment Dies

First, I created a sprinkling of spring showers using Spring Shaped Shaker kit dies with new Bubbles and new sentiment dies (coming soon). I die-cut the sun from yellow Simple Stripes patterned paper and the cloud from four pieces of white card stock. The cloud die-cuts were layered together to create a more dimensional shape. Once the sun and clouds were adhered using Sheer Glue, I arranged several colors of Bubbles as a rainbow of raindrops.

Queen & Company Spring Shaped Shaker Kit and new Sentiment Dies

New sentiment dies were used with yellow and orange Simple Stripes patterned paper to create a simple, easy greeting.

Supplies: Spring Shaped Shaker kit, new sentiment dies, Bubbles, Simple Stripes patterned paper, Sheer Glue

Queen & Company Love Jar Kit with new sentiment dies

Using new sentiment dies, Love Jar kit and new Gems Toppings, I created a bright summer greeting. After stamping the flowers and stems, I stamped a few extra flowers then die-cut each using Love Jar Flower & Stem dies. I used pieces of the leftover foam from the center of the jar to pop up/balance the extra flowers over the jar edges then placed new Bubbles in each flower center.

Queen & Company Love Jar kit with new Sentiment Dies

In the shaker are new Gems as well as silver Rubble. To ground the jar, I layered two oval circles then used the bottom of the jar die to remove the jar shape. In doing so, the jar is able to lay flat on the card base.

New sentiment dies were used with card stock to match the pink flowers then adhered over the shaker using Sheer Glue.

Supplies:  Love Jar kit, Love Jar Flower & Stem dies, Gems Toppings, Rubble, Bubbles, new sentiment dies, Sheer Glue

Thanks for stopping by today!

1amichele siggy

Queen & Company new Happy Harvest paper and more

Hi everyone! Today I’m popping in to share two cards using Queen & Company’s new Happy Harvest patterned paper as well as new sentiment dies (coming soon).

Queen & Company Happy Harvest paper and new sentiment dies

Happy Harvest is a lovely collection of fall themed patterns. I used the lighter paper as a background, stripes for the “pumpkins” and brown and green for stems and leaves. I used the circle tag die to create the tag as well as the plain circular frames. Here’s how I perfectly removed the tag loop on the left and right pumpkins:

1-Circle-Die-500

First, die-cut the tag shape from striped paper. I hung the die off the edge of the paper since I didn’t need the whole loop.

2-Circle-Die-500

Once the tag is die-cut, carefully place the paper back into the die, face down, with the extra loop area at the bottom. (That part could be along any side, just not at the top as that is the area we want to cleanly remove.)

3-Circle-Die500

Run the tag/die through the die-cutting machine a second time. The extra loop area is now perfectly removed. 🙂

Queen & Company Tag Shaped Shaker kit with new sentiment dies

Inside the shaker, I placed new Gem Toppings mixed with circular Wood Toppings and orange Pops. Once the shaker and additional pumpkins were created and assembled, I tied on a bit of hemp cord, added a few new orange Bubbles, and new die-cut sentiment word “happy.” “Autumn” was stamped from the Windows Shaped Shaker kit stamp set.

Supplies: Happy Harvest patterned paper, Tags Shaker Kit, Gems Toppings, Wood Toppings, Pops Toppings, new sentiment dies, Bubbles, stamp from Windows Shaped Shaker Kit, Sheer Glue

Queen & Company Happy Harvest paper and new sentiment dies

Next, I used Happy Harvest papers, new sentiment dies and Tag Shaped Shaker kit to create a fun fall birthday greeting.

Queen & Company Happy Harvest paper and new sentiment dies

Inside the shaker, I sprinkled new Gems Toppings and gold and green Rubble. The new sentiment dies were used with brown patterned paper from Happy Harvest.  As a finishing touch, I adhered a few yellow Bubbles and then three tiny Gems around the sentiment. New Gems are perfect as tiny embellishments and easy to adhere as the backs are flat. I used Sheer Glue to adhere.

Supplies: Tags Shaker Kit, Gems Toppings, Rubble ToppingsHappy Harvest patterned paper, new sentiment dies, Bubbles, Sheer Glue

Thanks so much for visiting today!

1amichele siggy

More Monster Mash fun from Queen & Company

Hi everyone! I hope you had a nice weekend.  🙂  Today I’m sharing two more cards using Queen & Company‘s Monster Mash kit.  It’s so very cute with several different themes possible using the fun coordinating stamp set.  The kit includes six colors of pompoms, each in two different sizes, 26 dies (!) providing base layouts for the pompoms, arms, legs, hair, antennae, smiles with white backdrops for creating easy teeth, gloobers for super quick adherance of the poms, and lets not forget the EYES! Serious monster love, here!

Queen & Company Monster Mash kit

First I created a friendly monster hello. The base shape (which includes embossed circles to help in pom placement) was die-cut then gloobers and poms adhered. After die-cutting the hair, I colored a piece of white string with a pink Copic marker then tied around a piece of the hair.

Queen & Company Monster Mash kit (close-up)

The sentiment was white embossed on Fright Fest patterned paper  with a scattering of pink Epoxy Dots applied as a finishing touch.

Queen & Company Monster Mash kit

Next, I have a fun “human” birthday card.  🙂  I created the monster as above, adhering the body at a tilt with balloons (not included in the kit) carrying him away. Again, the sentiment was white embossed on Fright Fest patterned paper with Epoxy Dots added as confetti.

Queen & Company Monster Mash kit (close-up)

Following are links to the kit, refills and additional embellishments to coordinate – Monster Mash Kit, Monster Bubbles Bundle, Monster Mash PomPom refill, Eyeball refill, Epoxy Dots and Fright Fest paper pad.

Thanks so much for visiting today!

1amichele siggy