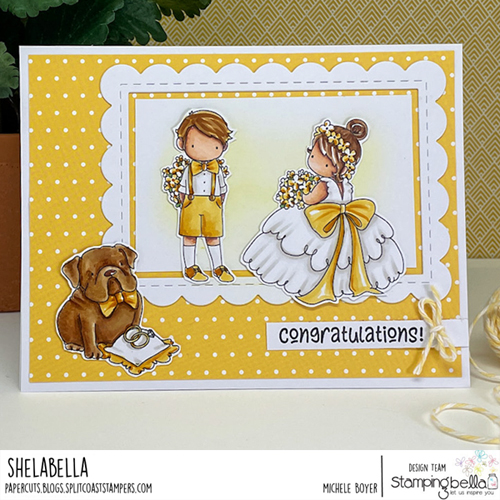
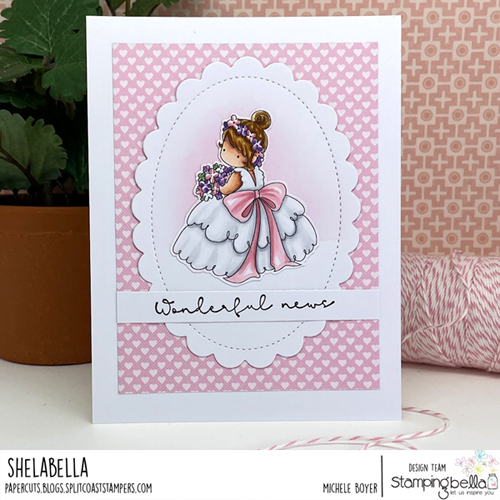
The bride alone makes a nice congrats or announcement card. After coloring, I cut her out and adhered over a lightly shaded scalloped oval. Sentiment also from Celebrate & Congratulate.
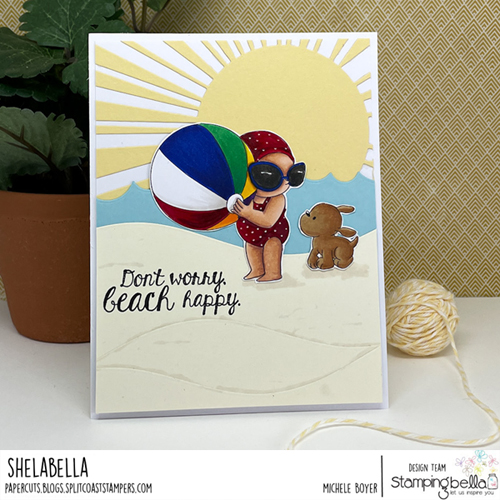
Summer Bundle Girl is a set of two separate images. Super cute. (I probably should not have tried to add shading on the sand. It looks a bit of a mess…) Sentiment is from Summer Sentiment set.
Pinky Promise is a super cute set of crossed pinkies. There’s also a coordinating new Pinky Promise Sentiment set with an assortment of love, friendship, encouragement, etc., all of which fit perfectly within the oval frame. ♥
Be sure to check out the Stamping Bella blog today to see additional stamp set previews and samples. 🙂
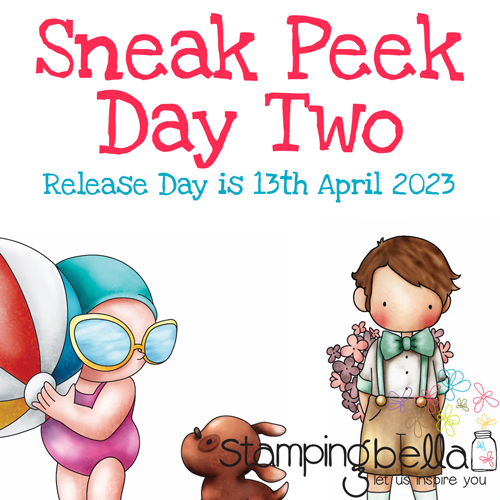
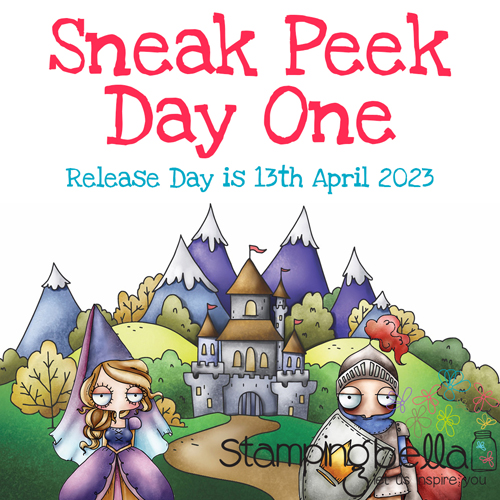
Today the Stamping Bella team is excited to begin sharing samples using our upcoming release! We’ll be previewing new stamp sets today, tomorrow and Wednesday with everything available to purchase on Thursday, April 13.
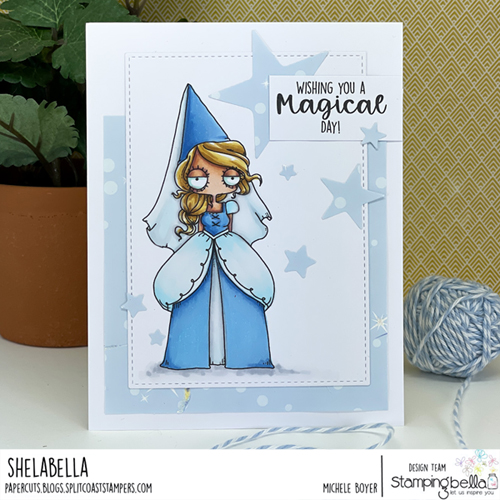
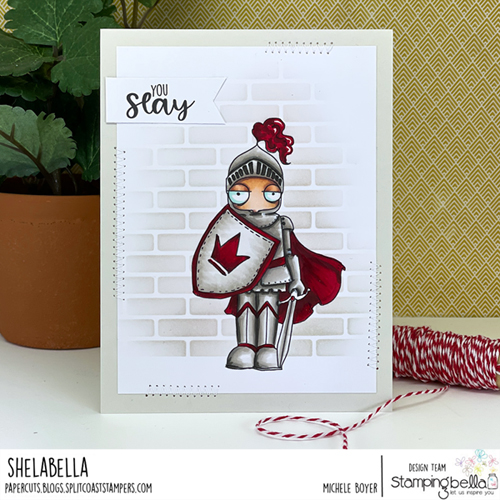
Today we’re using new Curvy Girls and Fairytale Oddballs. 🙂
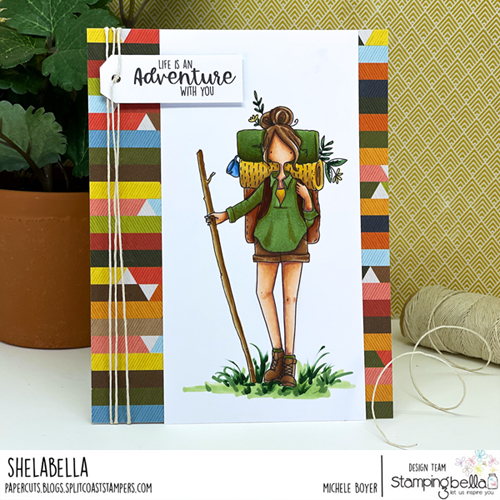
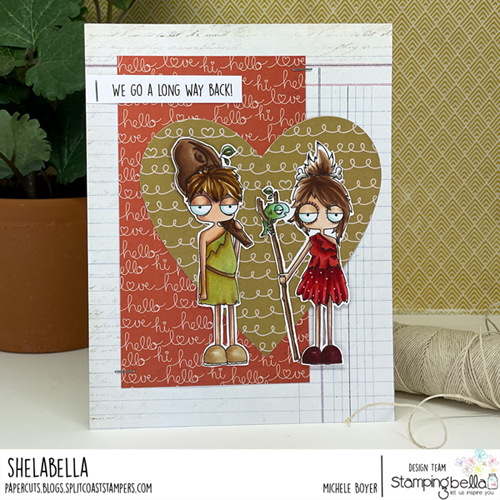
Here I paired Curvy Girl Loves to Hike with a new Fairytale Sentiment. I used ancient patterned paper and matched her clothing colors, backpack and rolls to the paper.
I used another Fairytale Sentiment here with Oddball Fairytale Princess. Stars were die-cut from the same (Disney-themed) patterned paper as shown below the image panel.
Lastly, I used Oddball Fairytale Knight with my favorite sentiment from Fairytale Sentiment set. Once colored, I masked the knight and lightly stenciled in a brick background.
Be sure to head over to the Stamping Bella blog to see additional stamp set previews, including a new Fairytale Backdrop. 🙂
Hello again! I’m back today to share two more samples from Stamping Bella‘s upcoming release. All images will be available tomorrow, Monday, January 30.
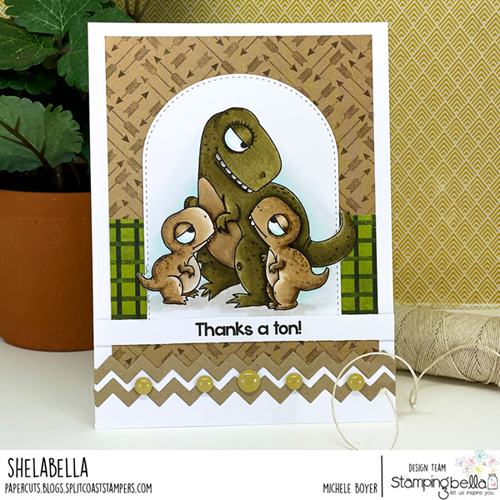
My first card features new Mama Dino & Her Babies as well as one of the new Dino Sentiments. I used (old) Pink Paislee Outfitters patterned paper, a zig-zag die and some dino-colored embellishments.
Next I have Oddball Cave Couple with another Dino Sentiment and more (old) Pink Paislee Switchboard patterned paper. I adhered the little sentiment strip using a Tim Holtz Tiny Attacher. I do ♥ my small stapler.
Please check out the Stamping Bella blog today to see many more new images and previews. Thanks so much for stopping by! 🙂
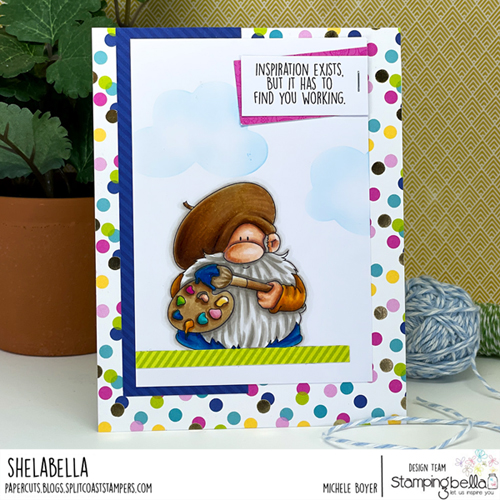
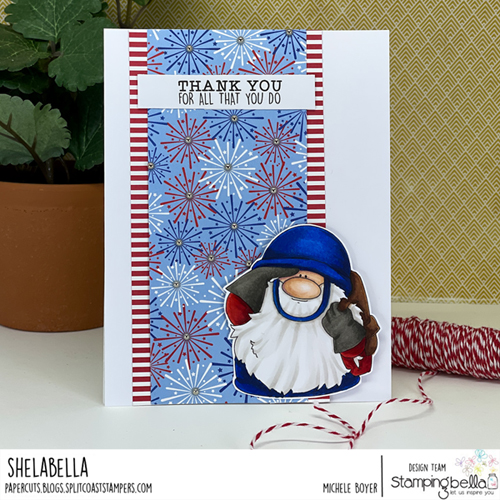
Today and tomorrow the Stamping Bella team is previewing new gnome images as well as a new Work Life Sentiment set. You can see more previews and samples on the Stamping Bella blog. All new stamps are available for purchase Monday, January 30.
Last for today I have Gnome Soldier with a Work Life Sentiment. In the center of each little explosion on the patterned paper I adhered a tiny Spellbinders silver embellishment.
I have a couple more to share tomorrow. See you then!
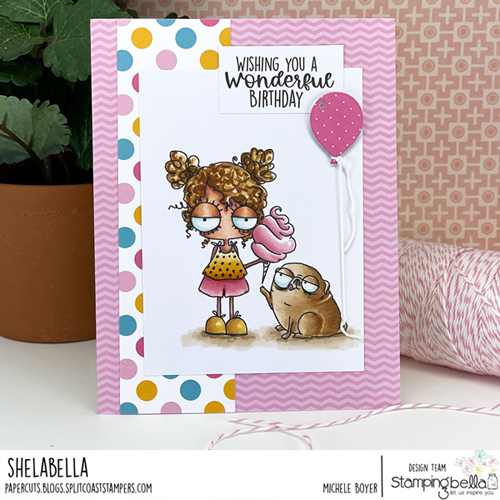
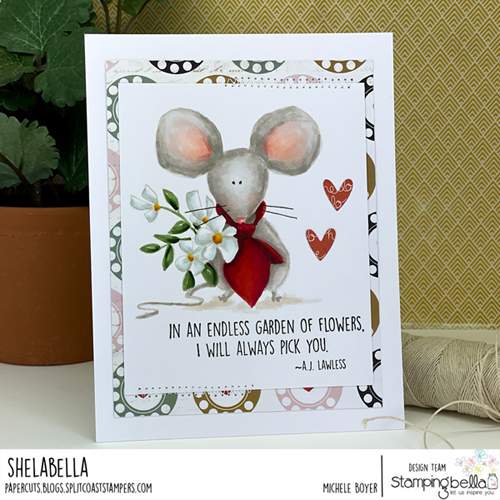
TGIF! 🙂 Today the Stamping Bella team is creating with images from the Animal Friends category. I chose super cute Mouse Bouquet. I stamped him in a light tan/natural ink then colored with my Copic markers. I’m always a little fearful of “no-line” coloring but at least we can see that it’s a mouse! Haha. The bit of patterned paper is very old Pink Paislee Switchboard.
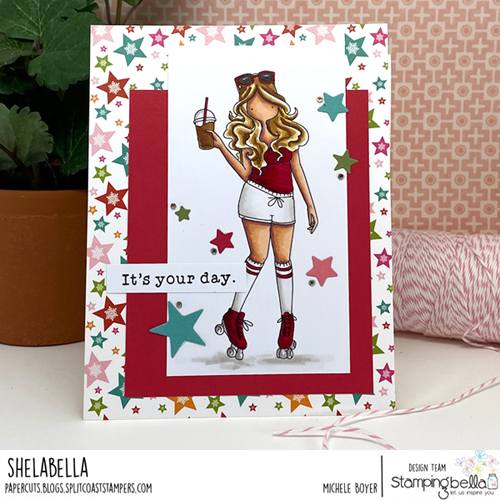
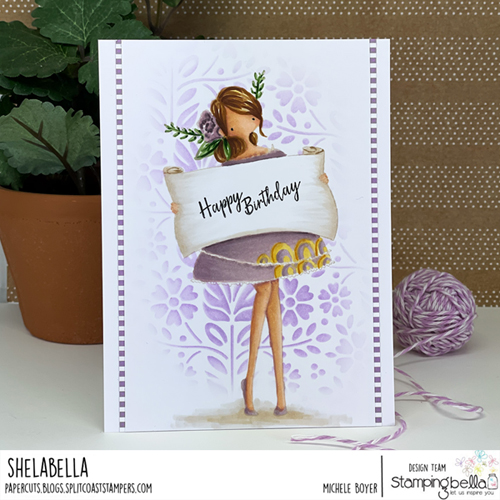
Last week I (no-line) colored Curvy Girl with a Sign. This one was a bit more challenging but I was thrilled with the outcome. Once colored I created a mask for the image using Post It Notes then blended in a background using Simon Says Stamp’s Folk Dance Stencil. It’s one of my favorites. The bit of striped paper is from Queen & Company’s Simple Stripes paper pad.
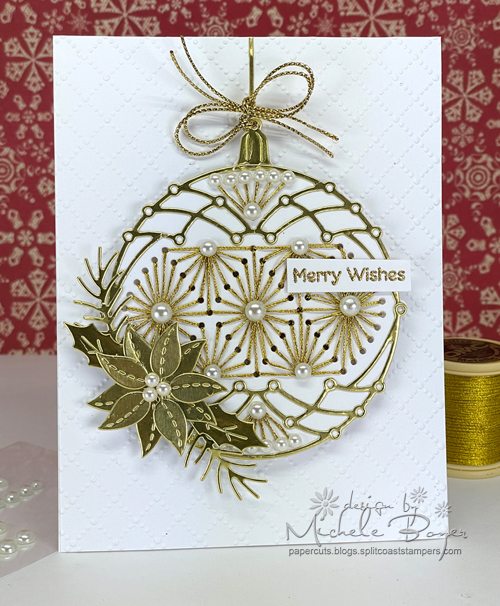
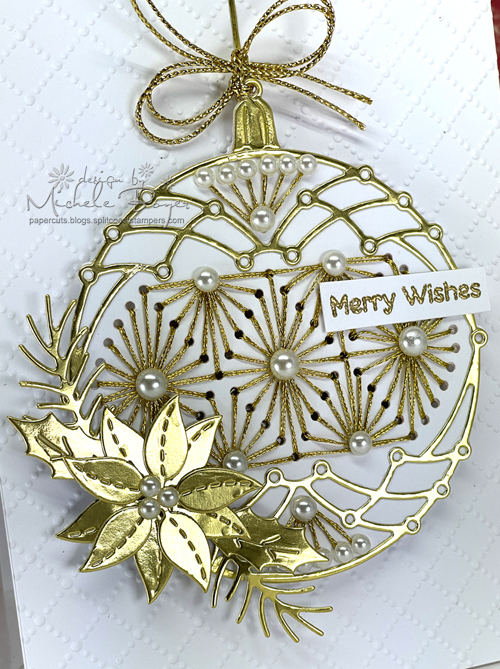
Spellbinders Stitched Ornament & Display (Large Die Club)
Several months ago I joined the Spellbinders Large and Small Die of the Month Club. I’d been spying them on Instagram and was very interested so I joined. I recently read there will be yet another club, 3D embossing folders, so I’m thinking about adding that one as well. I’ve been wanting to play since my first package arrived but work has been in the way quite a bit and for a while I was helping my mom move to a smaller home. I’ve been quite busy. Today I finally had a chance to play with Stitched Ornament & Display (though I did not use the display portion).
I love how this turned out. If you haven’t seen the Spellbinders Clubs, I highly recommend them! There are club perks as well, as if the dies themselves are not enough.
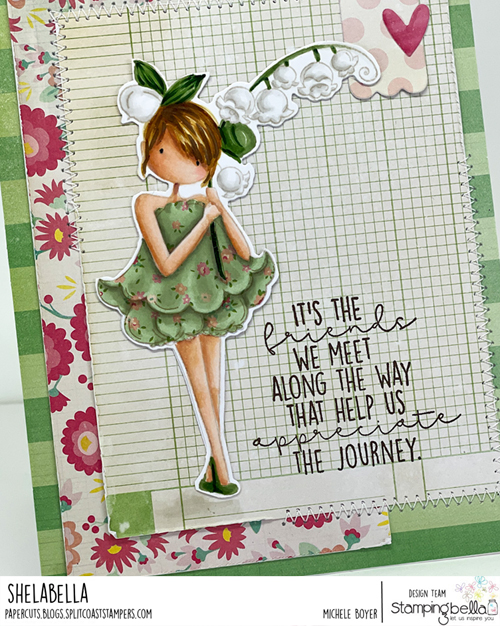
Stamping Bella Tiny Townie Garden Girl Lily of the Valley, Friendship Sentiment Set
I’ve been sitting here staring at my screen off and on for three days trying to find a way to begin this post. I’m not very eloquent with words, but I want whatever words I do use to be deserving of Emily. I guess I’m still trying to accept the fact that she’s gone. And it’s hard. As difficult as it is for me, I can’t begin to imagine how difficult it is for her family and close(r) friends. My heart breaks for them. (For those unaware, please read this post.)
One of the things I loved most about Emily was her sense of humor. We shared SO many texts that were FUNNY AS HELL. I would laugh until my face hurt.
We shared a love of the creative process (obviously). Historical fiction. Our kids. (I always wished we lived closer so they would know each other.) Hockey. A while back, when my husband and I would go to a Capitals game and they’d play Montreal, we would arrive early just to stand by Montreal’s tunnel (out of place in our Caps jerseys) so we could take pictures of Emily’s “hockey boyfriend.” (Sorry, Ryan.) Once she insistedhe was looking directly at my phone, just for her. Haha. When the Caps weren’t playing Montreal, I’d take pictures of Braden Holtby for Jayden. I’m sorry about the time I told you, Em, it was a live pic and if you touched it, you and Jayden could see him move. I didn’t know sounds of the entire Capital One Arena would go along with the photo. (Scared the crap out of her. Lol. So sorry!)
I had a bit of a hard time deciding which image to use for today’s post. EveryStamping Bella image reminds me of Emily. My entire stamp room reminds me of her. After some thought, I chose Tiny Townie Lily of the Valley because I know Lily of the Valley is Em’s favorite flower. I think of her every time I see one. And I forever will. I wish I had the chance to tell her one more time how much I appreciate her, how grateful I am for the privilege of being on her design team. But also I wish I could thank her once more for being a friend. For believing in me, even when I didn’t believe in myself. For making me laugh, SO hard, so many times. And for sharing herself with me. How lucky am I?
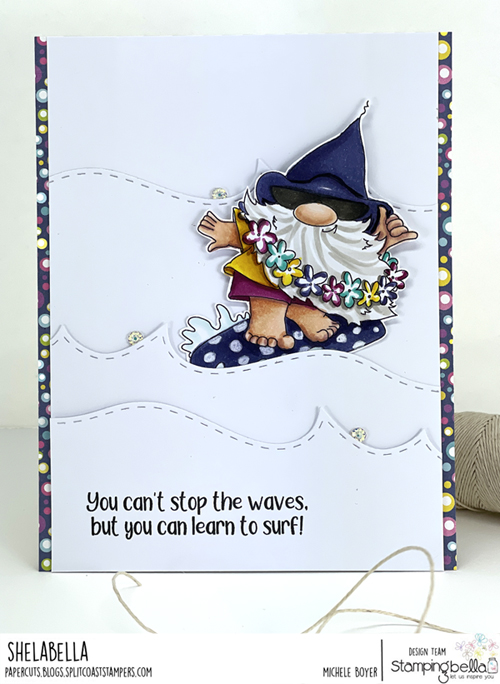
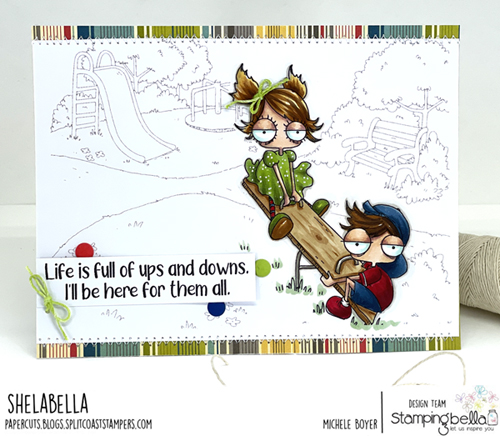
Hello everyone! I’m back today sharing two more cards featuring images from Stamping Bella‘s upcoming release. All images and sentiments will be available tomorrow, July 14.
On my samples, all images were stamped onto X-Press It Blending Card and colored with Copic markers. Markers used are listed beneath each photo.
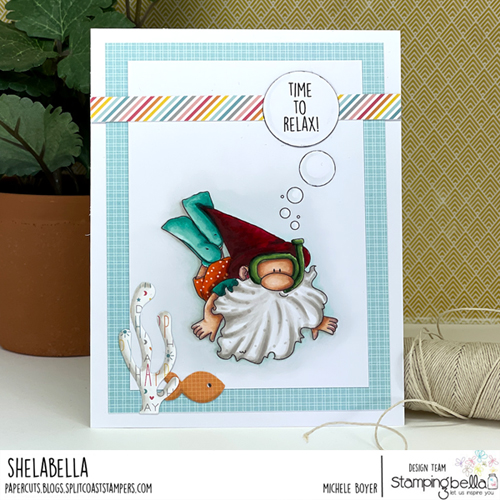
My first card uses new Gnome Riding the Waves. He’s so cute with his little “hang ten” hand signal. 🙂 I layered him among some die-cut waves. The board is tucked within the layers, and I used foam tape to pop up his head.
Next I have cute Mini Oddballs on a Seesaw layered over new Park Backdrop. I like stamping the background in a lighter color and leaving it uncolored. Super quick and easy.
Be sure to visit the Stamping Bella blog today for more images and samples. Happy shopping tomorrow! 🙂
Hello everyone! I’m popping in today to share several samples using new images and sentiments coming to Stamping Bella Thursday, July 14. Today’s theme (on my blog, anyway) is southwestern and gnomes. 🙂 All images were stamped onto X-Press It Blending Card and colored with Copic markers. Markers used are listed beneath each photo.
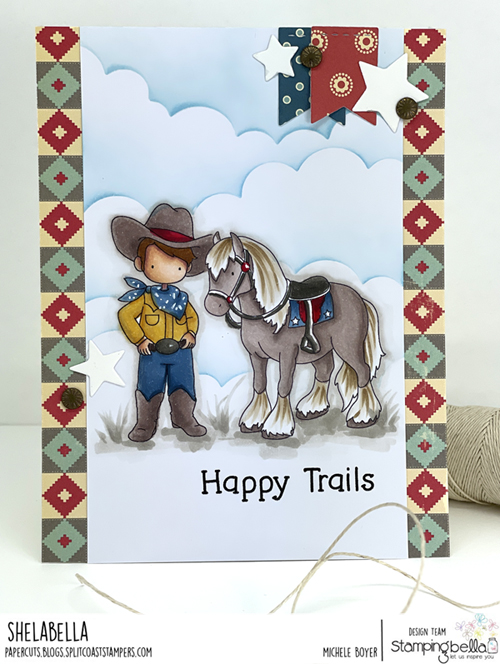
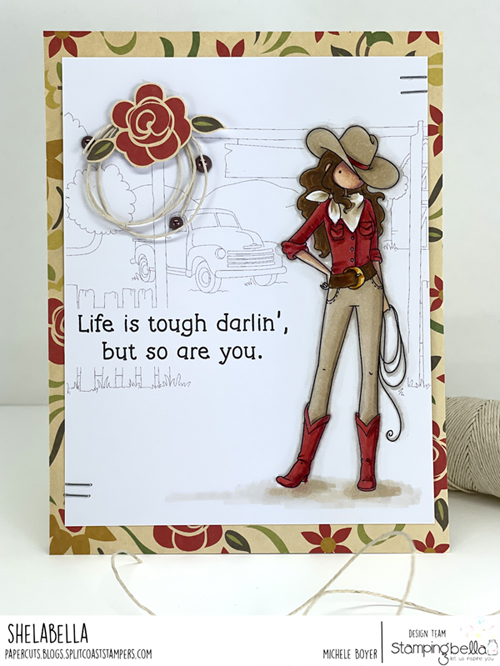
First I have two cards featuring new Uptown Cowboy Kids. The set includes a boy, girl and baby.
Uptown Cowboy Kids, Uptown Cowboy Pets, Country Western Sentiment
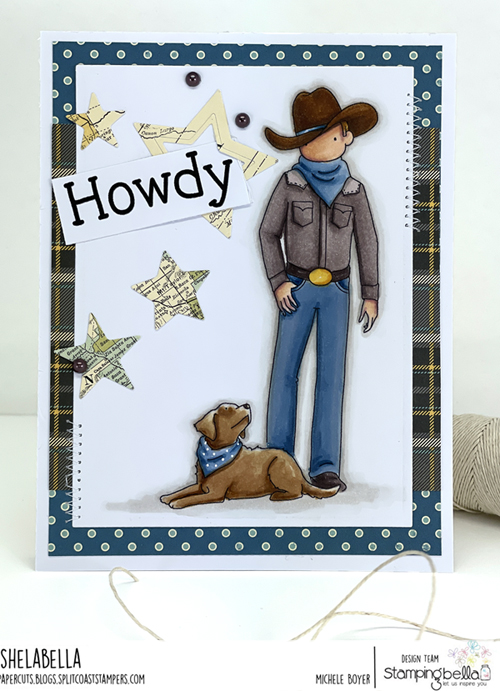
Here I paired my cowboy with an Uptown Cowboy Pet. Cowboy Pets includes a horse, dog and chicken. The sentiment is one of six Country Western Sentiments.
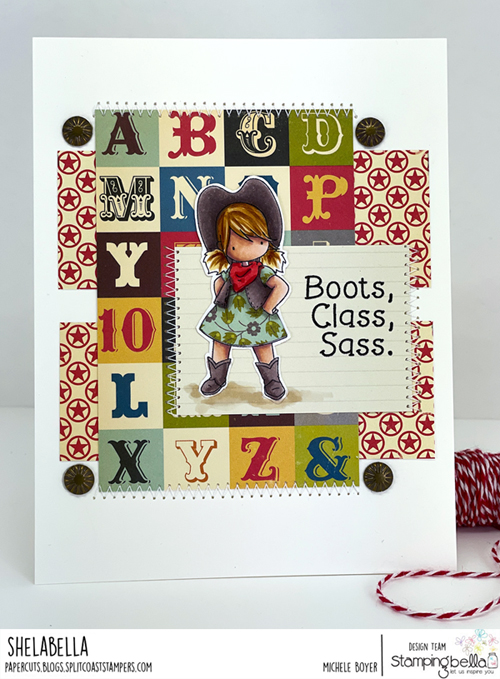
After stamping the cowgirl, I paper-pieced her dress, colored and cut her out then layered her over some scraps of ancient patterned paper. I then added a Country Western Sentiment.
After stamping and coloring the cowboy mom, I stamped new Cowboy Backdrop, blocking out an area for the sentiment which is part of the Parents set. Also included are “Hey Cowboy” and “Hey Cowgirl.”
Uptown Cowboy Parents, Uptown Cowboy Pets, Country Western Sentiment
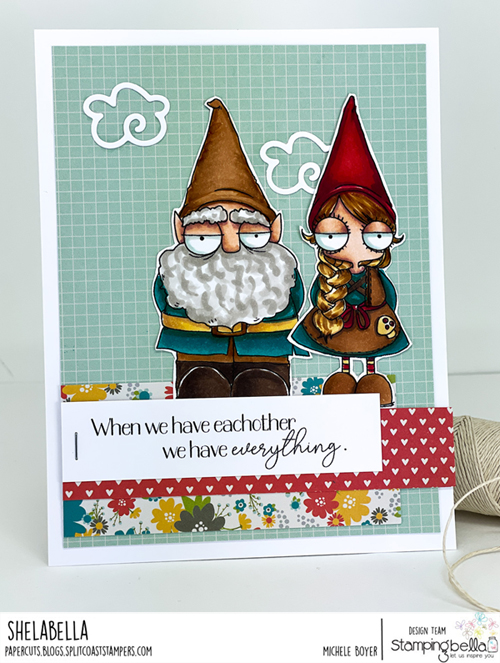
How cute are these Oddball Gnome Parents? I just love them. The set also includes a fox, a squirrel (chipmunk?) and a small mushroom. Sentiment is from fab new We are Family Sentiment Set.
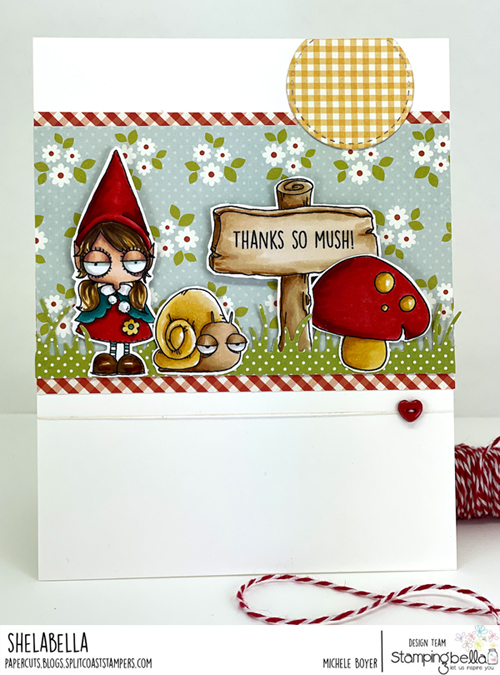
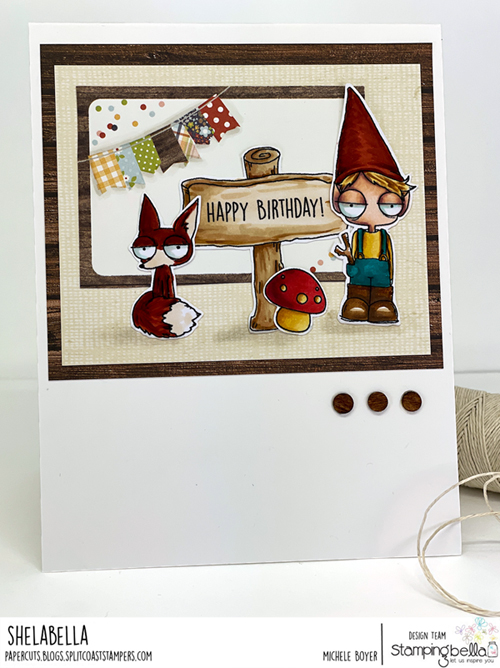
Lastly, I have two cards featuring Oddball Gnome Kids. The set includes a boy, girl, blank sign, a snail and larger mushroom. So cute. 🙂 Oddball Gnome Family Sentiment set includes four sentiments, all of which fit on the sign.
Oddball Gnome Kids, Oddball Gnome Family Sentiment
Are these images not the sweetest? I love them all. Be sure to check out the Stamping Bella blog to see even more previews and samples. I have none for tomorrow but I will be back on Wednesday with a couple more.
In accordance with FTC regulations, the following is a list of companies providing to me free product, discounted product or payment in exchange for promotional purposes:
-Stamping Bella
-Queen & Company
-Purple Onion Designs
Affiliate links are occasionally used where applicable. This means I receive a small commission from your purchase (at no cost to you) when my links are used. Thank you so much for supporting Paper Cuts! ♥